
How to Change the User Interface and Display Settings in Fontforge
This tutorial will show you how to change the appearance of some of the user interface settings in Fontforge.
How this Tutorial is Organized
- We’ll start with the appearance of cells in ‘Font View’.
- Then we’ll look at changing the size of ‘Font View’s’ interface.
- Next, we’ll specify the settings for an active cell.
- And lastly, I’ll show you how to change the display font for some dialogue boxes, so it’s easier to read.
i. You can download Fontforge for Windows, Mac, or Linux from here.
ii. The two fonts used in this tutorial are called Goodlight and Linux Libertine. They’re both free fonts for personal and commercial, use with an open source license.
iii. This tutorial is shown on a Windows 10 computer with Fontforge version 03142020.
iv. Fontforge does crash, so save often.
v. Further information that describes each ‘X Resource Editor’ item can be found at Fontforge’s Github repository or Fontforge’s online documentation.
Definitions
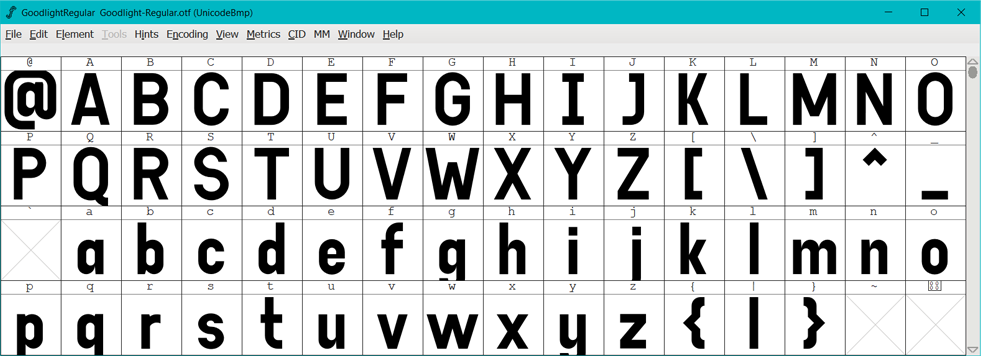
This is ‘Font View’
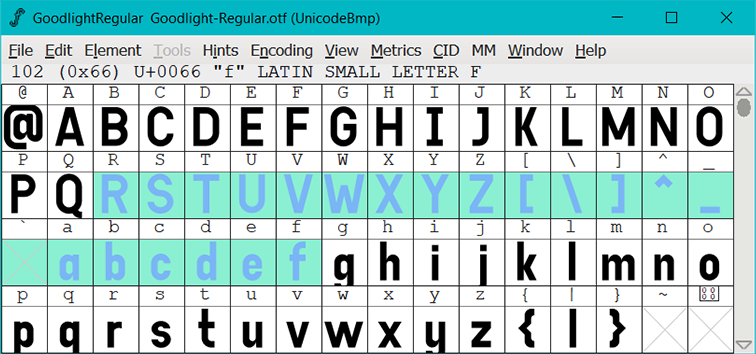
Glyph Cell Appearance
-
This section will focus on the appearance of the cells within ‘Font View’ and whether or not you want to see metrics in each glyph cell.
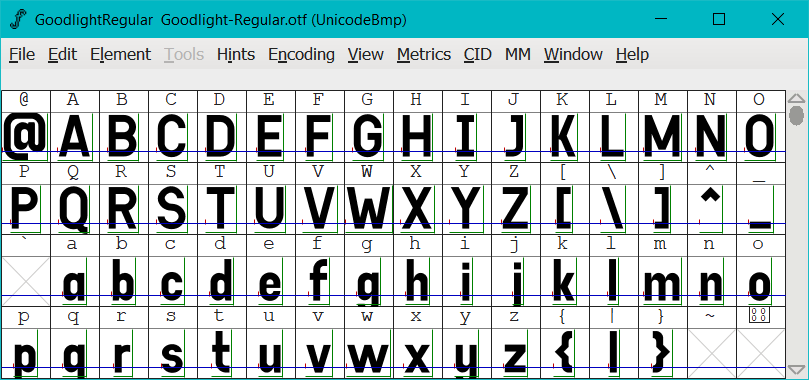
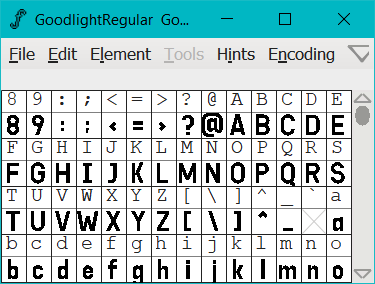
a) This is what ‘Font View’ looks like when all the glyph cell metrics are hidden from display.
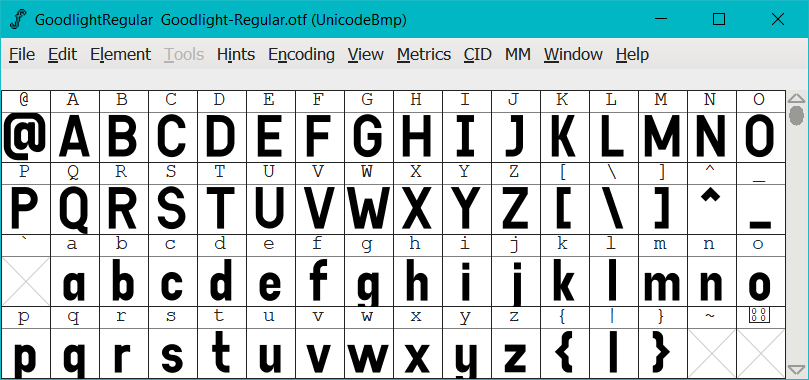
b) This is what ‘Font View’ looks like when all the glyph cell metrics are displayed.
-
To access the settings and change what you see in each glyph cell, you need to,
a) Click on ‘View>Show H. Metrics…’,

b) ‘Tick’ the boxes to show metrics or
c) ‘Untick’ the boxes to hide metrics from Font View.
d) Click ‘OK’ to save your settings.

Font View’s Interface
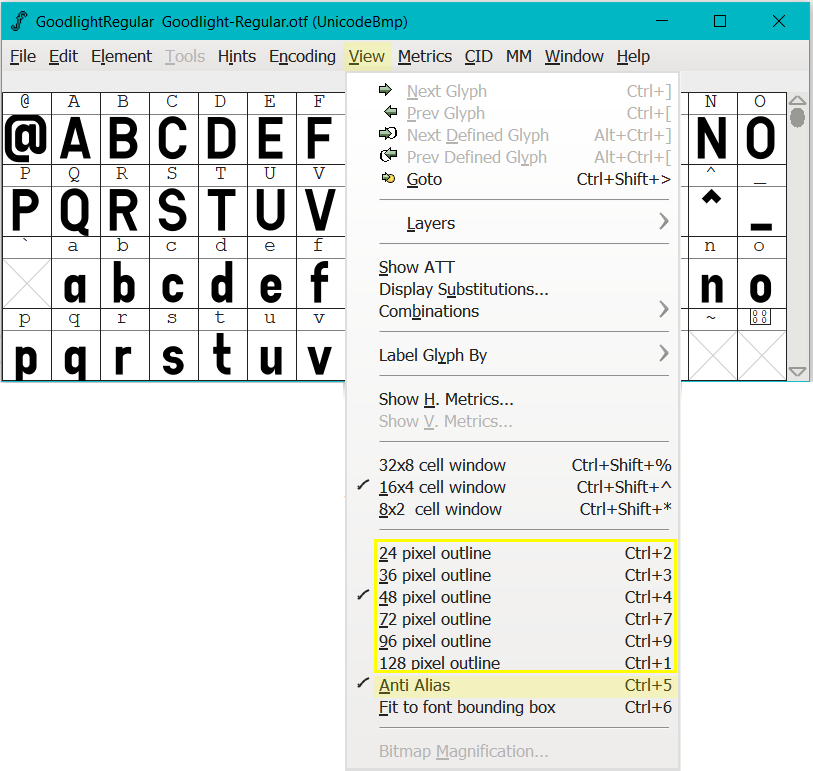
Next we’re going to change the size of ‘Font View’s’ interface.
-
To change the interface settings,
a) click on ‘View’
b) then select your desired size from the list. -
Consider also selecting ‘anti-alias’ to sharpen the display. Be aware that ‘anti-alias’ is slower to generate.
-
You can also change the number of cells displayed by,
a) clicking on ‘View’
b) then select your desired cell window.
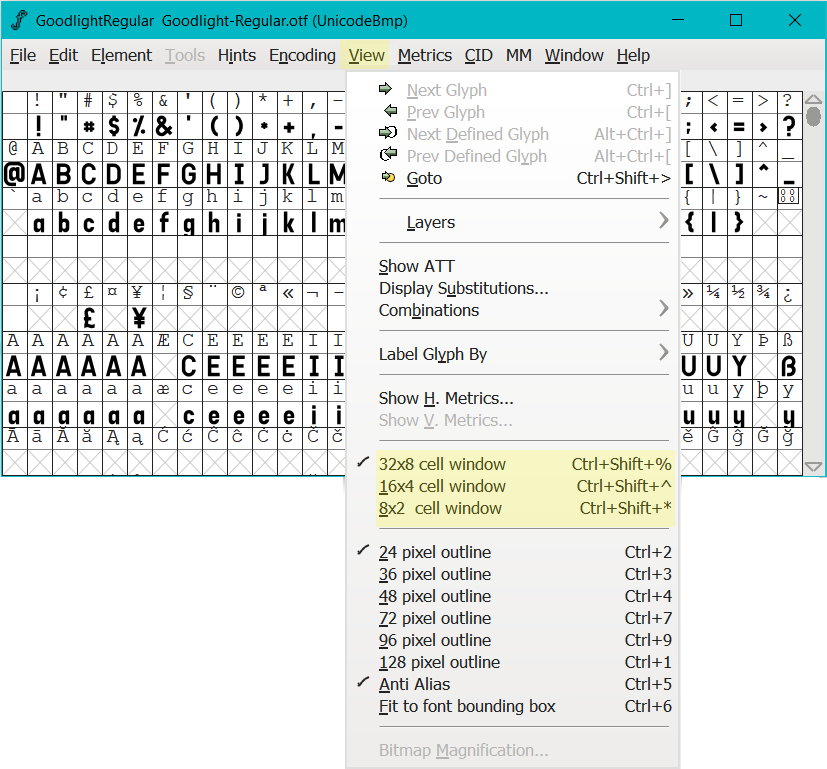
Included below are examples to consider:
-
This is an example of the display option
a) ‘8x2 cell window’,
b) with a ’96 pixel outline’,
c) anti-aliased enabled.

-
This is an example of the display option
a) ‘16x4 cell window’,
b) with a ’24 pixel outline’,
c) anti-aliased disabled.
-
This is an example of the display option
a) ‘16x4 cell window’,
b) with a ’48 pixel outline’,
c) anti-aliased enabled.
Active Cell Settings
-
The next section looks at defining the ‘active cell’ settings. More specifically, when you click on a cell it becomes an active cell and we’ll be selecting a color that displays when you click on a cell.
-
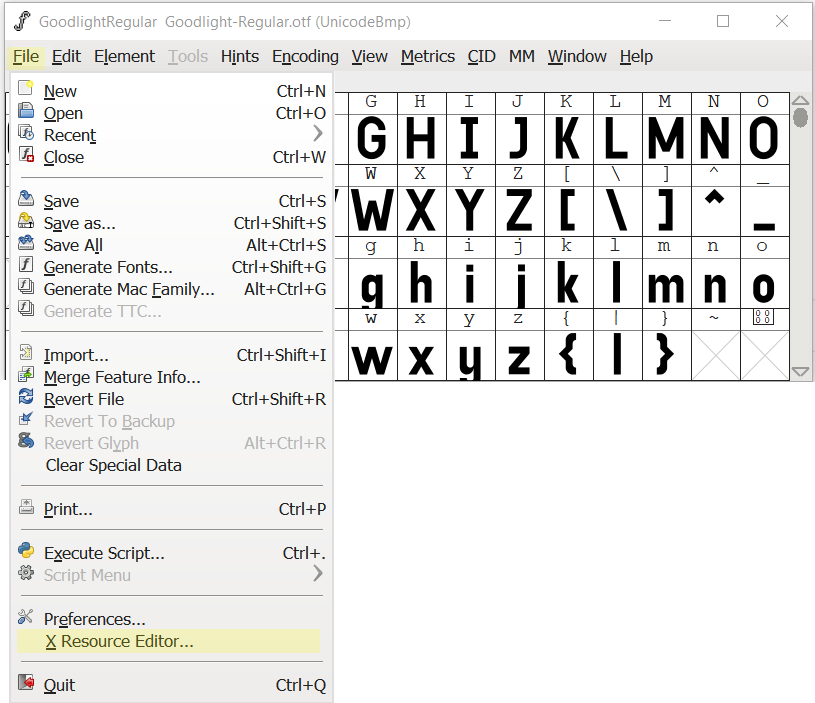
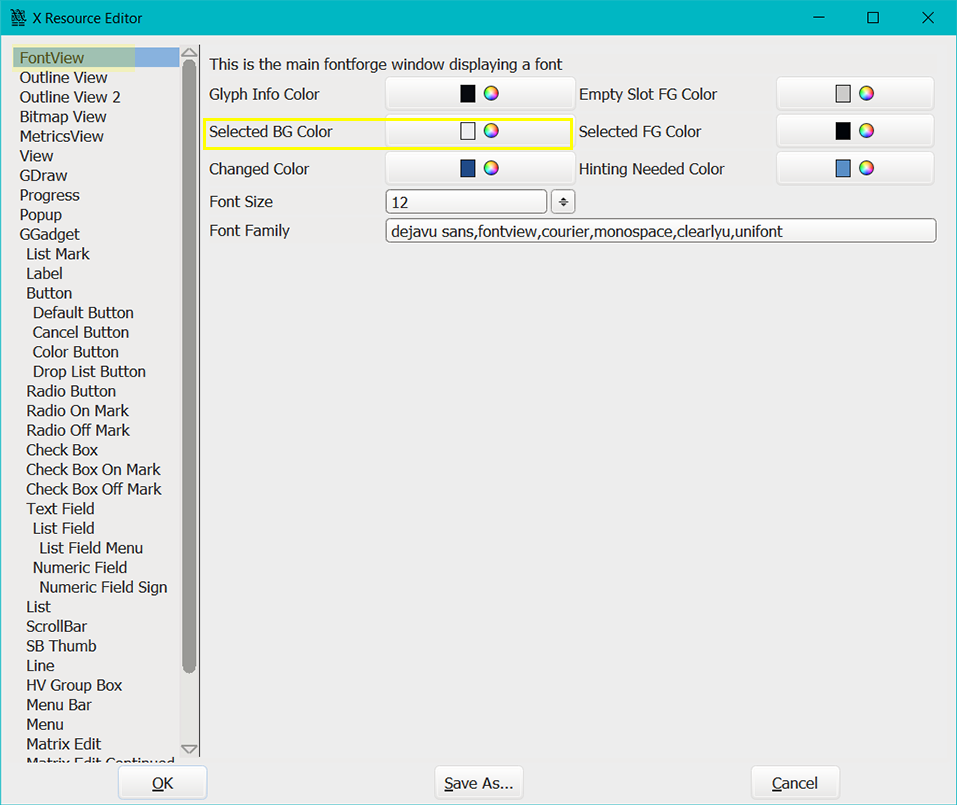
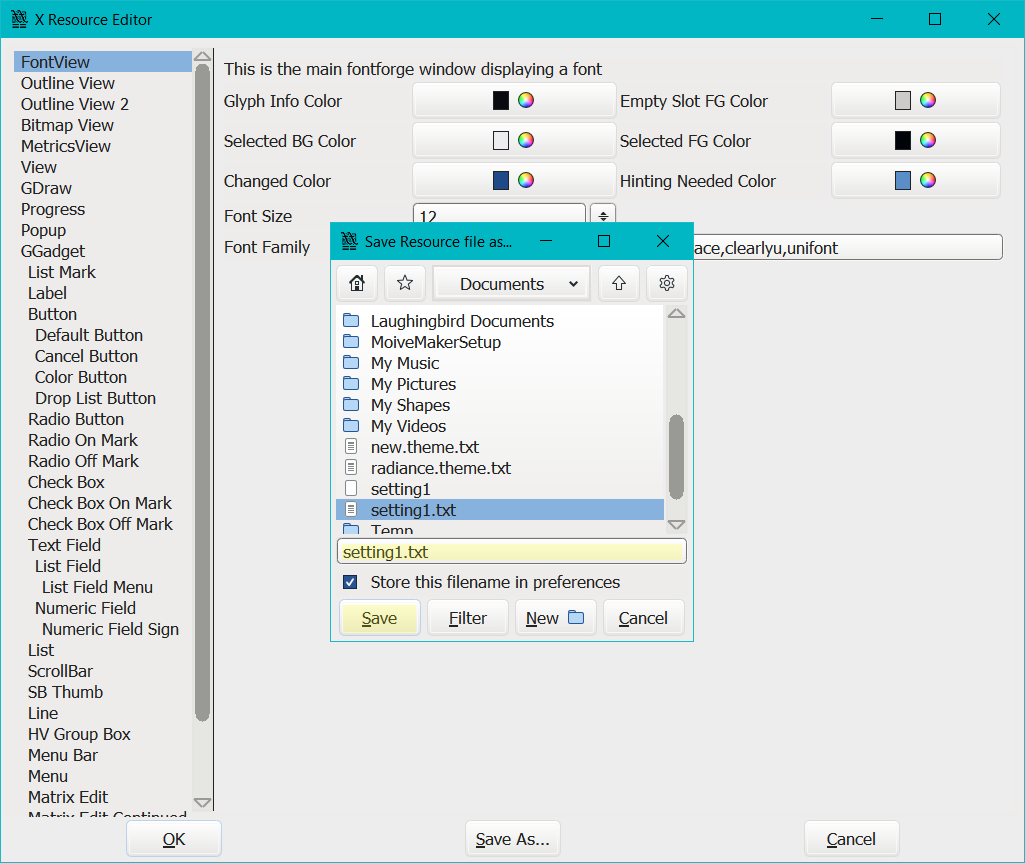
To change the background color an active cell,
a) Click on ‘File>X Resource Editor’
-
Ensure you have ‘Font View’ selected in the left hand column, then
a) change the ‘Selected BG Color’ (Background Color) to a color of your choosing.
-
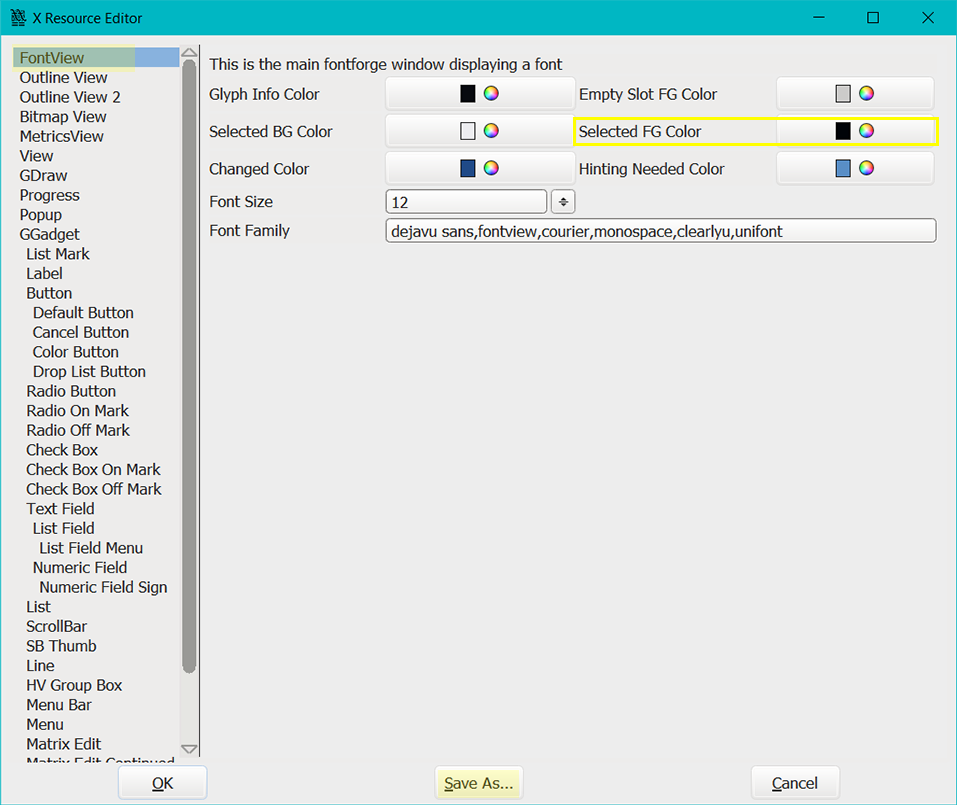
To change the color of the glyph when it’s an active cell,
a) change the ‘Selected FG Color’ (Foreground Color) to a color of your choosing.
-
When you have finished,
a) Click ‘Save As’ and save your settings. For this example, I’ve called my personal preferences file, ‘setting1.txt’.
b) If you click ‘OK’, the default setting will return the next time you open Fontforge.
-
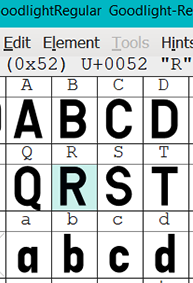
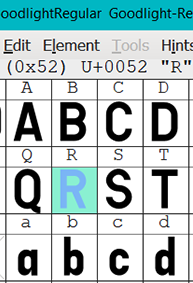
Test out your changes by selecting a few cells. If you don’t like the colors you’ve chosen, just repeat the process until you find colors you do.
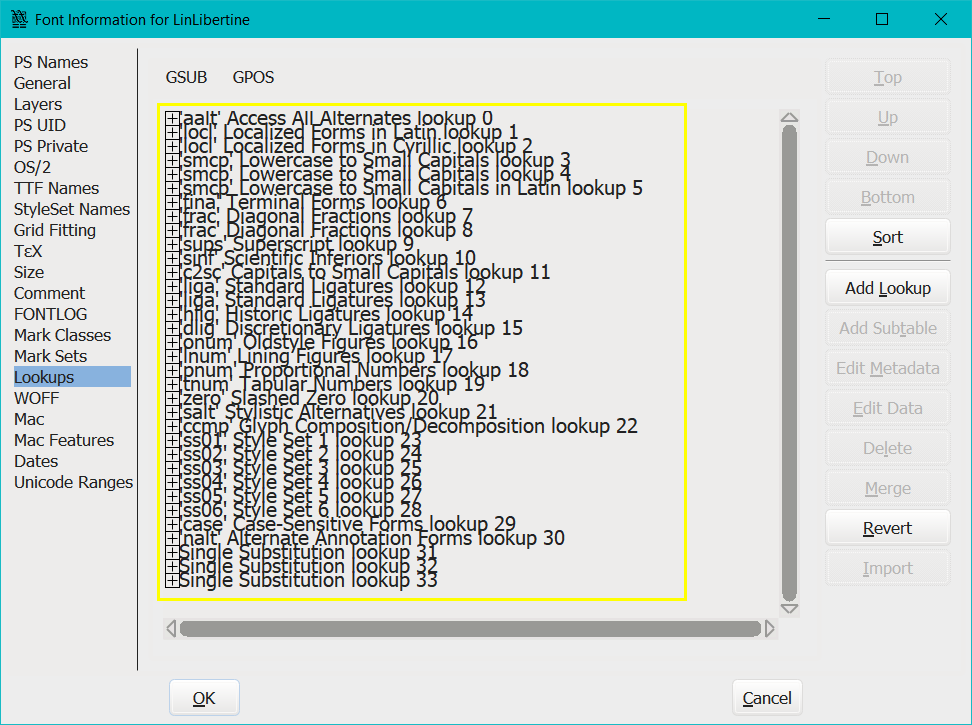
Display Font - Lookups
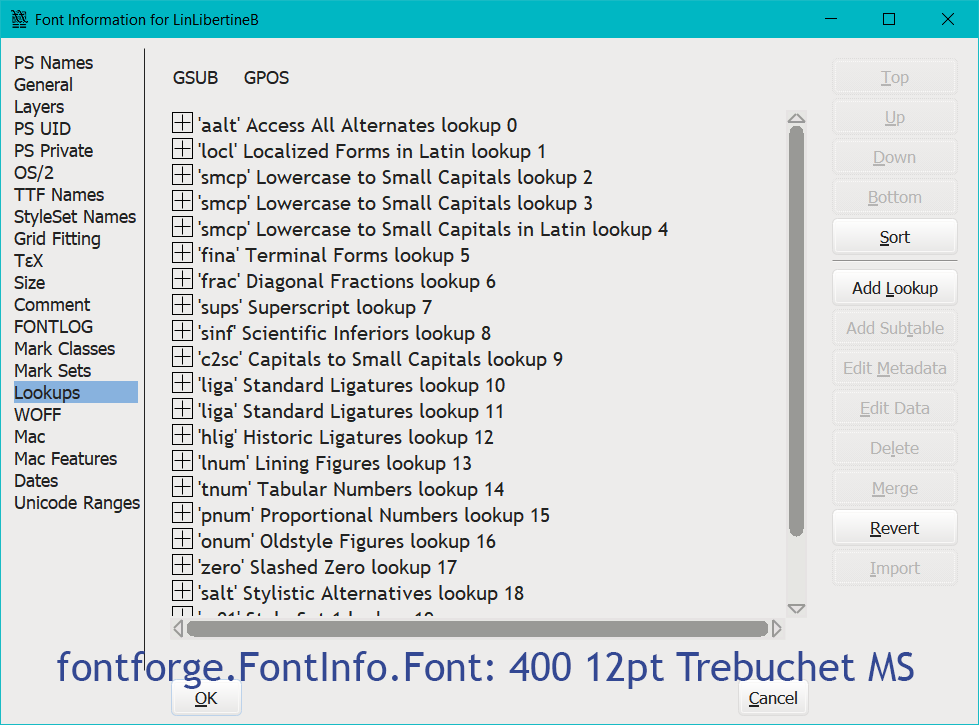
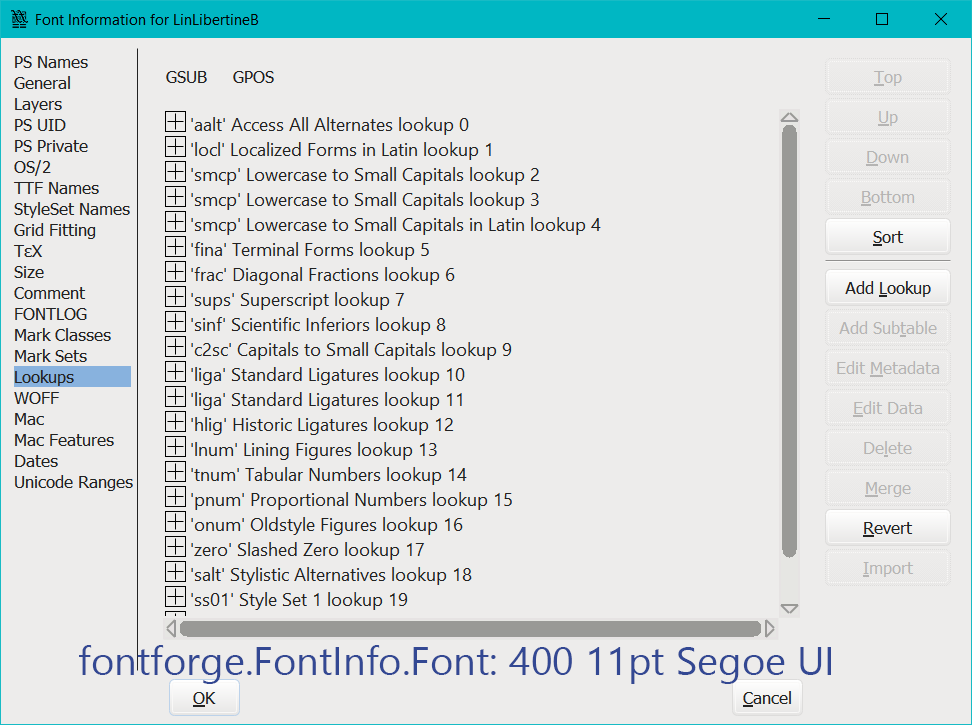
Next we’ll be changing the display font for the ‘Element>Font Info>Lookups’ dialogue box.
-
Here’s a picture of the default font display for ‘Lookups’. To change it, you’ll need to add a line of code to your personal preferences file.
a) Note that adding the code to Fonforge’s ‘resources’ file or ‘preferences’ file, had no effect for me on Windows 10.
-
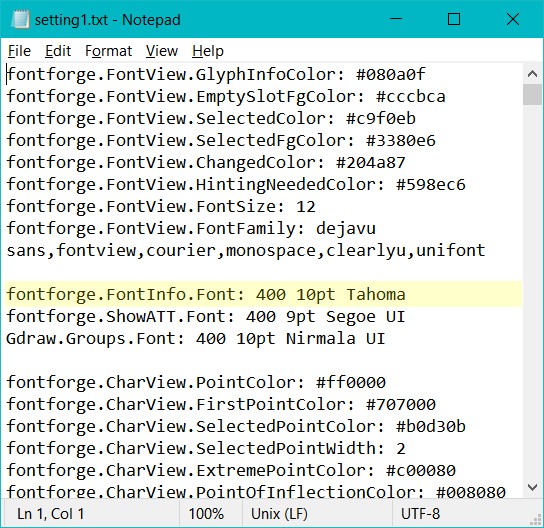
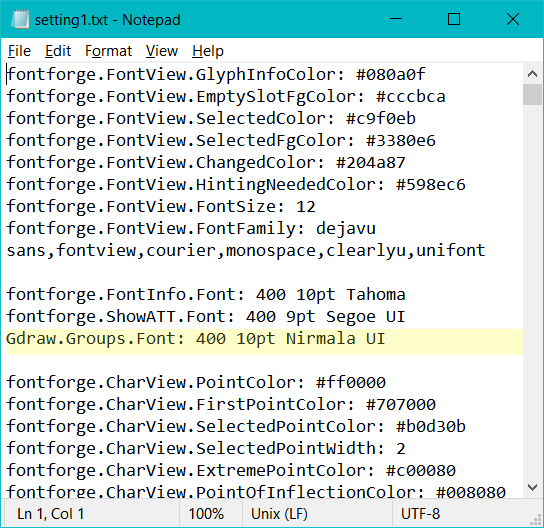
First you need to, create a personal preferences file via ‘File>X Resource Editor’.
a) It’s the file you created when you changed the active cell color in the previous step, and clicked ‘save as’. -
If you haven’t already created a personal preferences file, go ahead and change any of the settings within the X Resource Editor and save your preferences to your hard drive by clicking ‘Save As’ and a box called ‘Save Resources File as’ will pop up asking you to name your file.
For this example, I’ve called my personal preferences file, ‘setting1.txt’.
a) Click ‘Save’
-
Second, you need to close Fontforge so that any changes you make to your personal preferences file will take affect the next time you start Fontforge.
-
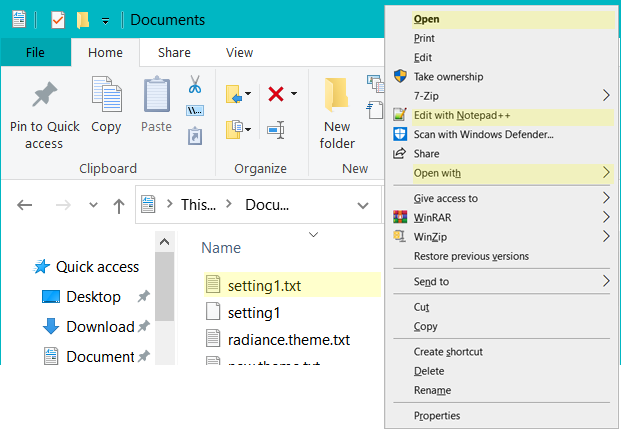
Third, open your personal preferences file with Notepad or a text editor.
a) To do this, right click on your personal preferences file and select either ‘open’ - to open with Notepad, or ‘open with’ and locate Notepad or ‘Edit with Notepad++’.

-
Fourth, paste the example line of code into your personal preferences file, anywhere on a separate line or choose your own desired font, weight and size.
-
Fifth, save and close your personal preferences file, then open up Fontforge, and navigate to ‘Element>Font Info>Lookups’ to view your changes.
Included below are some examples to consider:
fontforge.FontInfo.Font: 400 12pt Trebuchet MS
fontforge.FontInfo.Font: 400 11pt Segoe UI
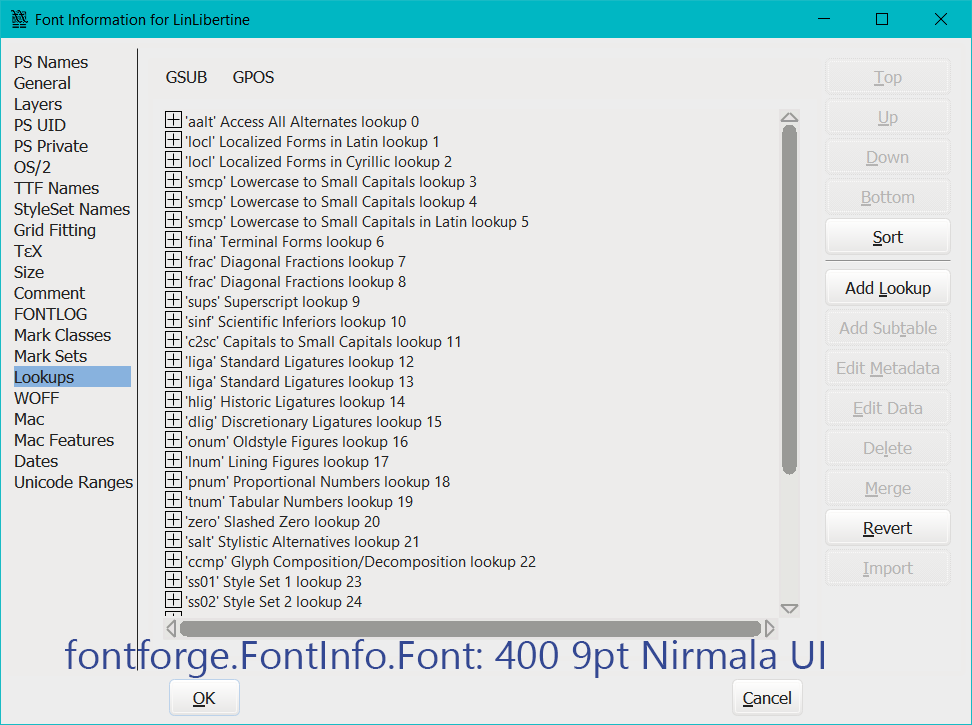
fontforge.FontInfo.Font: 400 9pt Nirmala UI
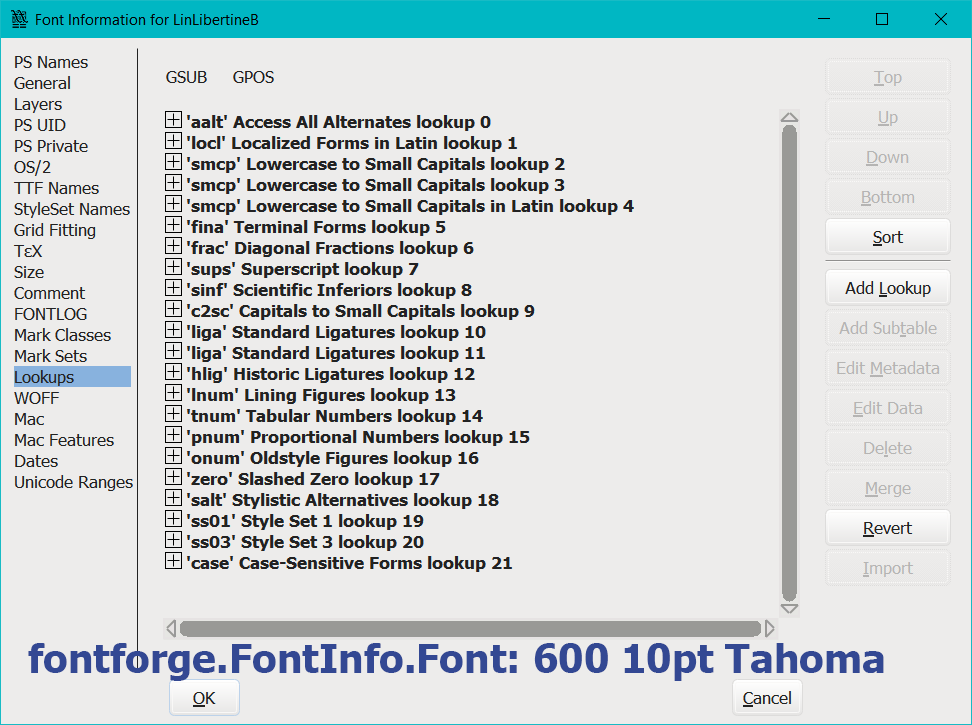
fontforge.FontInfo.Font: 600 10pt Tahoma
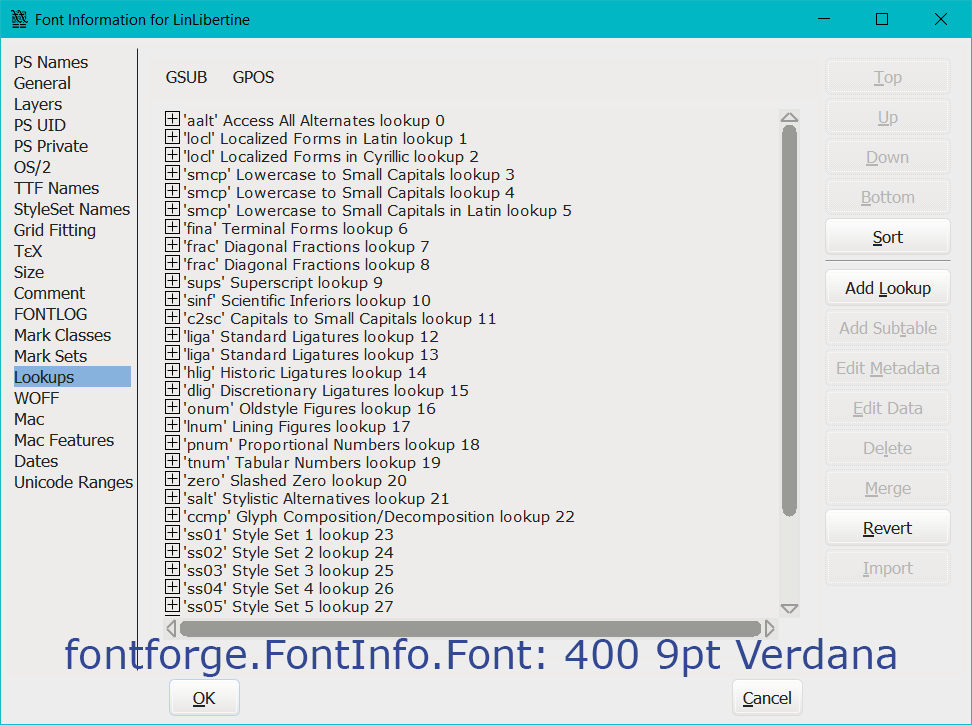
fontforge.FontInfo.Font: 400 9pt Verdana
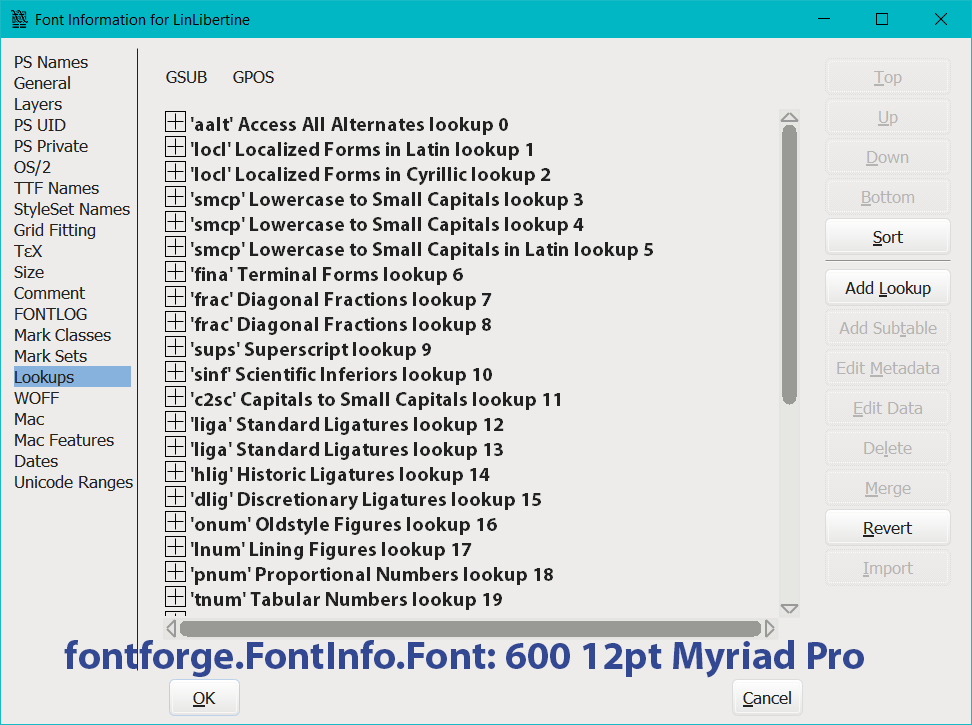
fontforge.FontInfo.Font: 600 12pt Myriad Pro
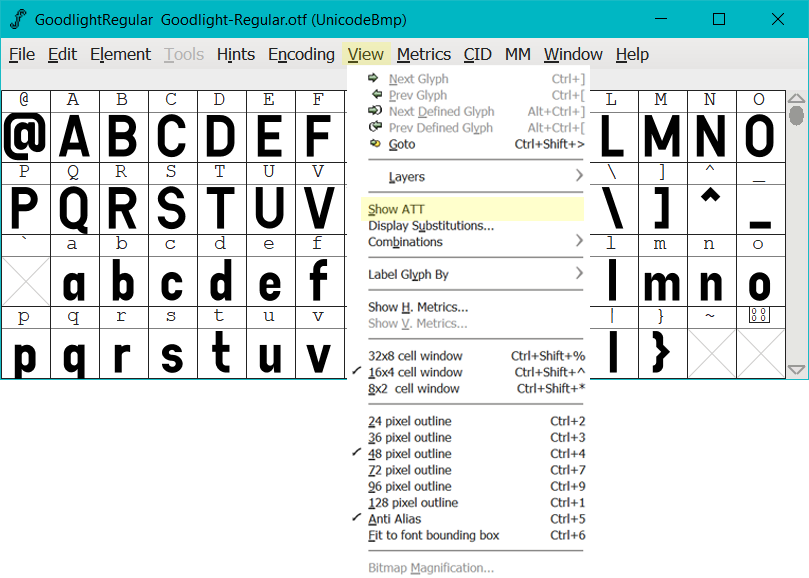
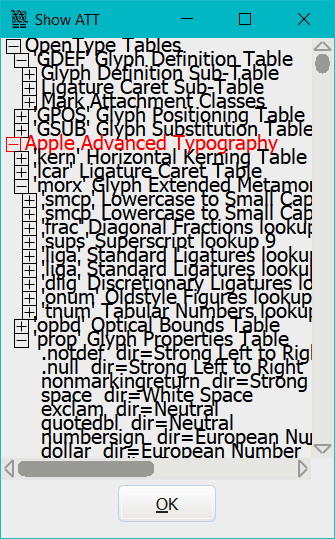
Display Font - Show ATT
-
Next we’ll be changing the display font for the ‘View>ShowATT’ dialogue box, just like we did in the previous step for Lookups.
-
This is what the default font looks like. To change it, you’ll need to add a line of code to your personal preferences file.
-
Paste the example line of code into your personal preferences file, on a separate line or choose your own desired font, weight and size.

-
Save and close your personal preferences file, then open up Fontforge, and navigate to View>ShowATT to view your changes.
Included below are some examples to consider:
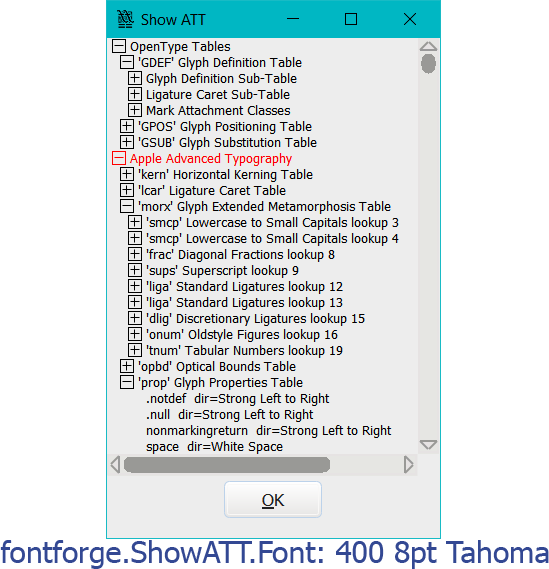
fontforge.ShowATT.Font: 400 8pt Tahoma

fontforge.ShowATT.Font: 400 10pt Segoe UI
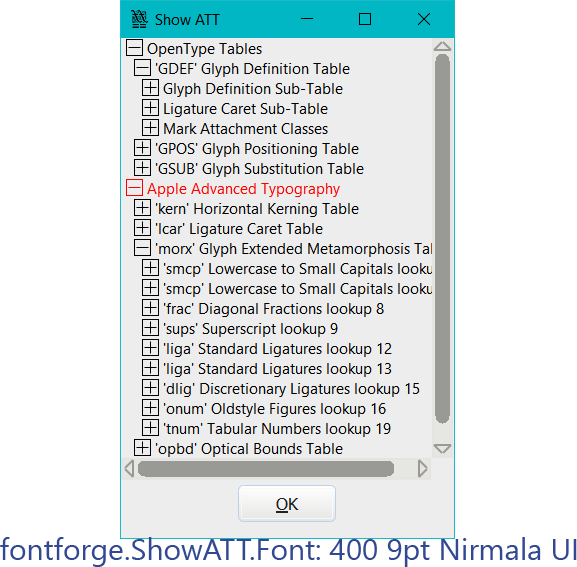
fontforge.ShowATT.Font: 400 9pt Nirmala UI
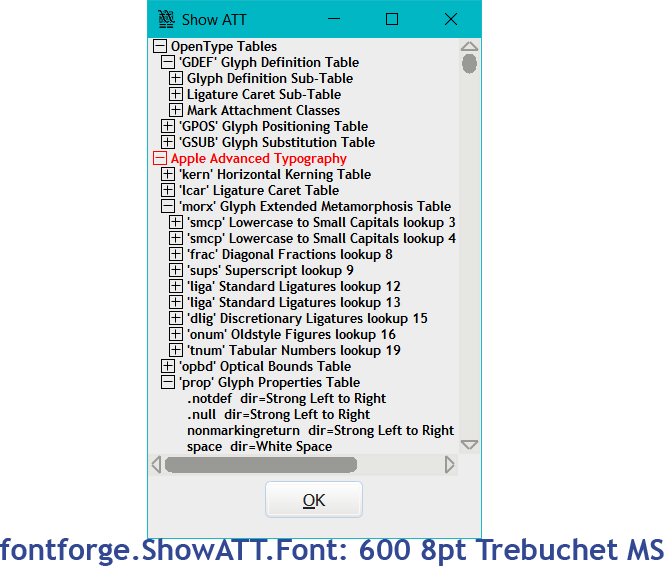
fontforge.ShowATT.Font: 600 8pt Trebuchet MS
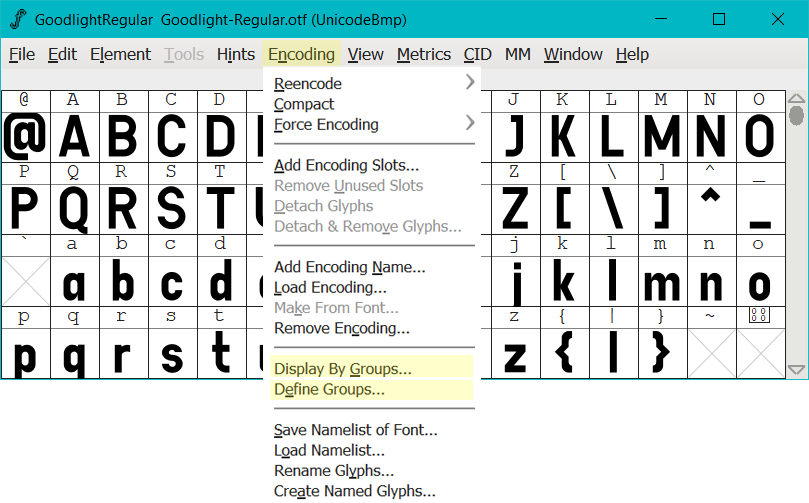
Display Font - Groups
-
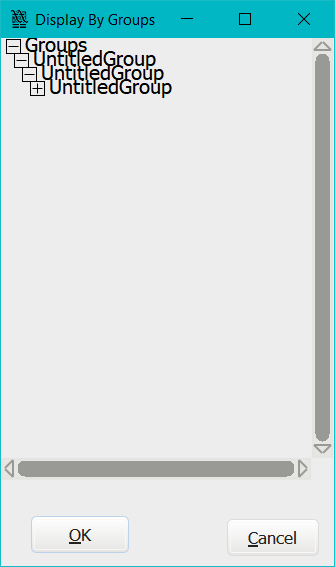
Next we’ll be changing the display font for the ‘Encoding>DisplayByGroups’ and ‘Encoding>DefineGroups’ dialogue boxes, just like we did in the previous steps for Lookups and ShowATT.
Be aware that within a couple of seconds after opening the ‘DisplayByGroups’ or ‘DefineGroups’ dialogue box, Fontforge crashes on Windows 10. This occurs with the default font and substituted font.
-
This is what the default font looks like;
-
To change it, you’ll need to add a line of code to your personal preferences file. Your changes will appear the next time you open Fontforge.
Here are some examples:
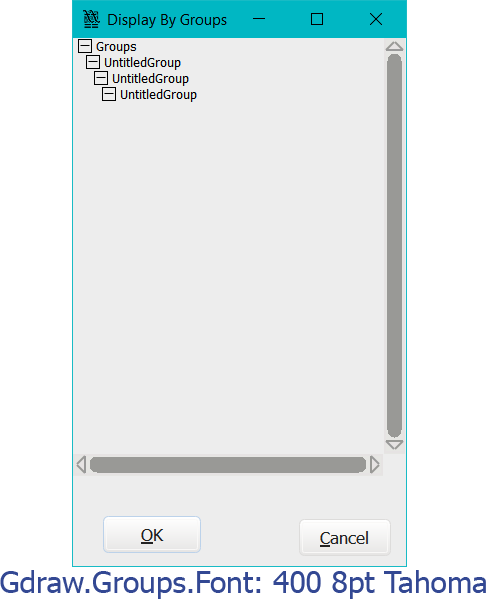
Gdraw.Groups.Font: 400 8pt Tahoma
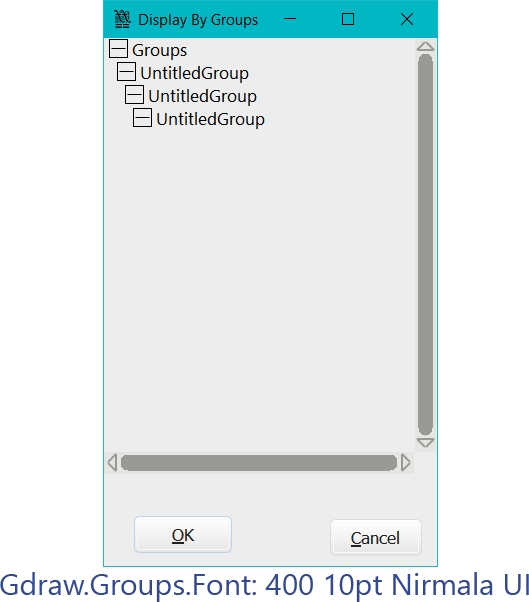
Gdraw.Groups.Font: 400 10pt Nirmala UI
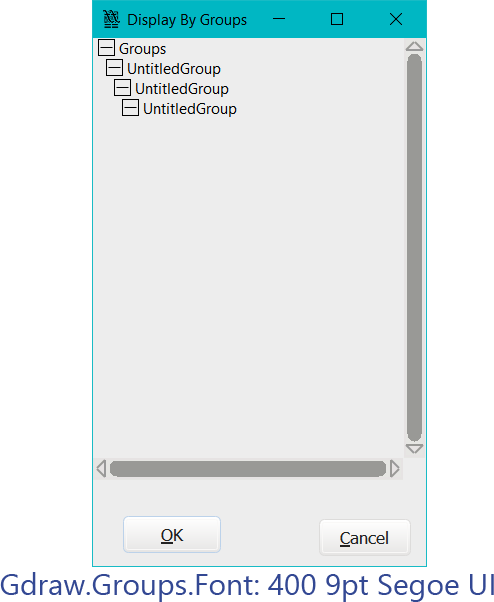
Gdraw.Groups.Font: 400 9pt Segoe UI
That brings us to the end of this tutorial.
I hope this tutorial has been of assistance and you can put some of the information to good use when using Fontforge.