
How to Name Font Families in Fontforge
This tutorial will show you how to name font families, so that they all group together in your operating system’s font location, as well as in Adobe Illustrator and Adobe Photoshop font previews, using Fontforge.
How this Tutorial is Organized
- We’ll start by defining terms and discussing the reasons why you may want to change a font’s name.
- From here, we’ll open Fontforge and select a font file.
- Then we’ll change the font name and review error messages.
- Next, we’ll generate our re-named font.
- Then, we’ll review and test our font.
- Finally, I’ll provide tips on why it may not be working for you.
i. You can download Fontforge for Windows, Mac, or Linux from here.
ii. The font used in this tutorial is called Linux Libertine. It’s a free font for personal and commercial use with an open source license.
iii. This tutorial is shown on a Windows 10 computer with Fontforge version 03142020.
iv. Fontforge does crash, so save often.
v. Detailed information on naming conventions can be found at Fontforge, Microsoft, Adobe.
Definitions
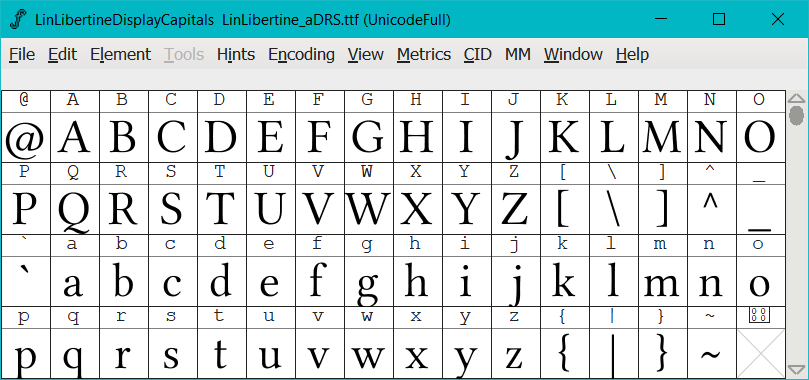
This is ‘Font View’
- Given font naming can be a little confusing, the following definitions will be used for this tutorial;
| Title | Meaning | Example |
|---|---|---|
| Font family name or family name | The name of a font | Linux Libertine, or Goodlight, or Lovers Quarrel. |
| Font family or family | Font family name + the group of font styles associated with this Font family name | Linux Libertine has 16 font styles and as a group (family name + font styles) this is a font family called Linux Libertine. Lovers Quarrel has one (1) font style and as a group this is a font family called Lovers Quarrel. |
| Font styles or style | The style of font | bold, italic, small caps, regular, display capitals etc. These are all font styles. Linux Libertine has 16 font styles. |
| Font name | Windows name for Font family + font style | Linux Libertine Bold, Linux Libertine Italic, Lovers Quarrel Regular |
Why Would You Change the Name of a Font
-
There may be several reasons why you may want to change the name of a font or a group of fonts. This tutorial will review some of the more common reasons and solutions, which are present using Linux Libertine as an example. The approach taken in this tutorial applies to all fonts not just the example font Linux Libertine.
-
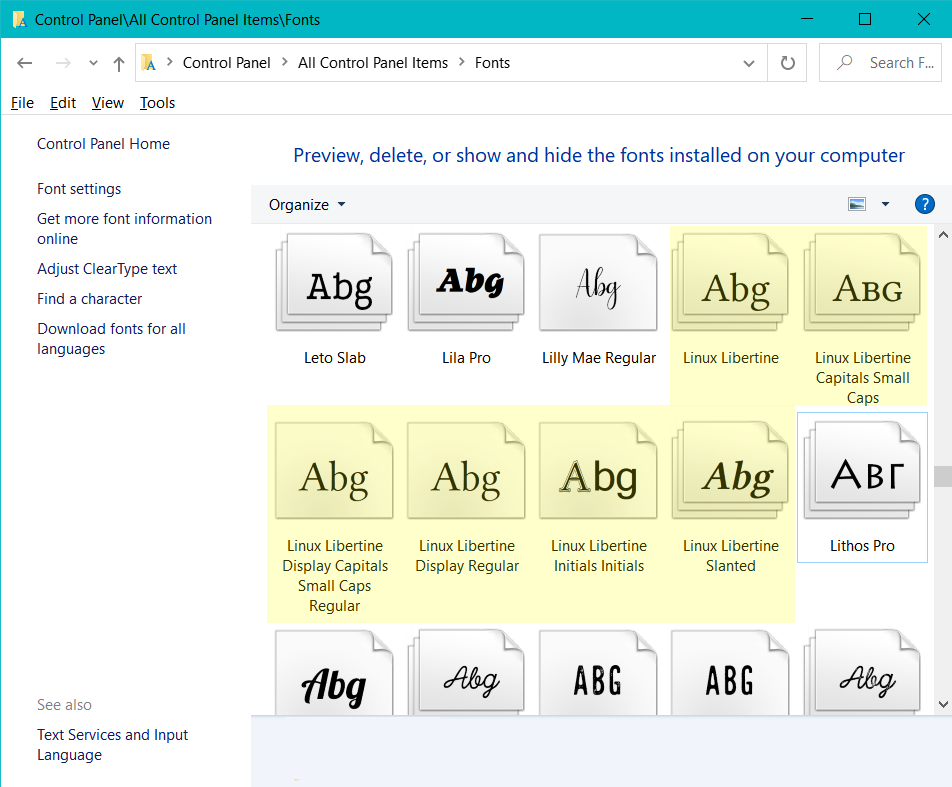
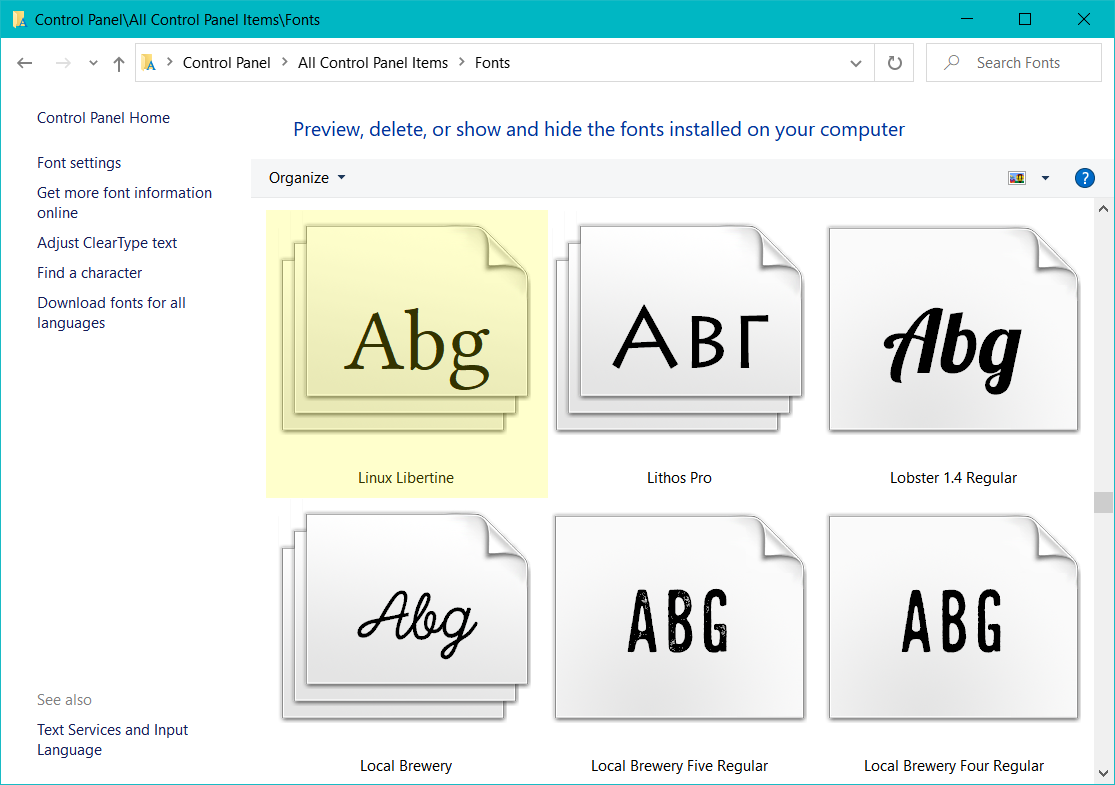
To get started, I’ve gone ahead and installed all 16 font styles of Linux Libertine.

Problems
-
The first problem I see when reviewing Linux Libertine in my Windows font directory, is
a) only nine (9) font styles out of 16 showed up, and
b) it has installed in a manner where some font styles are grouped and others are not.
-
This is a problem for me because I want them all grouped as one, not scattered in a random way that expands my font library, and I want to be able to use all 16 font styles not just nine (9).
-
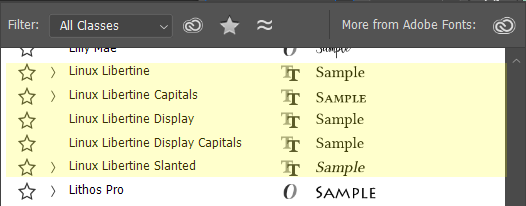
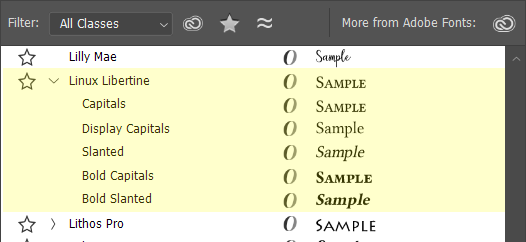
The next problem I see is, in Adobe Illustrator, when opening the font preview list.
a) Again, some font styles are grouped, others are not, and some don’t appear at all.
-
The problem with this is, it makes it hard to find fonts and it’s time consuming having to scroll through hundreds of fonts in Adobe Illustrator or Photoshop. I also want to be able to use all 16 font styles not just nine (9).
Why Don’t They All Show Up?
-
The reason why some font styles appear and others don’t is because many or all of the font styles, have the same ‘Font name’.
a) For example when I click on the original thumbnails to open Linux Libertine, I can see some have the same ‘Font name’, which means only one file will appear when installed.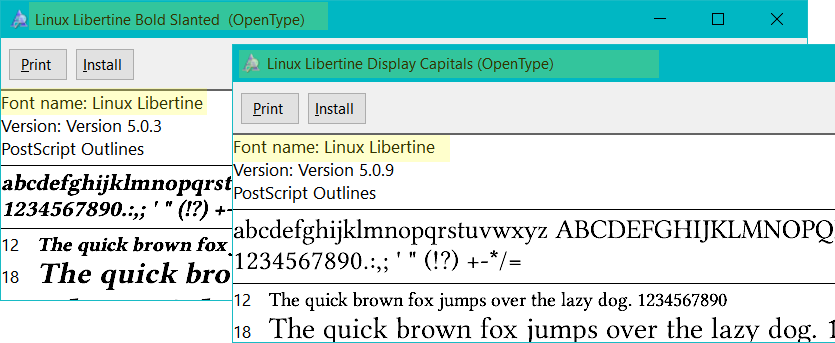
-
The remainder font styles (or files), you installed, will be buried and saved in your system. You will never see them and they will not be displayed or recognized unless you delete the font you can see, or of course change each file’s ‘Font name’.
Why Are Some Grouped & Others Not?
-
The reason why some font styles are grouped and others are not is because,
a) some font styles do not have identification that associates them to their font family, or
b) they have identification, but it’s in the wrong place and therefore not recognized, or
c) they have identification, and therefore they are grouped. -
There’s also the following, which display different groupings,
a) a Microsoft naming convention which only allows four (4) font styles to be grouped. These are regular, bold, italic, bold italic.
b) a Mac naming convention, and
c) an Adobe naming convention.Hidden Fonts Solution
-
The solution, to be able to see and use all 16 font styles of Linux Libertine, is to make sure each font style has a different ‘Font name’.
a) For example: Linux Libertine Regular, Linux Libertine Bold, Linux Libertine Bold Italic.
b) These changes need to be made using software that’s designed for fonts, like Fontforge.Ungrouped Fonts Solution
-
If I want all 16 font styles to be grouped or nested within the same font family in Windows and Adobe software, then each file needs to include identification that associates them to their font family.
a) These changes can be made using Fontforge.
The next section of this tutorial will go through the steps, to change the ‘Font name’ and identification, so that all font styles are visible and grouped into font families.
Selecting a Font File
-
To change a font name we need to open Fontforge, locate the font, select it and click ‘OK’.
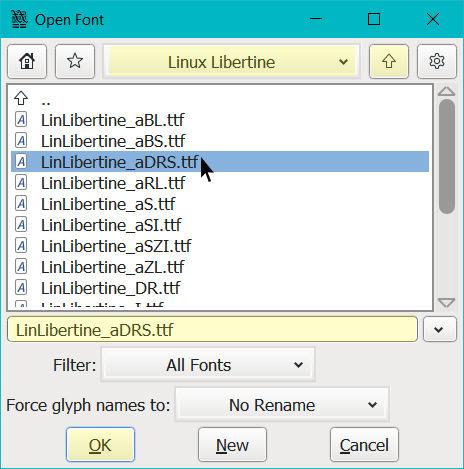
-
Ignore and close any warning dialogue boxes that open up.

- Make sure you’re not selecting, changing or saving any fonts within your Windows font directory, or system directory.
- If you want to change these ones, copy them onto your desktop, make changes to the copy, then move the original to a safe place.
- Delete the one you’re replacing, do not save over the top of it because Windows will not ‘replace’ the file with this new one, it will bury the original beneath the replacement. This will slow down your computer.
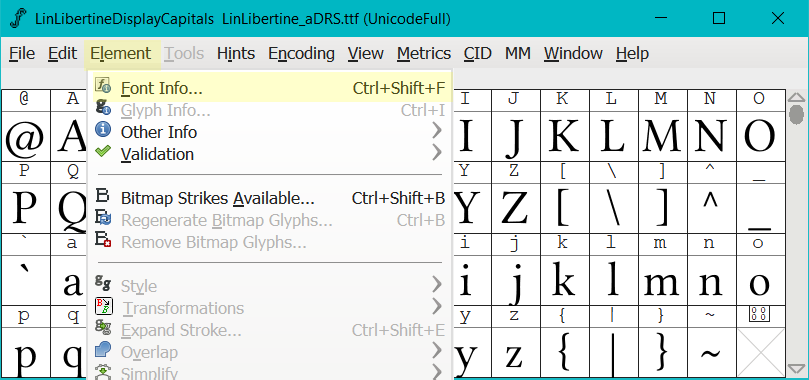
Changing A Font Name
Next we’ll be changing the details of the font name.
-
Starting in ‘Font View’,
a) click on ‘Element>Font Info’,
-
The ‘Font Info’ dialogue box will pop up,
a) select ‘PS Names’ in the left hand column. -
We’ll be changing what’s written in the boxes next to ‘Fontname’ and ‘Family Name’.
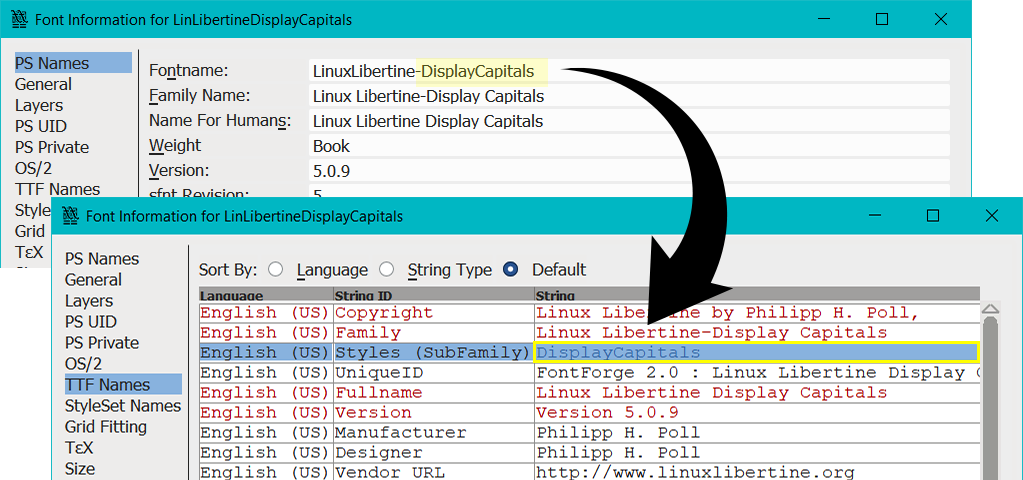
a) Change ‘Fontname’ so there are no spaces and include a hyphen between the font family name and font style.LinuxLibertine-DisplayCapitalsb) On the second line called ‘Family Name’, you need to include a hyphen between the font family name and font style. There are no spaces between the hyphen.
Linux Libertine-Display Capitals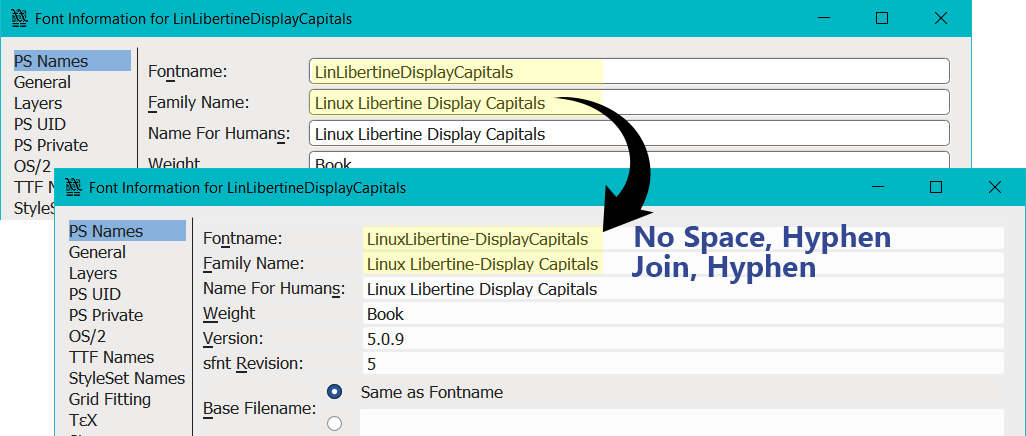
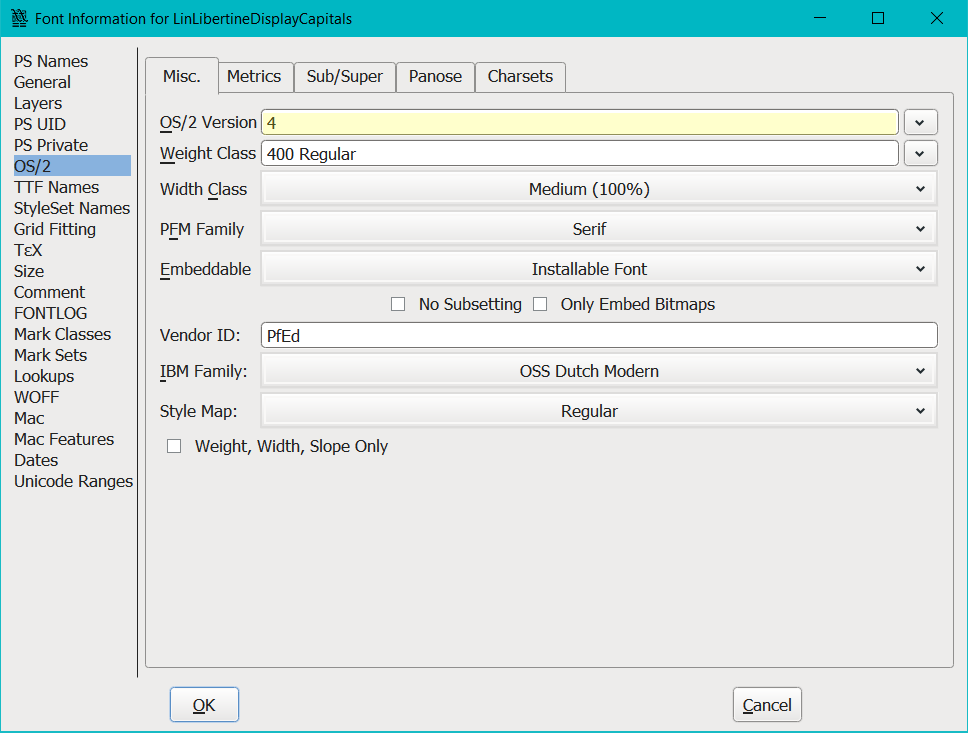
OS/2 Settings
-
Now in the left hand column,
a) Select ‘OS/2’
b) Then, type either a ‘4’ or ‘5’ into the ‘OS/2 Version’ field.i. This applies to all fonts. Currently there are 6 versions with 0 being the oldest. Apple provides an easier to read document on OS/2 tables, and at the bottom of their page describes how Mac OS handles the OS/2 table.
After changing the settings in ‘OS/2’, we’ll move on to changing the information within ‘TTF Names’.
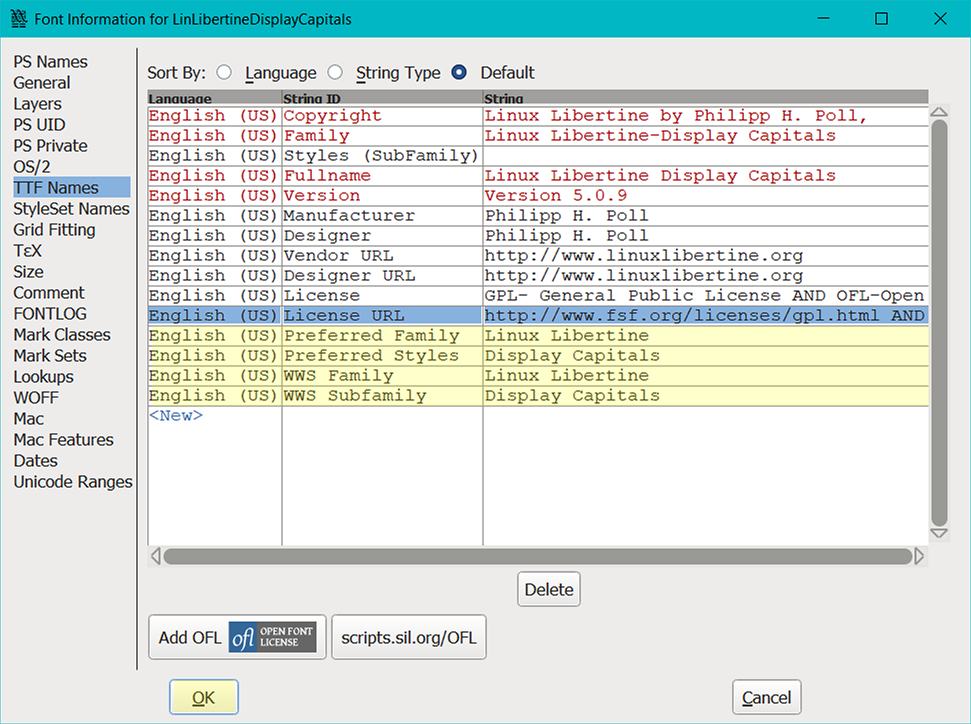
TTF Names
-
Make sure you’ve selected ‘TTF Names’ in the left hand column, then
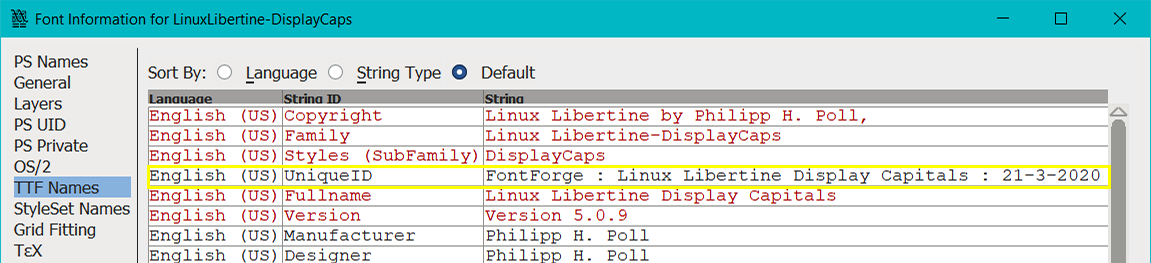
a) Check that the cell next to ‘Family’ is populated with the same name you entered in the previous step from ‘PS Names>Family Name:’.Linux Libertine-Display Capitals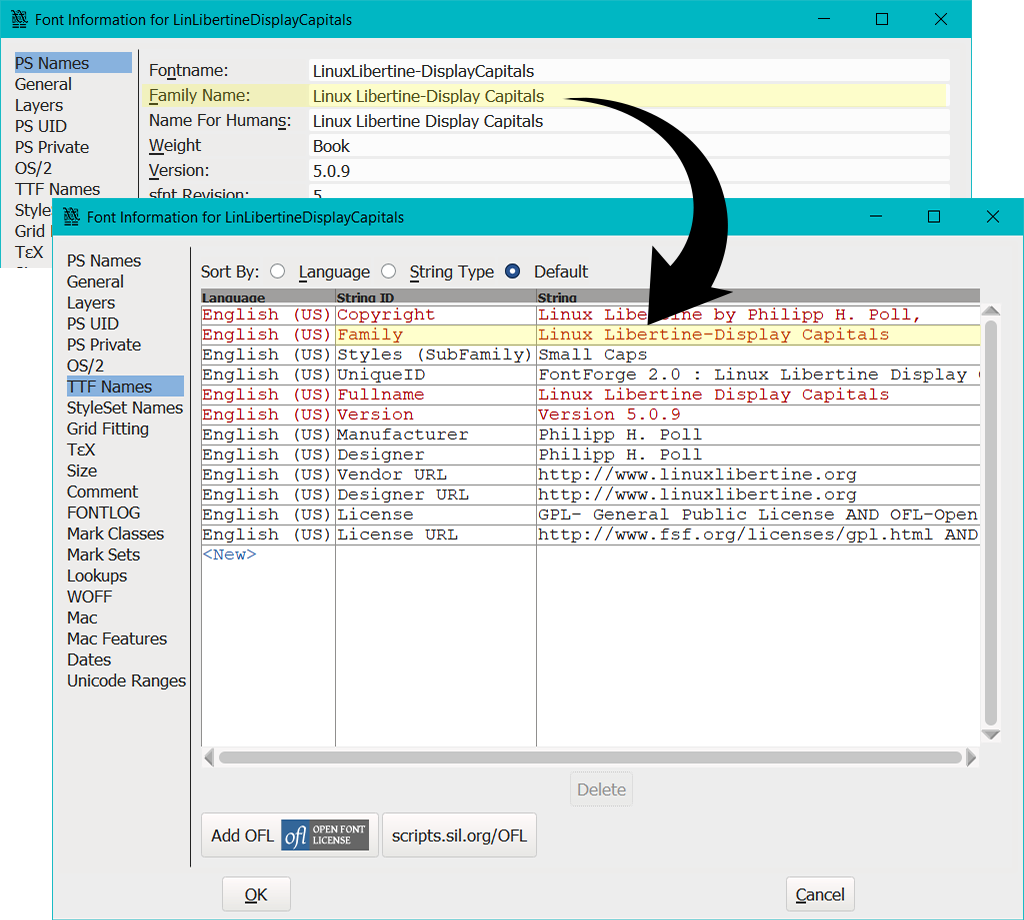
-
Next we’ll be changing the cell next to ‘Styles (SubFamily)’.
a) select and right mouse click on the cell next to ‘Styles (SubFamily)’, then
b) select ‘Same as PostScript Names’ from the drop down.
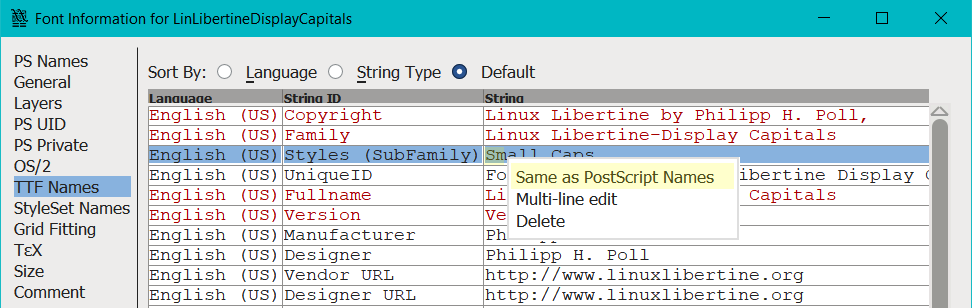
i. The field will ‘go blank’, which is normal.
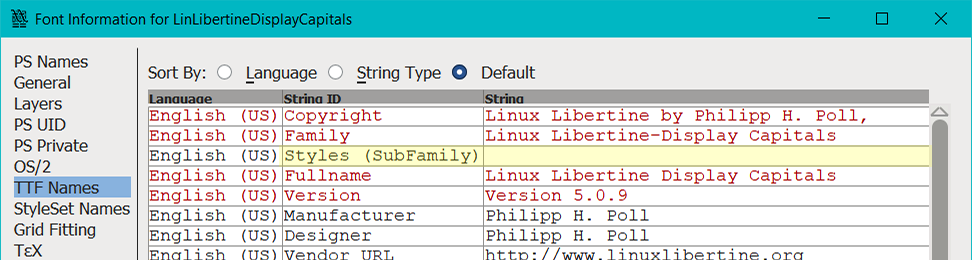
ii. If this drop down box doesn’t pop up, left mouse click into the dell and delete whatever is in there. In this example it’s ‘Small Caps’.
iii. Then type the words that appear after the hyphen in your ‘Fontname’ field from the previous steps. In this example it’s ‘DisplayCapitals’.
-
The next line we’ll change is the ‘UniquieID’ line.
a) Select and right mouse click on ‘UniqueID’, then
b) select ‘Delete’ from the drop down box.
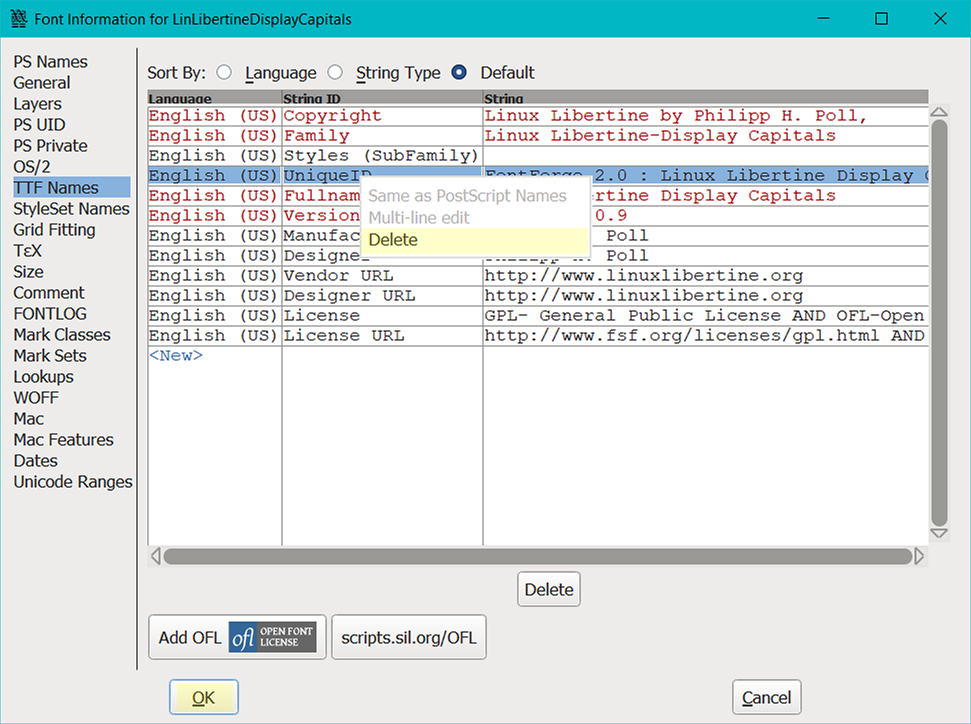
i. If you forget to delete the ‘UniqueID’ line, a helpful message pops up when you click ‘OK’.
ii. If you do receive this pop up, click ‘Change’ which will delete the entry and take you back to ‘Font View’.
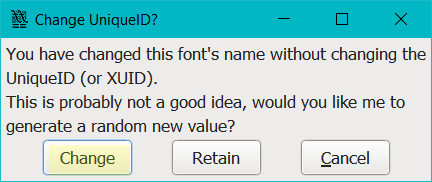
iii. When you generate the font, and ‘UniqueID’ has been deleted, Fontforge will generate a new ‘UniqueID’ line. Fontforge takes the information from the ‘Name For Humans’. The ‘Name For Humans’ is found under the ‘PS Names’ tab.
Identification
-
Now we’ll create 4 new entries so that our font styles associate and identify with their font family and group together.
-
This section is a little tricky and annoying.
a) If nothing pops up when you left mouse click on the cells, just click in the cell and start manually typing.
b) Sometimes, clicking on the cell, deletes the line entirely and you’ll have to re-add the line and start again.
c) You can also follow Fontforge’s inbuilt prompts which display when you hover over text. -
To create a new line,
a) click on ‘New’,
b) celect your language from the pop up list – English (US).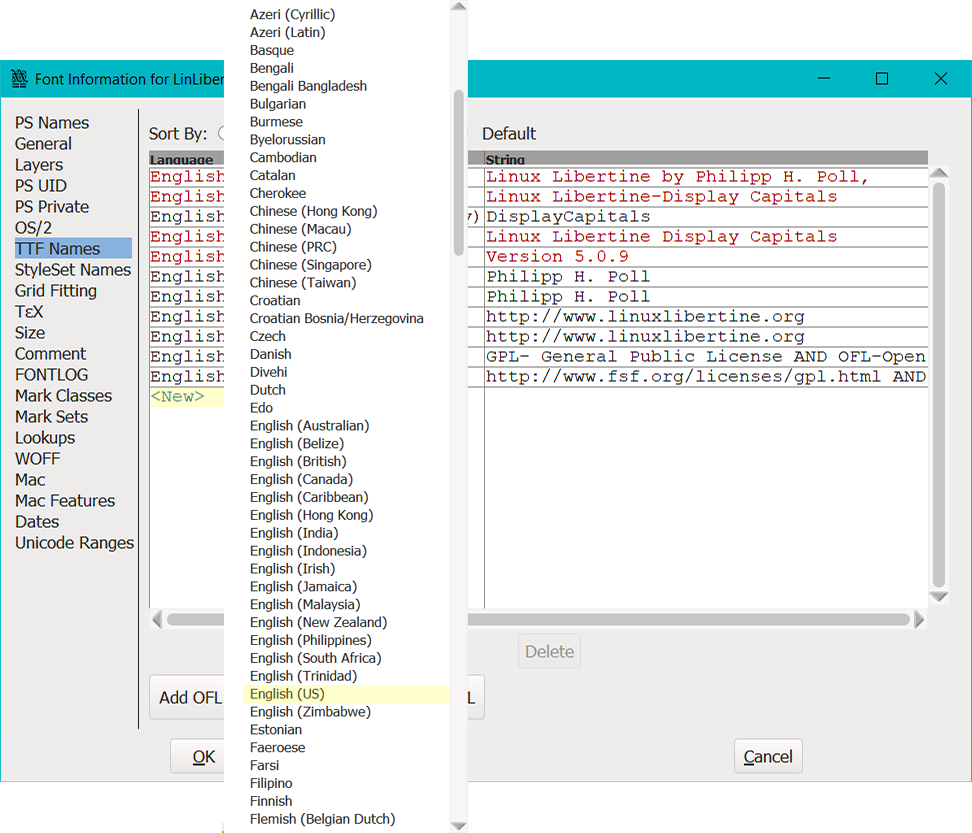
-
In the next column,
a) click on ‘UniqueID’ and select ‘Preferred Family’.
-
In the last column we need to manually type our preferred family name.
a) The ‘Preferred Family’ is the first half of the name you entered in the previous step from ‘PS Names>Family Name:’.
b) In other words, it’s the words that appear before the hyphen in your ‘Family Name’ field from the previous steps.
c) In this example it’s ‘Linux Libertine’.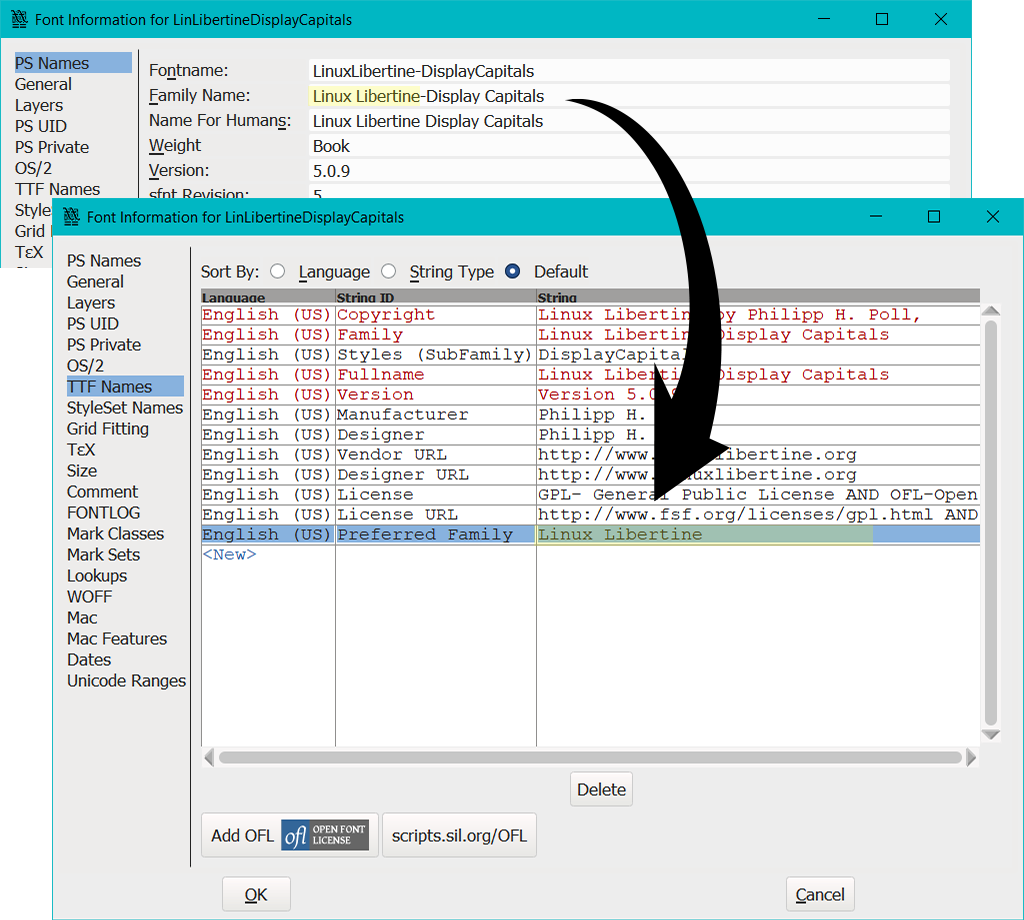
-
Next, we’ll add a second line just like we did in the previous step, but this time we’ll select ‘Preferred Style’.
a) Click on ‘<New>’
b) Select ‘English (US)’ from the list.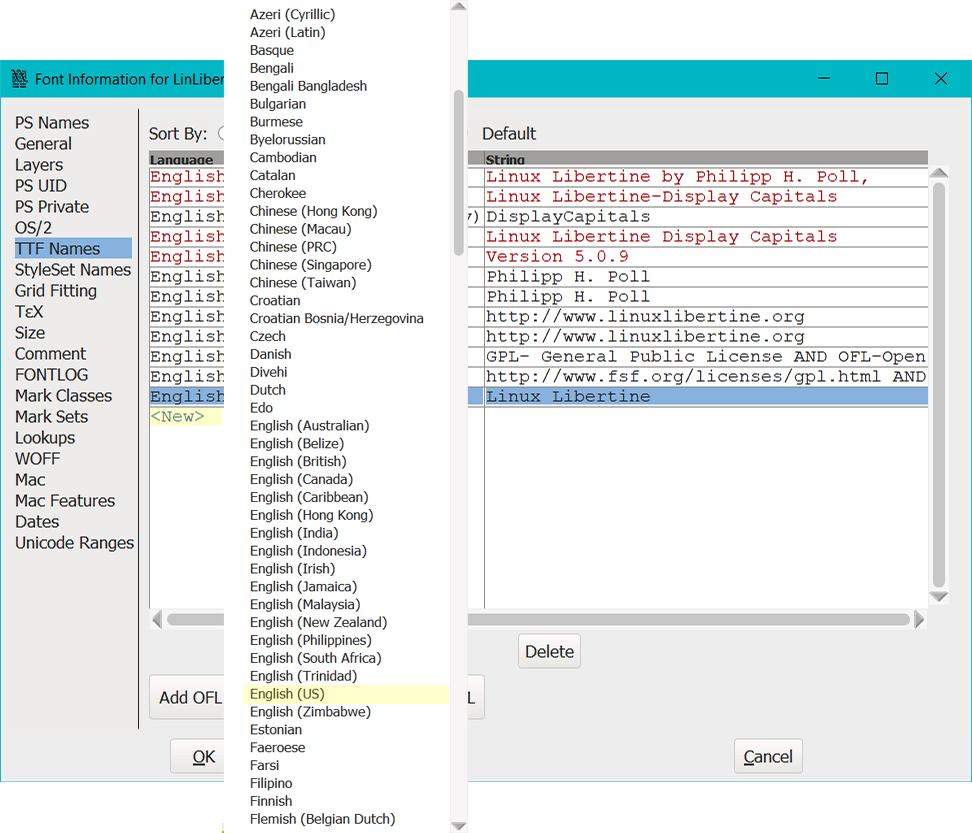
-
In the next column,
a) click on ‘UniqueID’ and select ‘Preferred Style’.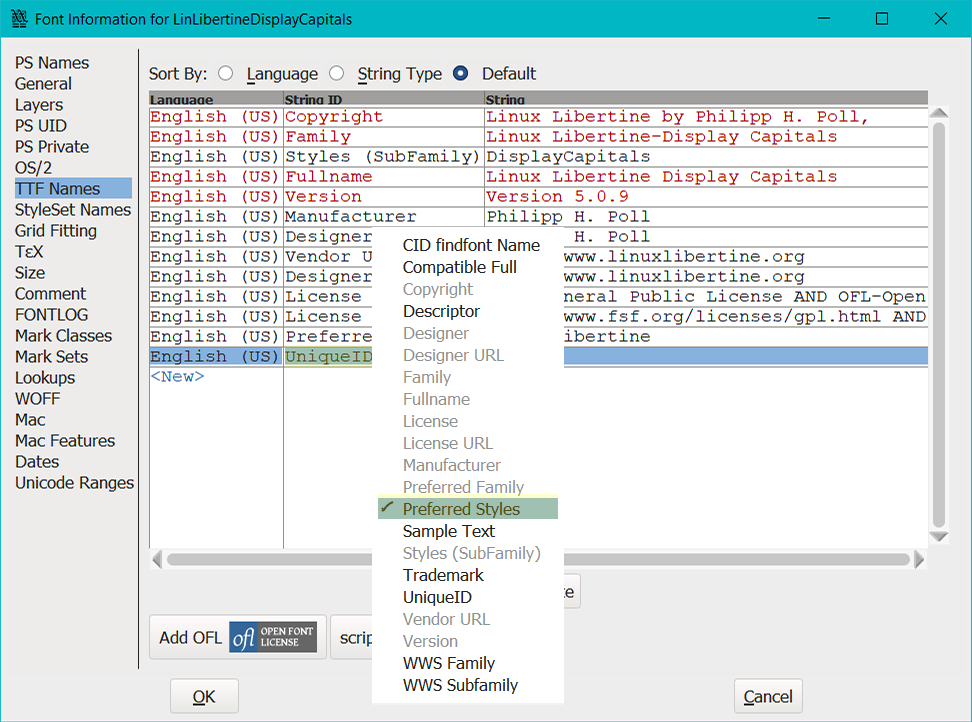
-
In the last column we need to manually type our preferred style name.
a) The ‘Preferred Style’ is the second half of the name you entered in the previous step from ‘PS Names>Family Name:’.
b) It’s the words that appear after the hyphen in your ‘Family Name’ field from the previous steps.
c) In this example it’s ‘Display Capitals’.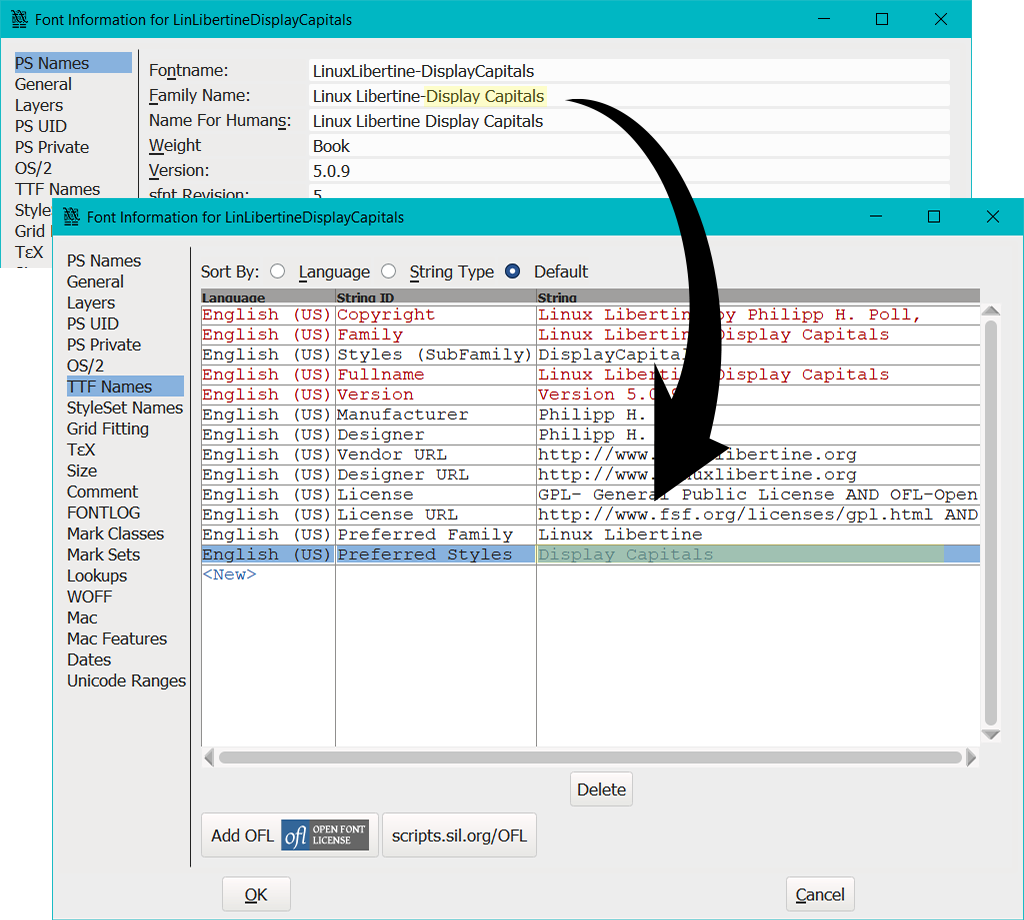
-
Now go ahead and create two (2) more rows, just as we did in the previous two rows, only this time changing the second column to ‘WWS Family’ and ‘WWS Subfamily’.
-
When completed the additional 4 rows should look like this:
a) Click ‘OK’ to save the changes and return to ‘Font View’.
After clicking ‘OK’, you may receive an error message about long font names. The next section will help you overcome this.
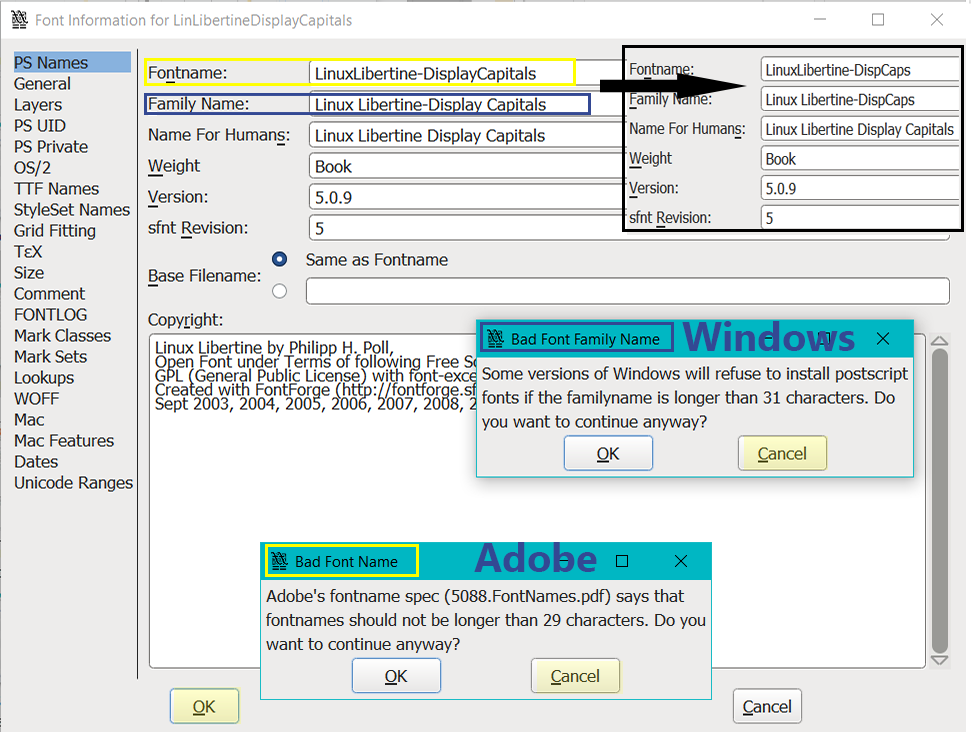
Error Messages
-
If your ‘Fontname’ and or ‘Family Name’ are too long, a dialogue box will pop up.
-
If you receive one or both of these dialogue boxes,
a) Click ‘Cancel’ and reduce the number of characters.
b) ‘Family Name’ is related to the Windows error.
c) ‘Fontname’ is related to the Adobe error. -
When you’ve finished reducing the name,
a) click ‘OK’ to save the changes and return to ‘Font View’.
b) There is no need to change the information within OS/2 or TTF Names.
Generating Your Font
-
Now we’re ready to generate our font. Make sure you’re in ‘Font View’ then,
a) click on ‘File>Generate Fonts’.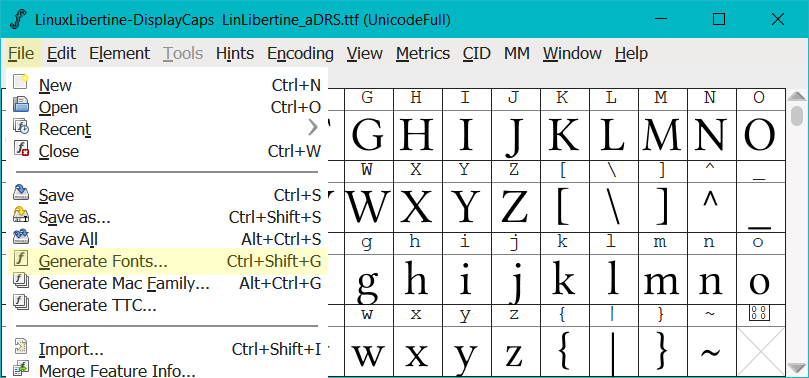
-
Head on over to my Abg Font Thumbnail tutorial for detailed instructions on generating fonts.
-
When you’ve completed all the settings in the ‘Generate Fonts’ dialogue box,
a) click ‘Generate’. -
After clicking on ‘Generate’ you may receive an error pop up,
a) click ‘Yes’.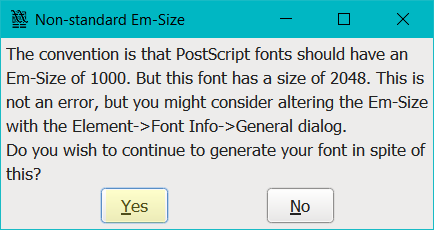
-
Your updated font will save to your nominated file path ready for reviewing.
Review And Test
-
Open your generated font and check the font name for correctness.
-
Delete any legacy Linux Libertine fonts in your system.
a) I’ve found it’s best to delete or uninstall the font you want to replace, then install the replacement font, rather than letting Windows ‘replace’ the new font, because Windows often saves over the top and buries the unwanted font deeper into the operating system.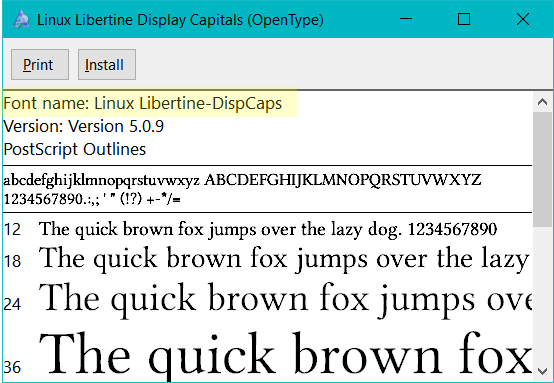
-
Then install your re-named Linux Libertine font styles and test them out to see if they’ve grouped within your font directory, and software font preview drop down lists.
It’s Not Working
- If it’s not working out correctly, after you’ve followed this tutorial, then
a) review what you’ve entered in the ‘PS Names’ section and the ‘TTF Names’ section,
b) make sure the ‘PS Names’ section matches the ‘TTF Names’ section,
c) check spelling throughout,
d) check spaces, no spaces and hyphens are in the right place,
e) go back and make sure you’ve followed the instructions, step by step.
That brings us to the end of this tutorial.
I hope this tutorial has been of assistance and you can put some of the information to good use when you want to change the font attributes using Fontforge.