
How to Create Chained Contextual Lookup Tables in Fontforge
This tutorial will show you how to create contextual chaining lookups in Fontforge.
How this Tutorial is Organized
- We’ll start with a brief outline of definitions.
- Followed by creating a set of glyphs that we’ll use for a single substitution lookup table.
- Then we’ll create a single substitution lookup and troubleshoot problems that occur when completing its subtable.
- Next we’ll create a contextual chaining substitution lookup and its companion subtable.
- Then, we’ll test our formula.
- I’ll then provide alternate formulas so you can see how they work, and
- I’ll give you some tips on why your contextual chaining substitution may not be working.
i. You can download Fontforge for Windows, Mac, or Linux from here.
ii. The font used in this tutorial is called Cabin. It’s a free font for personal and commercial use with an open source license.
iii. This tutorial is shown on a Windows 10 computer with Fontforge version 03142020.
iv. Fontforge does crash, so save often.
v. Detailed information on contextual chaining lookups can be found at Fontforge.
Definitions
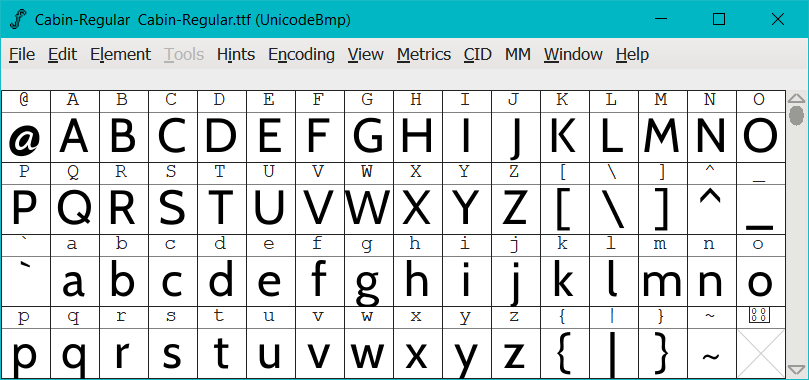
This is ‘Font View’
| Title | Meaning | Also Known As |
|---|---|---|
| Single Substitution Lookup Table | It’s a table you create when you want to replace a single glyph with another single glyph. | Lookup, lookup table, substitution lookup, single substitution lookup |
| Subtable | Every lookup table has one or more subtables that defines what glyph will replace another glyph. | Lookup subtable, substitution subtable, single substitution lookup subtable |
| Contextual Chained Lookup Table | It’s a sequence that has three parts: backtrack, current glyph, and lookahead glyph. It can also be two parts. | Any combination of the words ‘chain, contextual, substitution, lookup’. Chained lookup, chaining contextual lookup, chaining contextual substitution, chained substitution |
| Contextual Chained Substitution Lookup Subtable | This has the same meaning as ‘Subtable’ | Same as subtable with the addition of chained or chaining |
Creating Glyphs
-
First create a set of glyphs to be used for the single substitution lookup table.
a) In this example I’ve created 26 glyphs and named them lowercase with the suffix ‘slant’.a.slant, b.slant, c.slant, etc...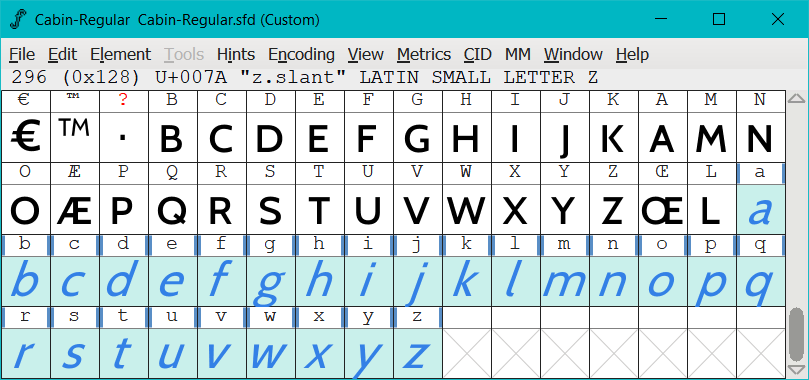
Single Substitution Lookup Table
Now we’ll create our single substitution lookup table to describe our changes.
-
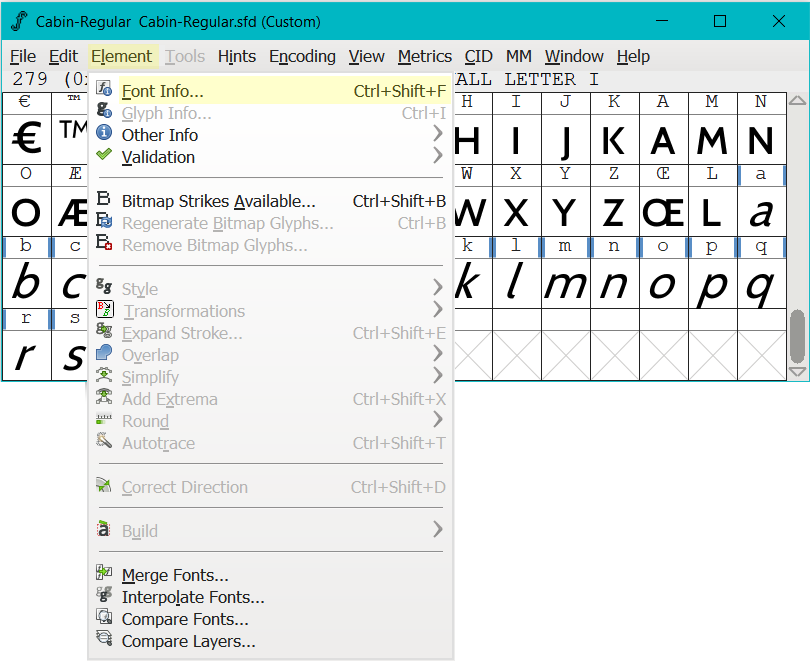
To create a new lookup table, make sure you’re in ‘Font View’ then
a) click on ‘Element>Font Info’
-
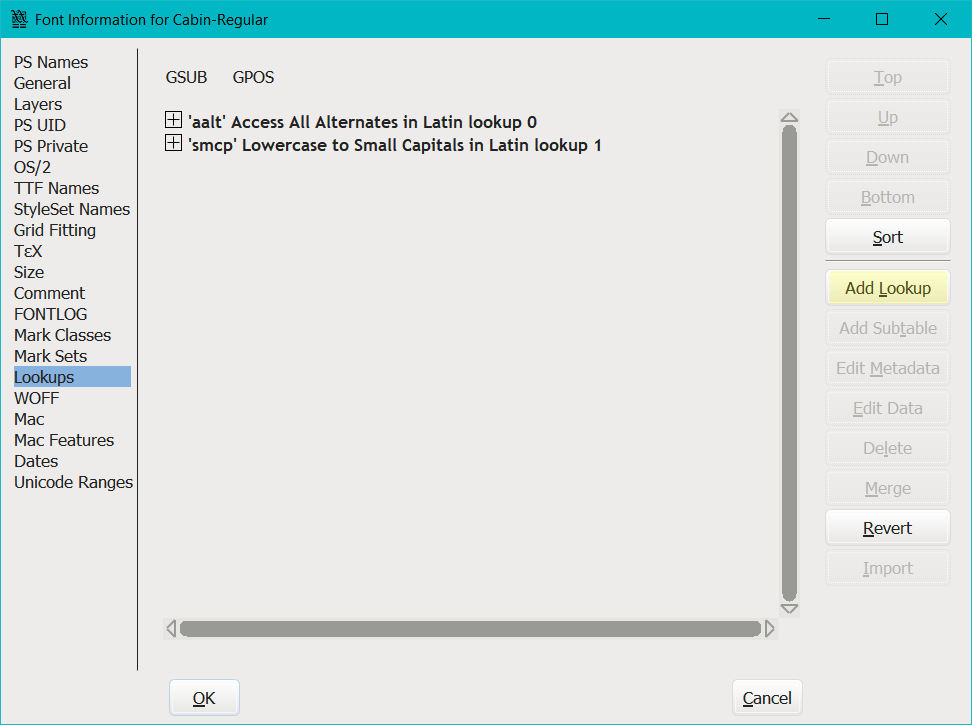
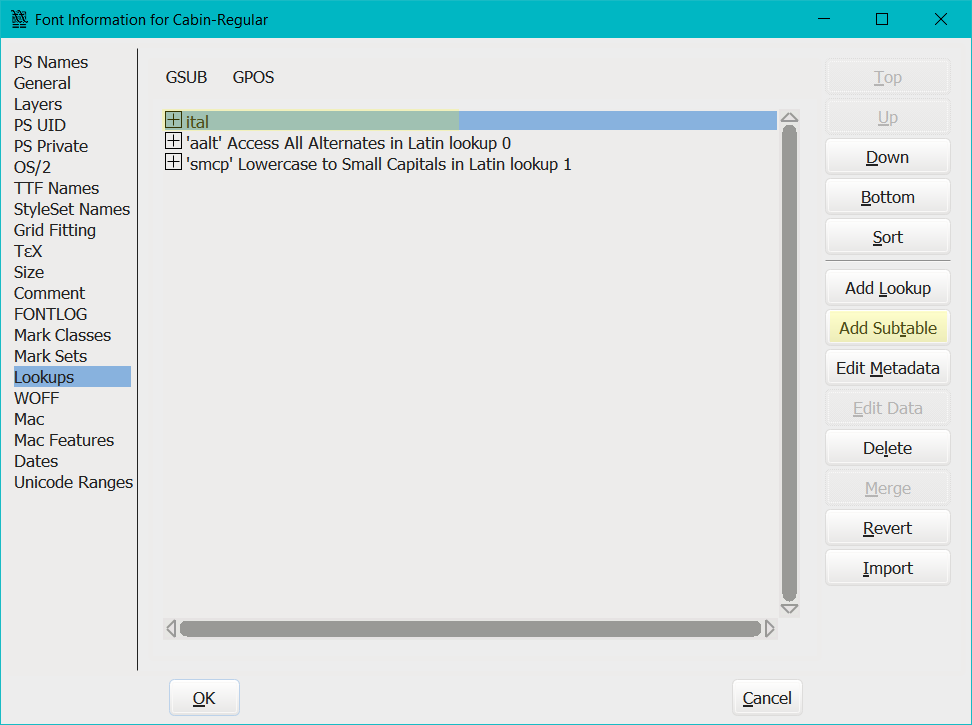
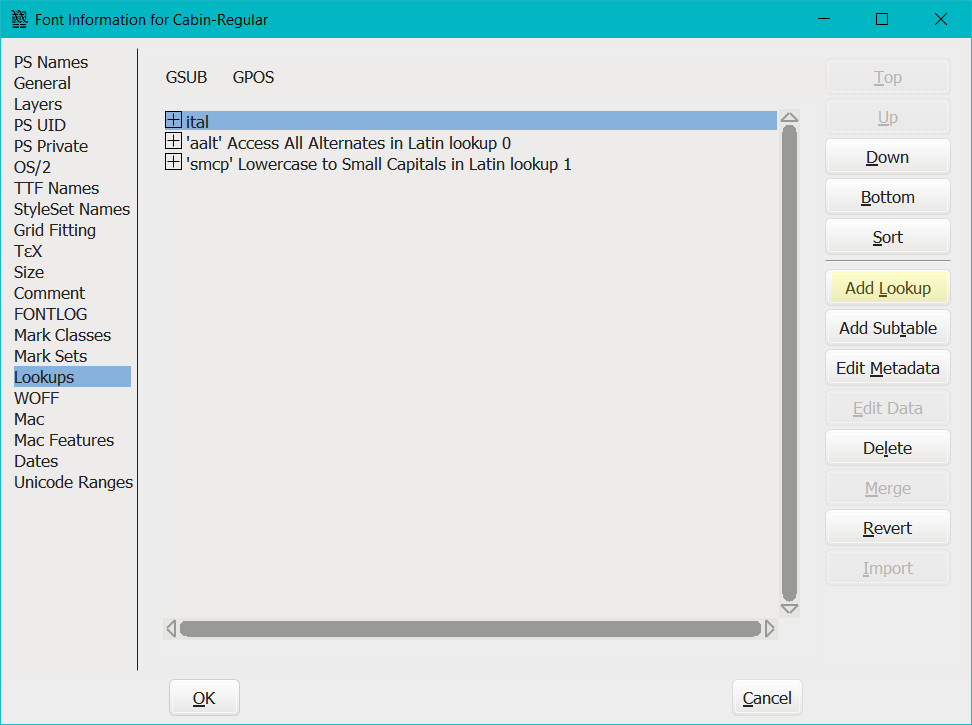
On the next screen that pops up, make sure you’ve selected ‘Lookups’ in the left hand column, then
a) Select ‘Add Lookup’
-
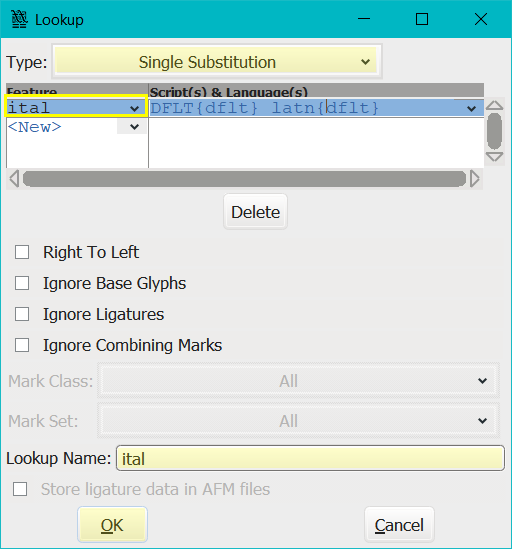
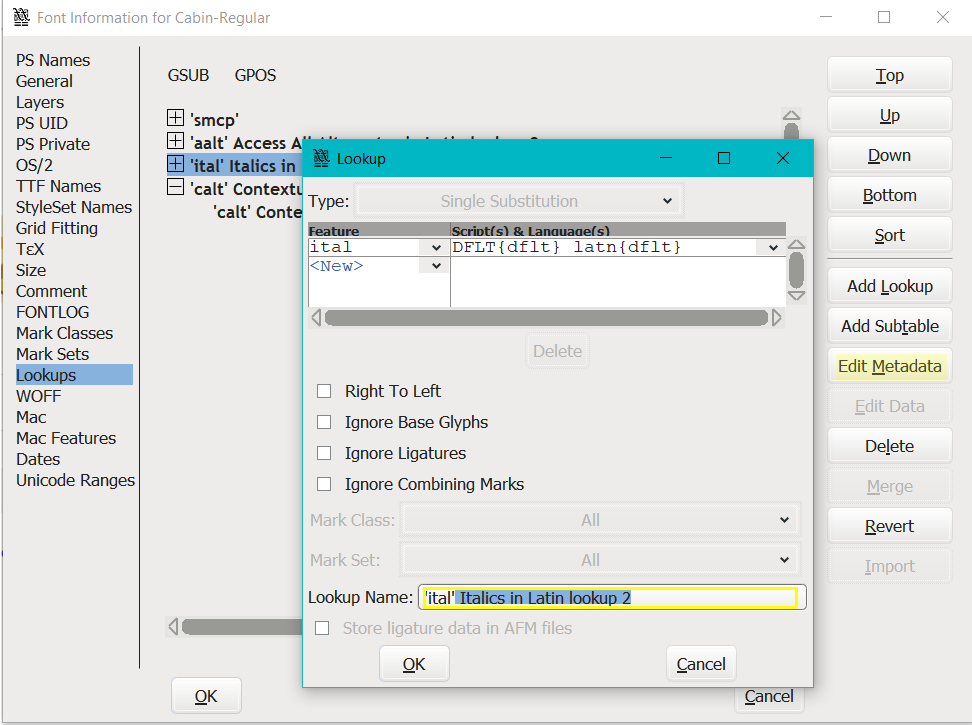
When the ‘Lookup’ dialogue box pops up,
a) Select ‘Single Substitution’ from the drop down list at the top, next to the word ‘Type:’.
b) Now click on the little button next to <New> to add a new line, which should also trigger a drop down list.
c) Make your selection. In this example I’ve selected ‘ital’ because the glyphs I created are italics.
d) The ‘Lookup Name’ will now be auto populated and you can either keep the default name or change it.
In this example I’ve changed name to ‘ital’.
e) Click ‘OK.’
Single Substitution Subtable
-
We will now add a subtable to our lookup by,
a) selecting ‘ital’,
b) then click on ‘Add Subtable’.
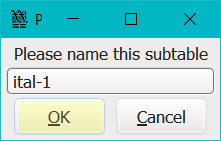
c) Click ‘OK’ to accept the default name, or you can rename it.
-
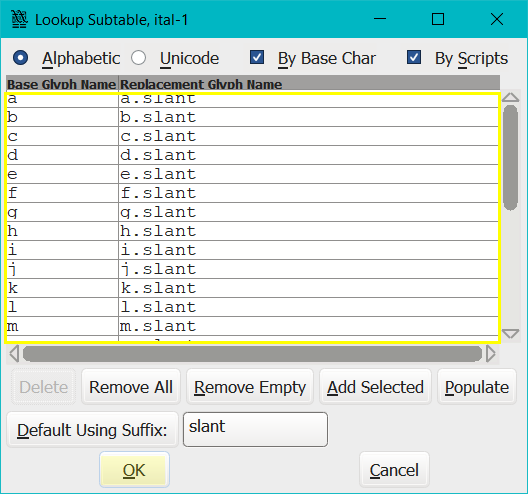
The next dialogue box that pops up will be our subtable called ‘Lookup Subtable, ital’ where we’ll associate our substitution glyphs with their default glyphs.
a) Type ‘slant’ in the box next to ‘Default Using Suffix’.-
The ‘Default Using Suffix’ is associated with the name you gave your created glyphs.
For example, I called my new glyphs ‘a.slant, b.slant, c.slant, etc’ and their suffix is ‘slant’. -
If I created ‘g.name, s.name, y.name’ their suffix would be ‘name’ and I would type ‘name’ in the box next to ‘Default Using Suffix’.
b) Now click the button called ‘Default Using Suffix’ to automatically fill the list.
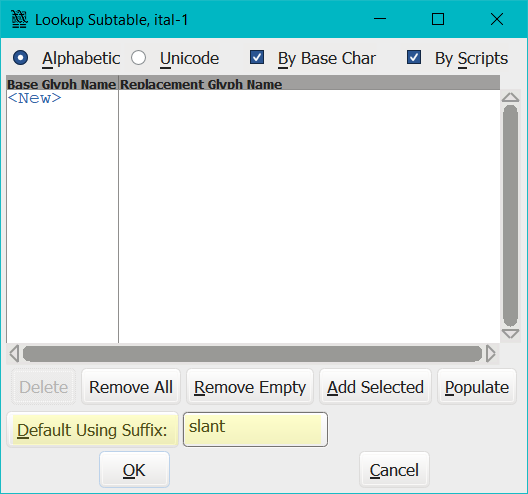
c) Click ‘OK’ to take you back to the ‘Font Info’ dialogue box.
-
Problems Completing the Subtable
-
If the list doesn’t auto fill,
a) check the glyph names,
b) check spelling,
c) make sure you’re referring to the right names (g.sc and G.sc are not the same), are you thinking about the uppercase glyph and have named it with a lowercase letter.
d) Try to manually type in the list, and as a last resort save, quit and restart Fontforge and start again. -
Be aware if you use Fontforge’s ‘Element>Other Info>Mass Glyph Rename’ function, the ‘Default Using Suffix’ will not recognize the names, and manually entering the glyphs in the subtable will throw an error.
a) The only way for ‘Default Using Suffix’ to work is to manually type the glyph names in ‘Glyph Info’, even though ‘Mass Glyph Rename’ has correctly named them.b) This is the ‘Glyph Info’ dialogue box that can be accessed by selecting a glyph in ‘Font View’, then right mouse click and select ‘Glyph Info’.
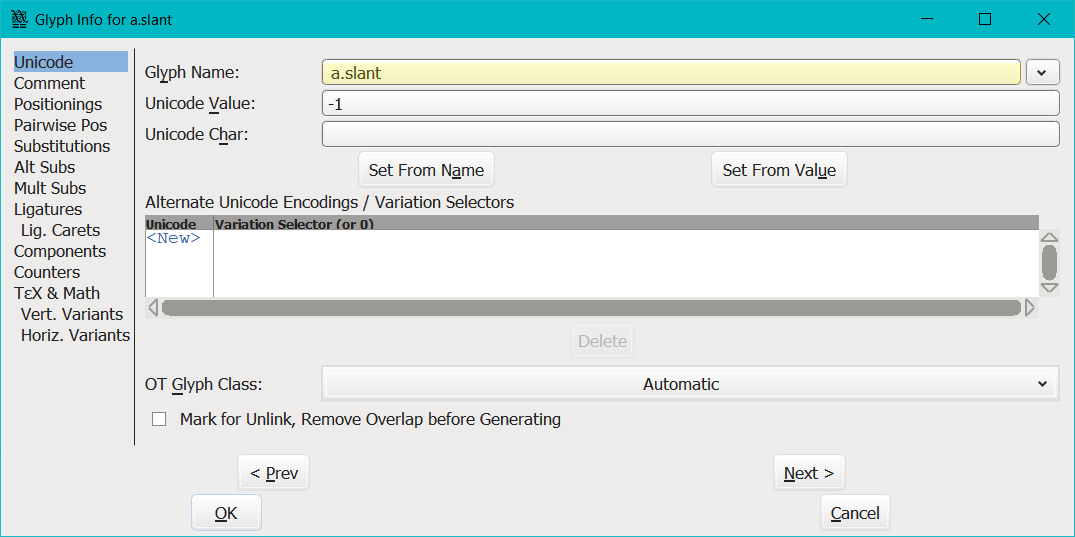
c) You also can’t try ‘Mass Glyph Rename’ then delete the name in ‘Glyph Info’ and manually type the name.
d) The only way forward after you’ve tried ‘Mass Glyph Rename’ is to close Fontforge and start again.
-
Be aware if you get the error pop up asking ‘whether the glyphs you typed were intentional’, you need to save, quit, re start Fontforge and start again for the ‘Default Using Suffix’ button to work.
Contextual Chaining Substitution Lookup
-
Next, we need to create another lookup table just as we did above, only now using ‘chaining contextual substitution’.
-
You should still be on the ‘Font Info’ dialogue box, however if you’re not, you can navigate back to it from ‘Font View’ then
a) click on ‘Element>Font Info>Lookups -
Next you’ll need to,
a) click on ‘Add Lookup’.
-
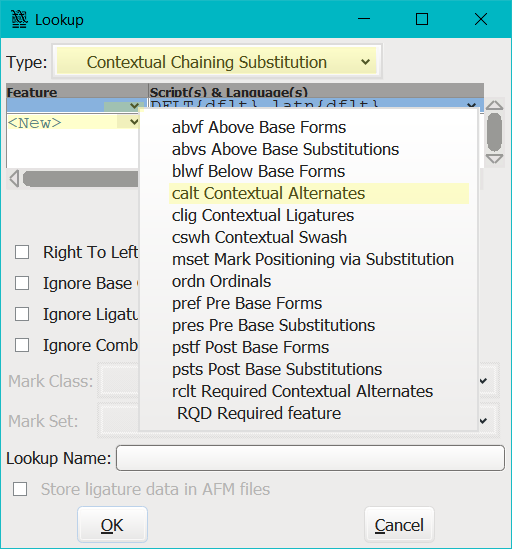
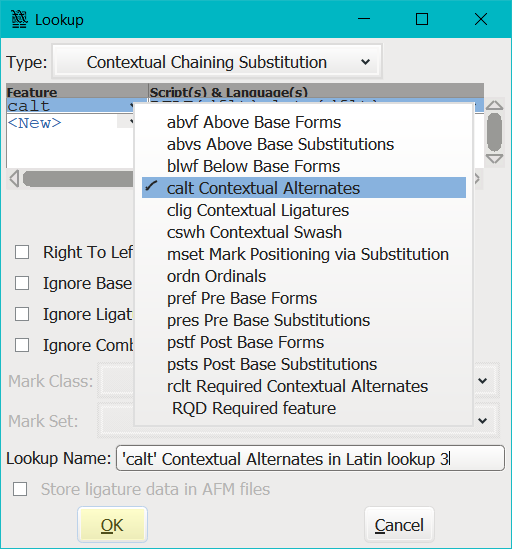
In the next dialogue box that pops up,
a) select ‘Contextual Chaining Substitution’ from the drop down box at the top next to the word ‘Type:’.
b) Then click on ‘<New>’ to enable another drop down box.
c) Then select ‘calt Contextual Alternatives’.
-
The ‘Lookup Name’ will now be auto populated and a ‘calt’ will be added in the feature column.
-
In the box next to ‘Lookup Name’, you can either keep the default name or change it.
-
Click ‘OK’ to save the changes.
-
Now that we’ve added a contextual chaining lookup table the next step will be to add a corresponding subtable to it, just like we did in the previous step.
Contextual Subtable
-
Next we’ll add a subtable to our contextual chaining lookup table.
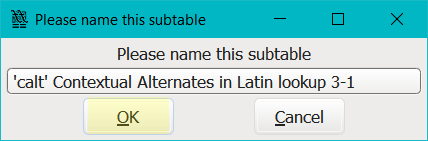
a) Click ‘Add Subtable’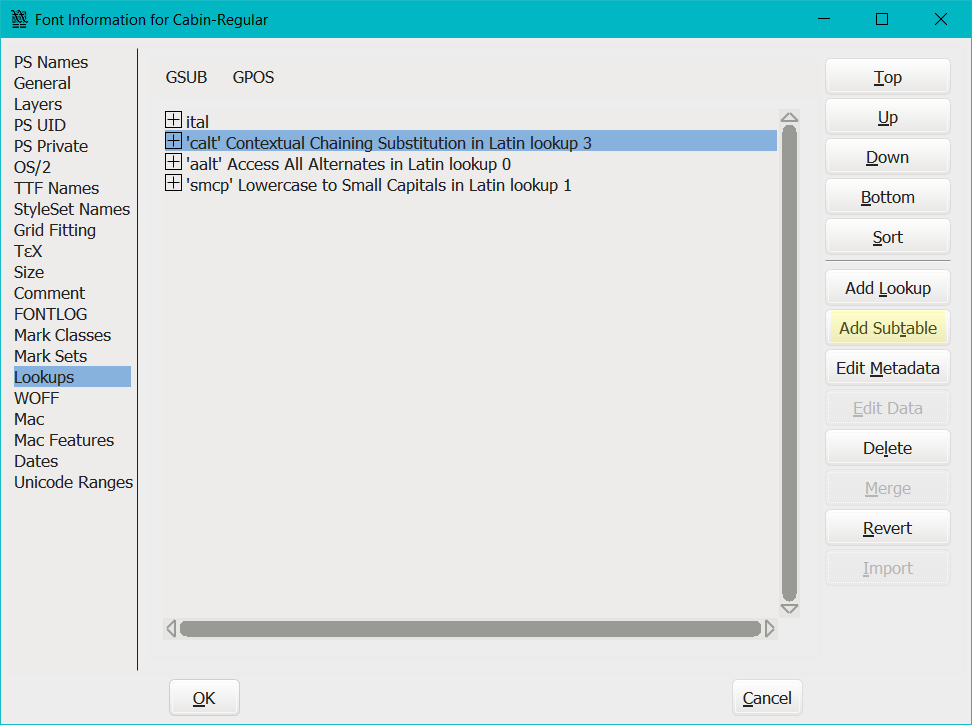
b) Click ‘OK’ to accept the default name, or rename it.
c) Select ‘By classes’, and ‘Simple’,
d) Click ‘<Next>’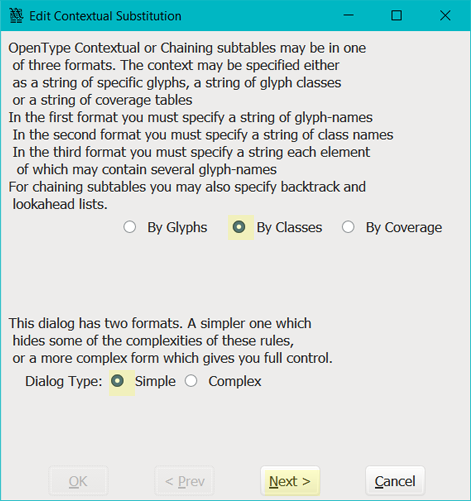
Step Sequence
-
To be able to complete the next section you need to complete the following steps in this order only, otherwise the functions of ‘Back’ and ‘Ahead’ are inaccessible.
-
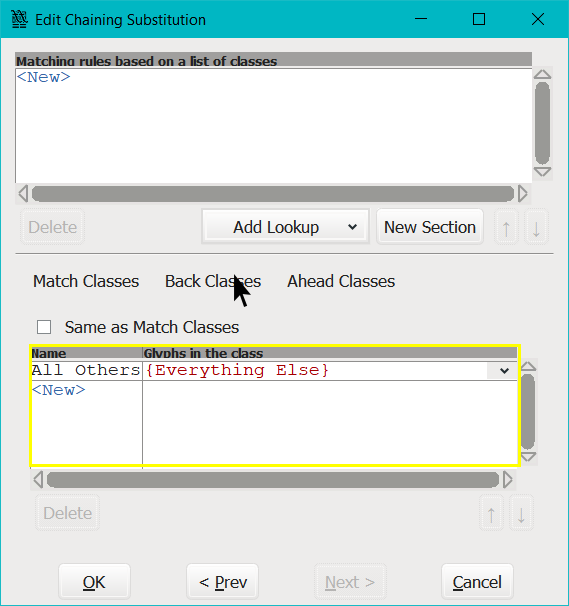
First, click on ‘Back Classes’ and remove the tick from ‘Same as Match Classes’.
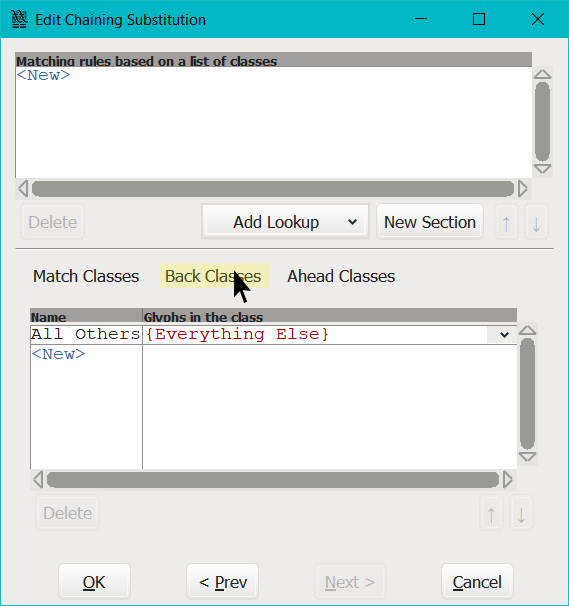
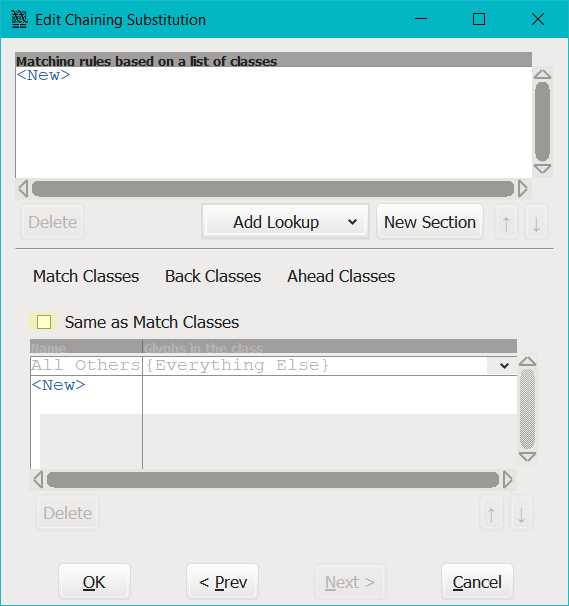
-
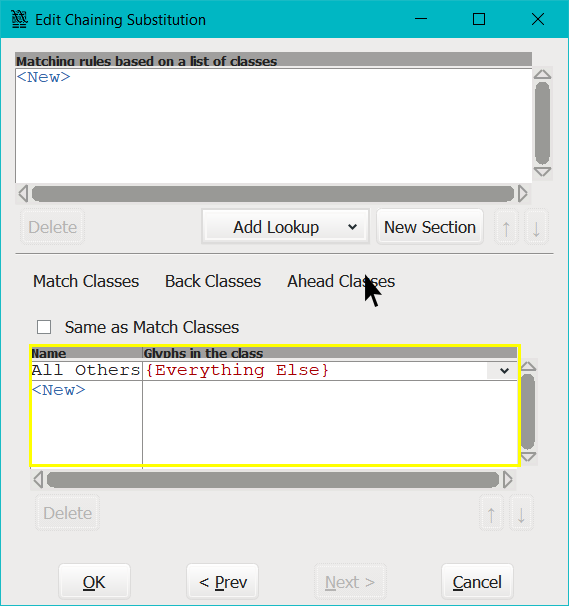
Then, click on ‘Ahead Classes’ and remove the tick from ‘Same as Match Classes’

Bottom Section
-
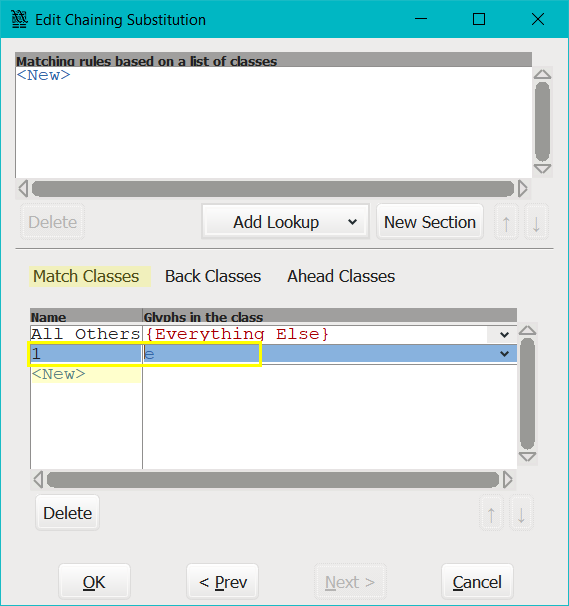
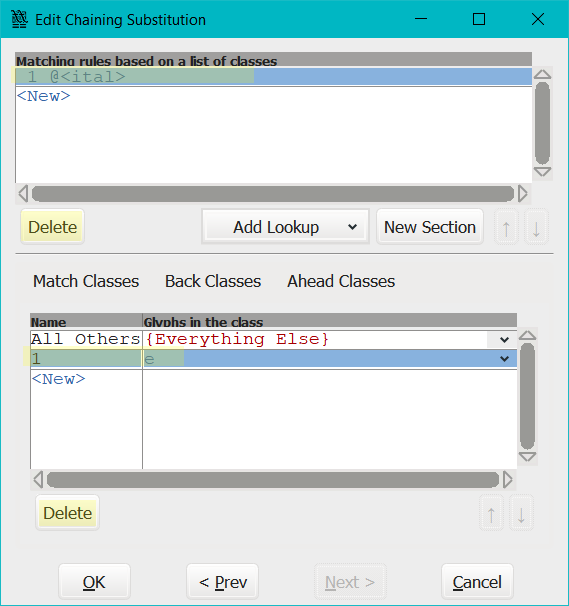
Now, click on ‘Match Classes’ and populate the table with any random data, starting with the bottom section first. The random data will act as dummy place holders. For example,
a) Click on ‘<New>’
b) Type ‘1’ into the ‘Name’ column,
c) type ‘e’ into the ‘Glyphs in the class’ column.
Top Section
-
Now we’ll complete the top section,
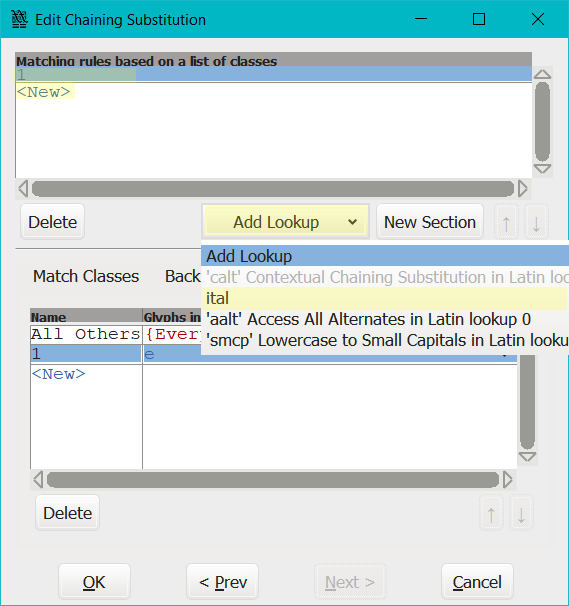
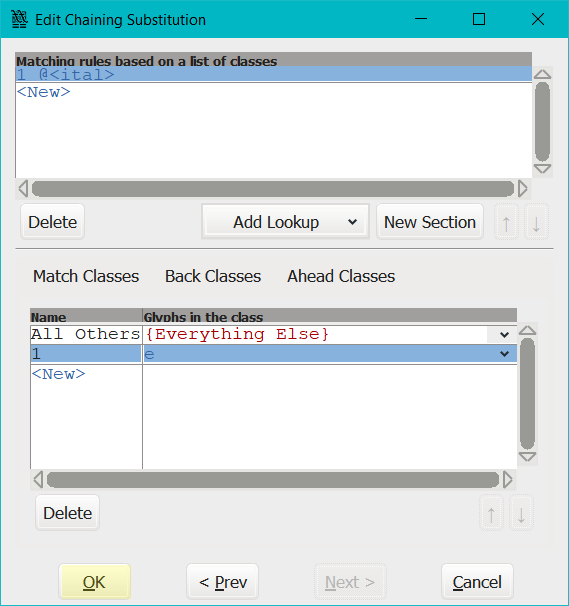
a) Click on ‘<New>’ in the top section
b) Type ‘1’ on the newly created line
c) Click on ‘Add Lookup’
d) Select one of the Lookup tables, for example ‘ital’
-
Your formula should now look like this:
1 @<ital>a) Click ‘OK’ which will take you back to the ‘Font Info’ dialogue box.
-
This is the end of the step sequence. We’ll now check we can access the ‘Back’ and ‘Ahead’ classes.
Accessibility
-
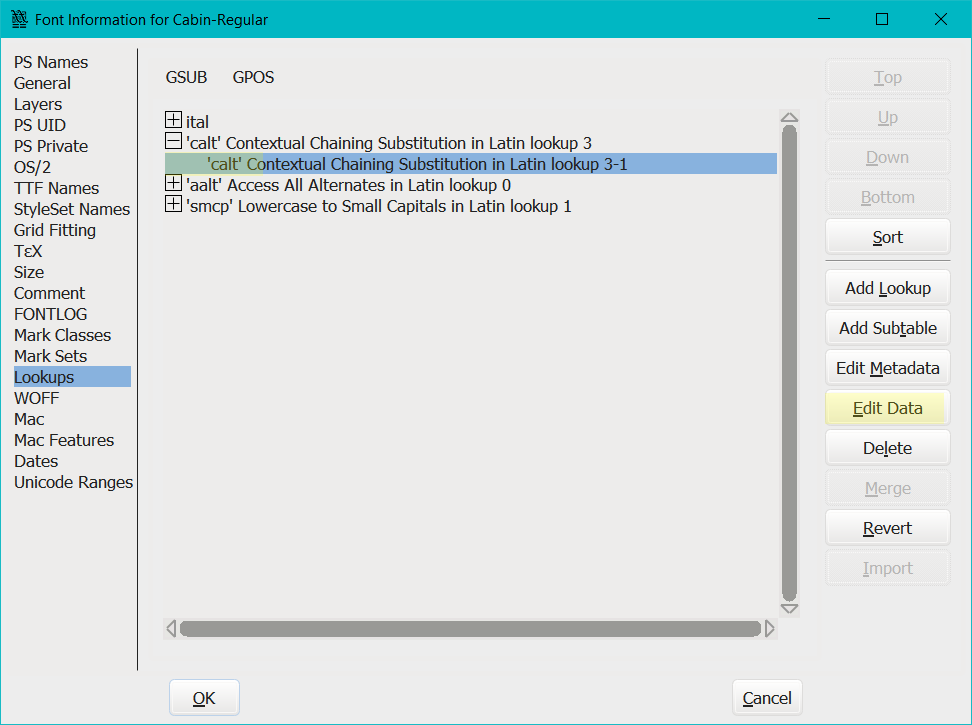
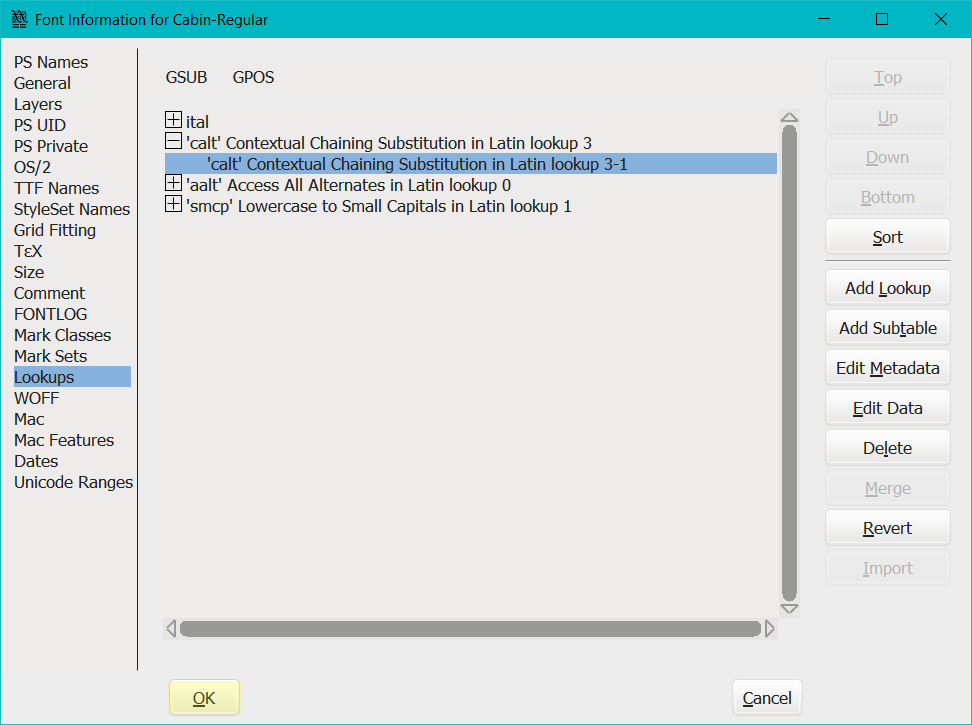
Go ahead and expand the ‘calt’ Lookup line and select the ‘’calt’ Contextual Alternates in Latin lookup 3-1’ subtable.
a) Then click on ‘Edit Data’
-
Click on ‘Back Classes’ and ‘Ahead Classes’ to confirm the bottom section is now accessible.
a) If it isn’t, delete the entire Contextual Lookup and start again, making sure to follow the steps in the above order only.
Deleting Place Holders
-
Continue with the following steps after confirming you can access the bottom section.
-
Go ahead and delete the dummy place holders you created in the previous step.
Chaining Formula
-
Now we’ll enter our contextual chaining formula. Remember the bottom section needs to be completed before the top section.
Match Classes
-
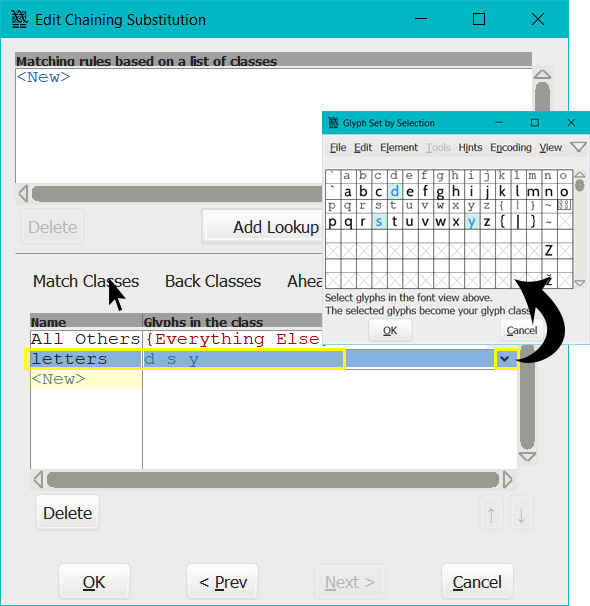
We’ll complete the ‘Match Classes’ first.
a) Click on ‘Match Classes’
b) Click on ‘<New>’
c) Type the word ‘letters’, or a word of your choosing, in the column on the left.
d) And in the column on the right, either manually type ‘d s y’, separated by a space, or use the drop down arrow to select the glyphs that represent the class that you want substituted.i. The glyphs should auto populate as you type.
Back Classes
-
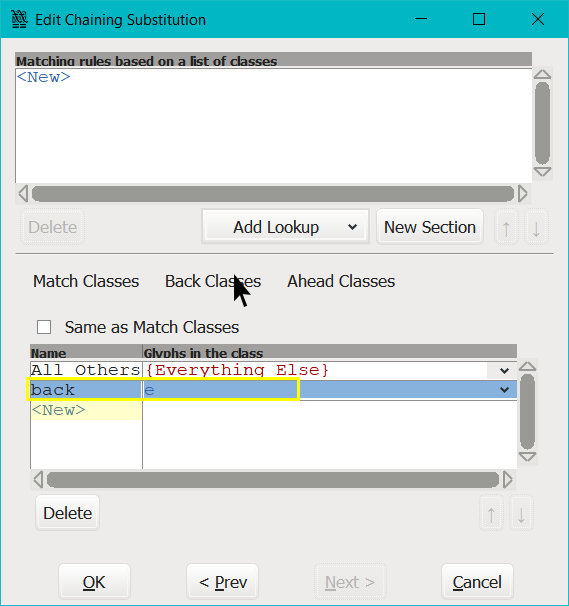
Now we’ll complete the ‘Back Classes’ section.
a) Click on ‘Back Classes’
b) Click on ‘<New>’ in the bottom section
c) Type ‘back’, or a word of your choosing, in the column on the left.
d) Type ‘e’ in the column on the right.
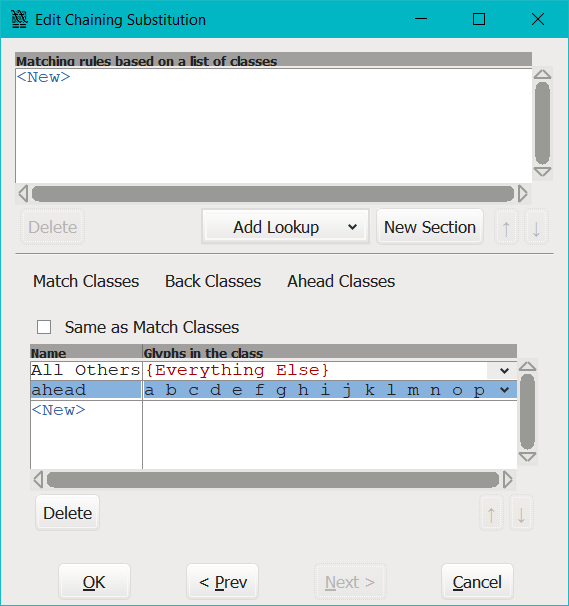
Ahead Classes
-
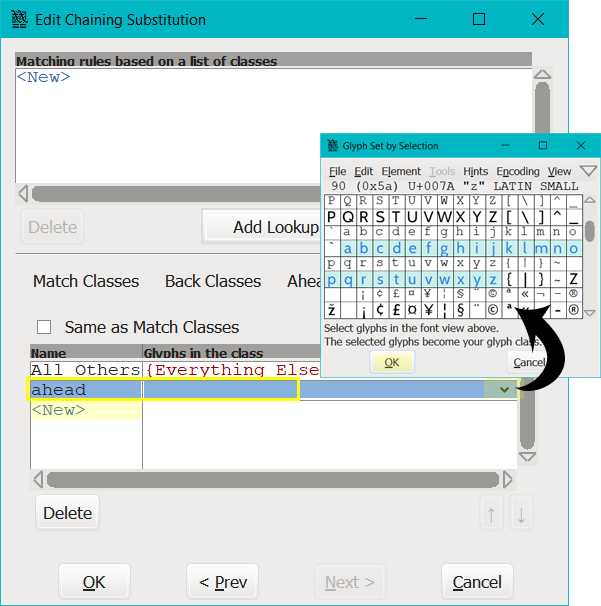
Next we need to complete the ‘Ahead Classes’ section.
a) Click on ‘Ahead Classes’
b) Click on ‘<New>’ in the bottom section
c) Type the word ‘ahead’, or a word of your choosing, in the column on the left.
d) In the column on the right, type in the alphabet, separated by spaces, or click on the small arrow and select the letters, then click ‘OK’.
Top Section
-
We will now complete the top section formula.
a) Click on ‘<New>’ in the top section
b) Type ‘back’ to define the glyphs that should appear before the glyph to change.
c) Click on ‘New Section’. What this does is, it separates ‘Back Classes’ from ‘Match Classes’ in the equation.
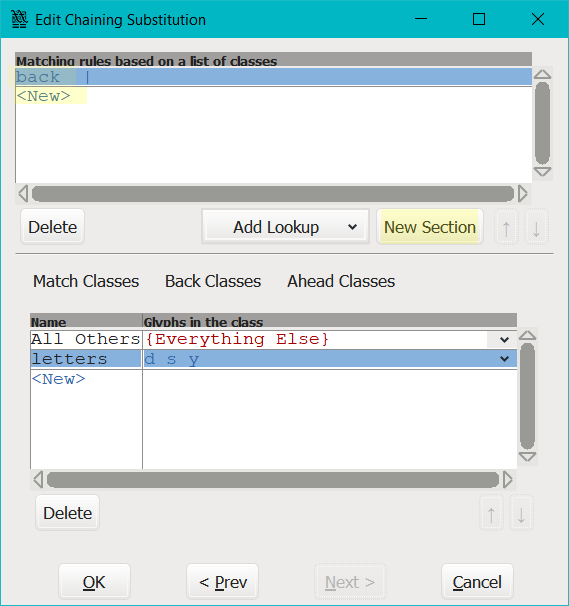
d) Type ‘
letters’ to define the glyphs that will be changed.
e) Click on ‘Add Lookup’ and select a lookup. I selected ‘ital’
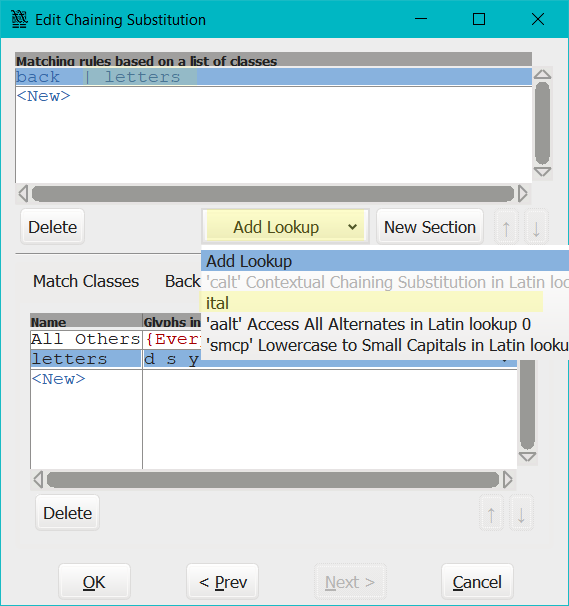
-
Your formula line should look like this:
back | letters @<ital>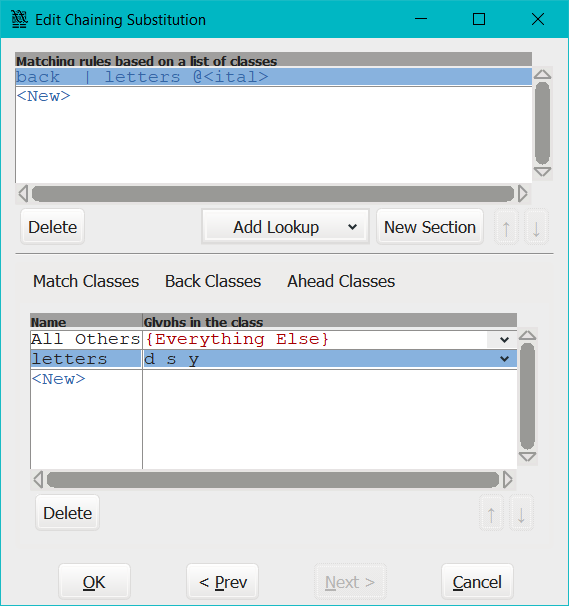
-
If you de-select the formula line, the only way to continue with the process is to manually enter the information in the popup dialogue box.
a) Therefore, try not to ‘de-select’ and turn the formula line from blue to clear.
b) If this happens to you, type: ‘| ahead’
c) Click ‘OK’. -
The entire formula should look like this:
back | letters @<ital> | ahead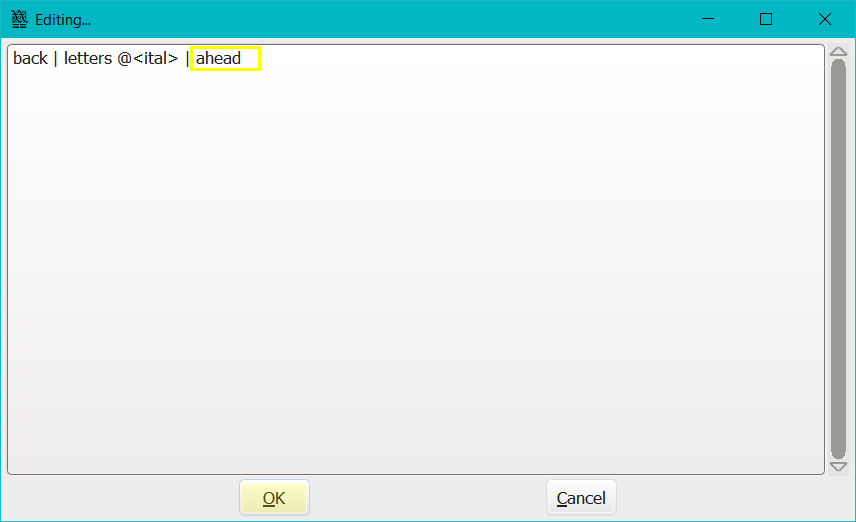

-
If your curser is still in the blue formula section,
a) click on ‘New Section’ to separate ‘Match Classes’ from ‘Ahead Classes’ in the equation.
b) Type ‘ahead’.
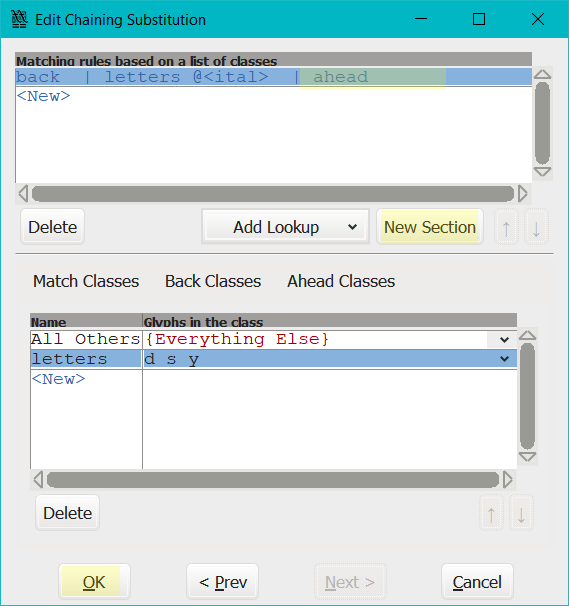
c) The entire formula should look like this:back | letters @<ital> | ahead -
The formula means:
Where a glyph appears from ‘letters’, replace it with a glyph from ‘italics’, only if the next glyph is from ‘ahead’, and the preceding glyph is from ‘back’ -
To finish up,
a) click ‘OK’,
e) click ‘OK’ again to save your lookups.
-
We have now finished completing our lookup tables and will move on to testing them.
Testing Your Formula
-
To test your contextual chained lookup, start from ‘Font View’
a) Click on ‘Metrics>New Metrics Windows’
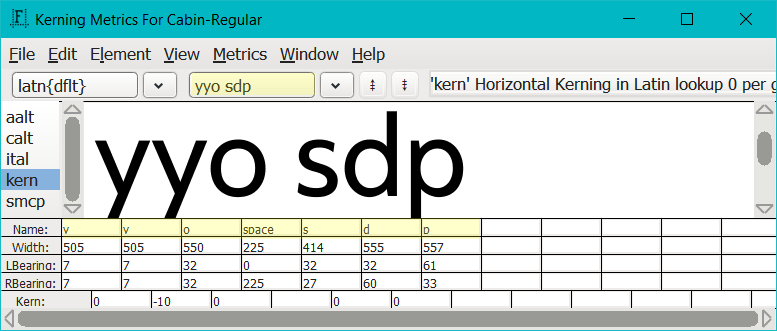
b) Type into the box and test whether your formula works or not.
c) De-select ‘calt’ by holding down ‘Ctrl’ on your keyboard and left mouse click on ‘calt’ to see the changes from normal text to ‘calt’ text.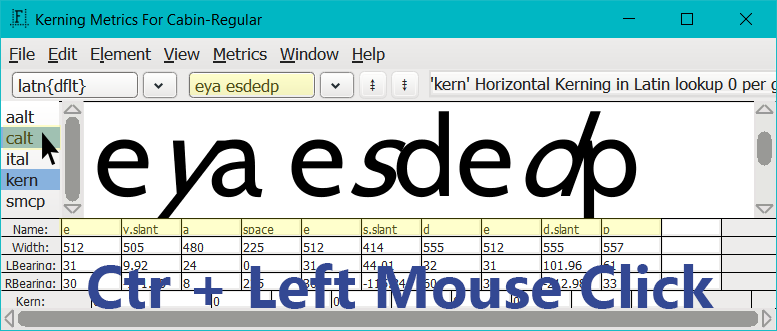
Alternate Formula Examples
-
Here are some alternate formulas to consider.
Example 1
-
In this example, we’ll be using the two single substitution lookups of;
ital smcp -
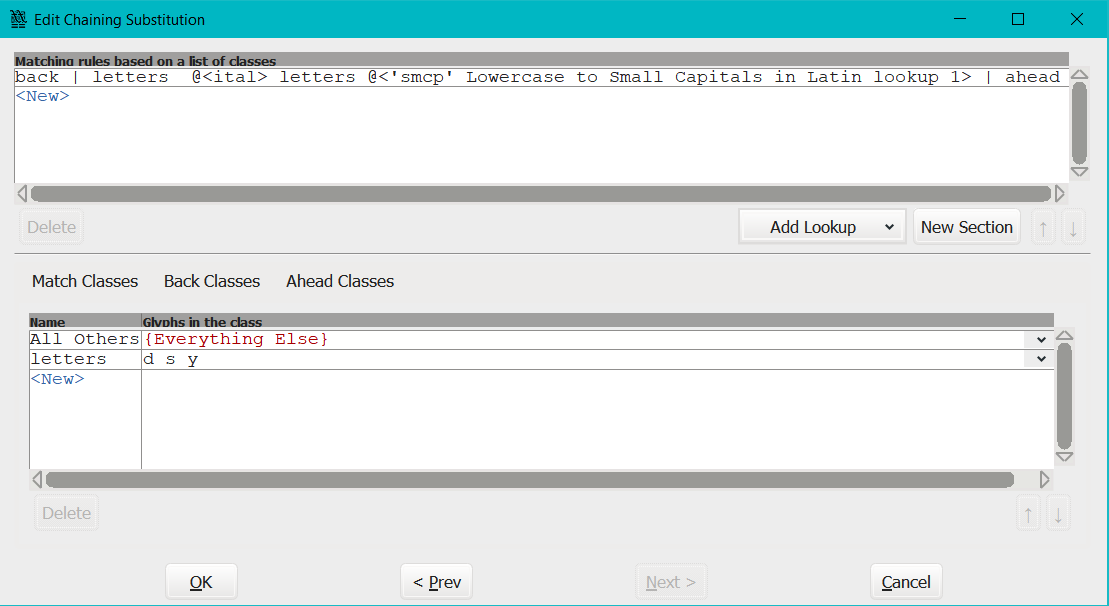
The information within Match Classes, Back Classes and Ahead Classes are the same as our original example.
-
And the contextual lookup formula will be:
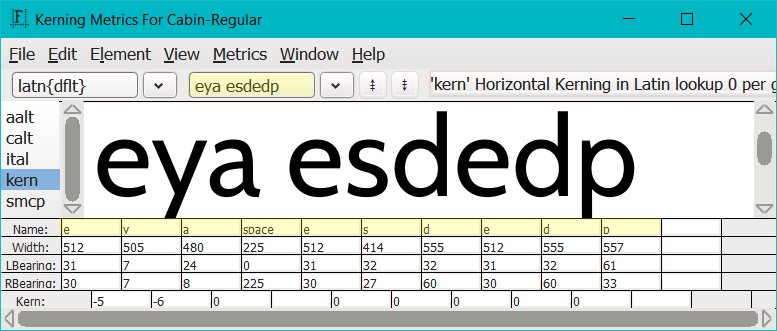
back | letters @<ital> letters @<'smcp' Lowercase to Small Capitals in Latin lookup 1> | aheada) Remember that ‘spaces’ in the formula don’t matter.
-
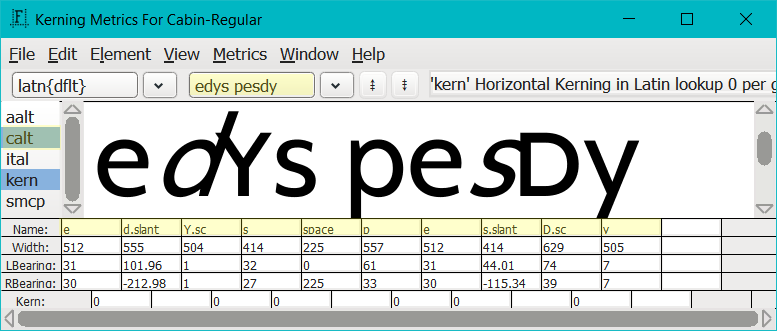
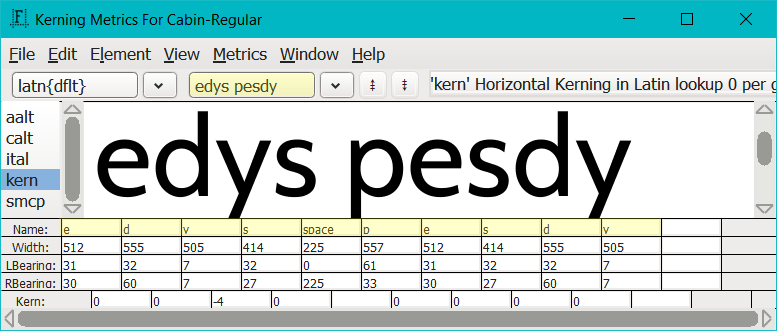
The contextual formula means:
Where 2 consecutive glyphs appear from ‘letters’, replace the first glyph with ‘italics’ and replace the second glyph with ‘smcp’, only if the next glyph is from ‘ahead’, and the preceding glyph is from ‘back’
-
Explained another way
- If the preceding glyph is from ‘back’, and
- 2 consecutive glyphs appear from the match class ‘letters’, replace the first glyph with ‘italics’ and replace the second glyph with ‘smcp’,
- only where the next glyph is from ‘ahead’.
-
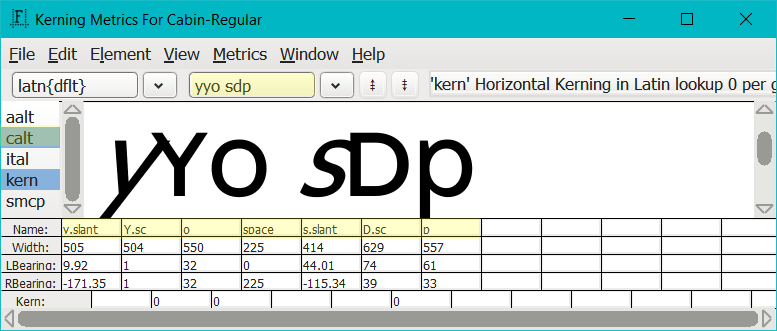
Testing the new formula looks like this:
Example 2
-
For the next example, I’ve gone back to each lookup table, clicked ‘Edit Metadata’ and renamed them so that the code is shorter.
a) I’ve also added a second row in the bottom table to now include numbers 1 to 9. -
The example formula is:
back | letters @<ital> number | ahead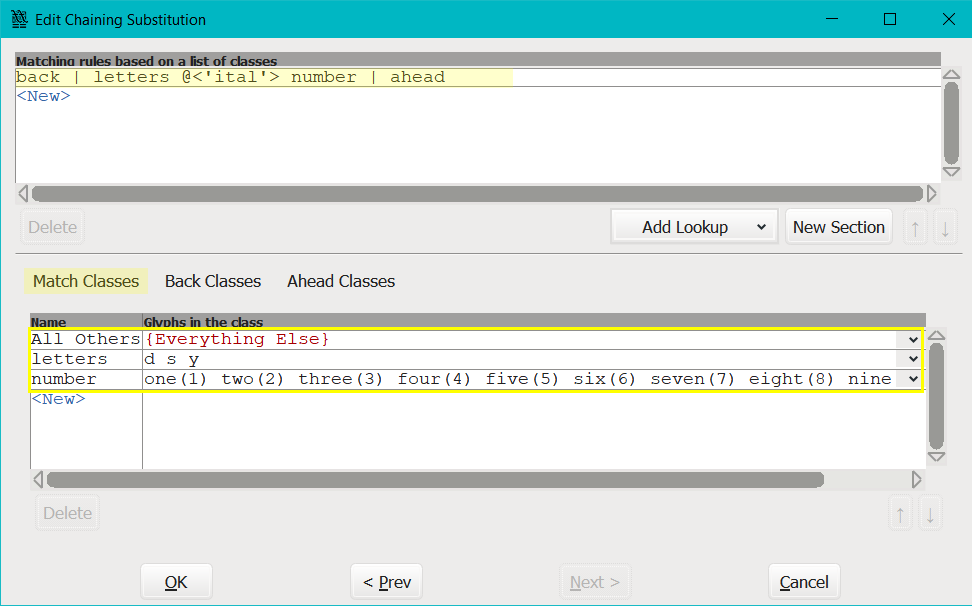
- This means:
- If the preceding glyph is from ‘back’, and
- a glyph appears from ‘letters’ and is immediately followed by a number, then replace the glyph from letters with ‘ital’,
- only where the next glyph is from ‘ahead’.
-
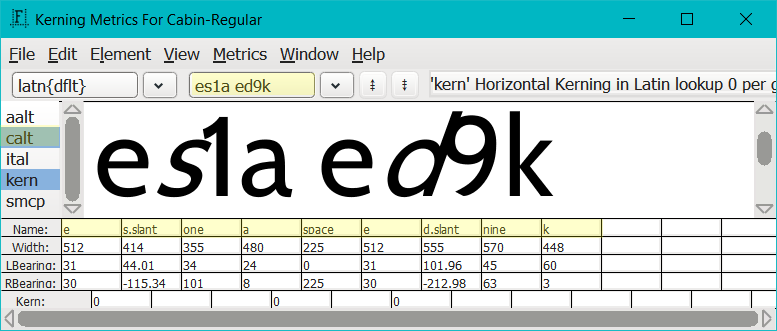
Testing the new formula looks like this:
Example 3
-
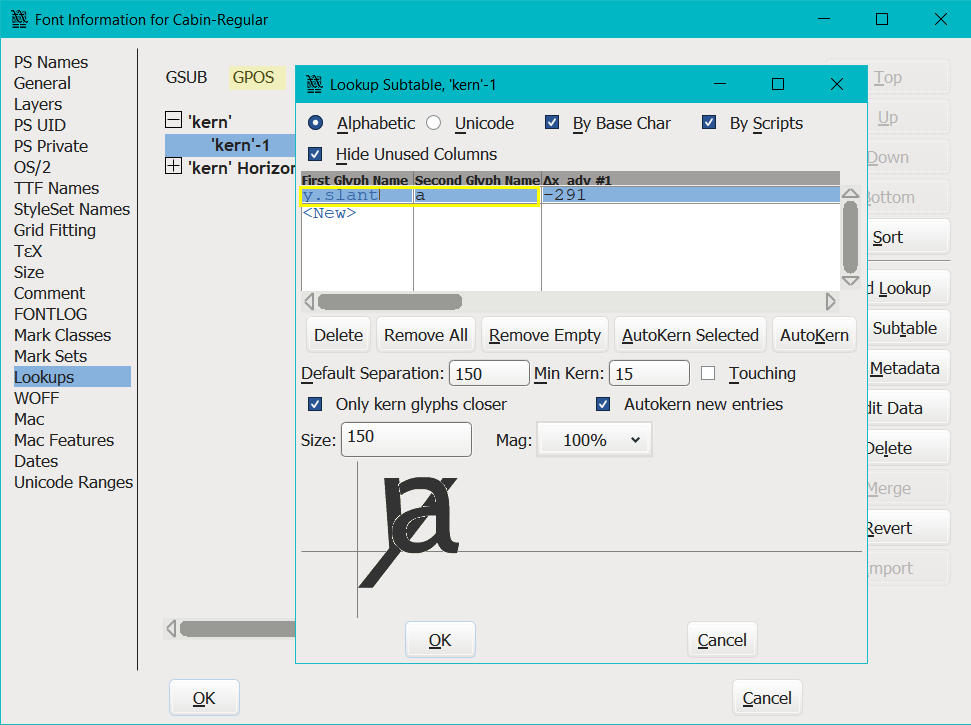
For the next example, I’ve added a ‘kern’ lookup table and kerned ‘y.slant’ + ‘a’.
a) This means, ‘y.slant’ followed by an ‘a’ will be kerned if they appear in a chaining contextual lookup. -
The kern subtable looks like this:
-
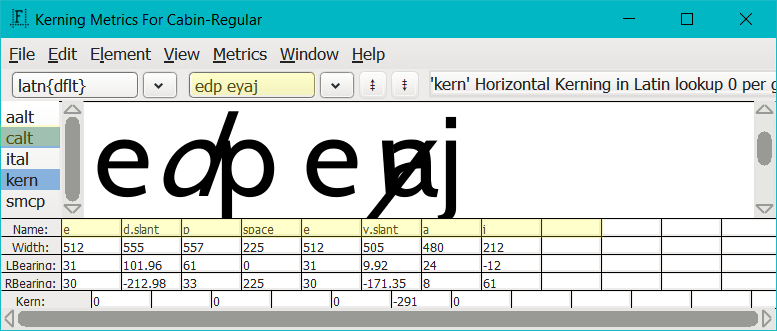
The example formula is our original formula:
back | letter @<ital> | ahead -
Testing the new formula looks like this:
Example 4
-
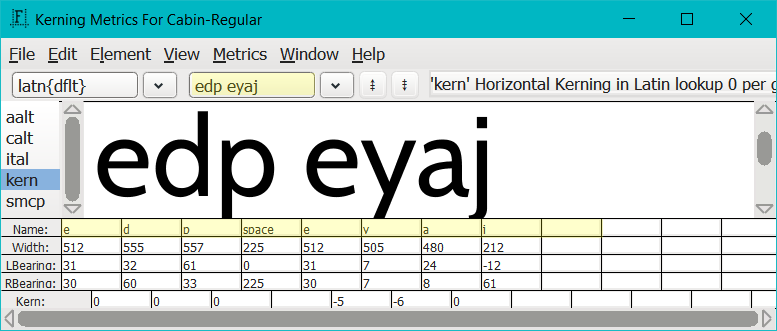
For the last example, I’ve only included the ‘Match Classes’ and the ‘Ahead Classes’.
a) The formula is| letters @<ital> letters @<smcp> | ahead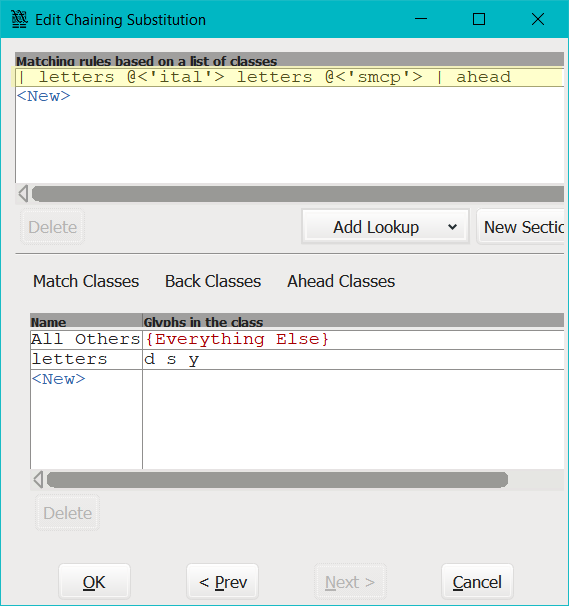
b) Testing the new formula looks like this:
It’s Not Working
-
If it’s not working out correctly,
a) Review your ‘single substitution’ look up tables,
b) Make sure lookup tables match what you’ve typed / included in your contextual formula top and bottom containers,
c) Check spelling throughout.
d) Start with small formula so that you can identify what is and is not working.
e) If you get a warning pop up asking ‘whether the glyphs you typed were intentional’, you need to save, quit, restart Fontforge and start again for the ‘Default Using Suffix’ button to work.
f) ‘Default Using Suffix’ will never work if you’ve used Fontforge’s ‘Mass Glyph Rename’ function. I’ve outlined the reasons why and what to do, to be able to use ‘Default Using Suffix’, [here]. -
Days after working out the order of steps to get the chaining subtable to work, I was looking through Fontforge issues on Github and found this exact bug has been reported by RolfNoyer on Aug 30 2016. If I have confused you, read RolfNoyer’s explanation.
That brings us to the end of this tutorial.
Take a deep breath! You’ve now completed everything you need to run a successful contextual chaining lookup for your font.