
How to Create Contextual Ligature Lookup Tables in Fontforge
This tutorial will show you how to create contextual ligature lookup tables in Fontforge.
How this Tutorial Is Organized
- We’ll start with a brief outline of definitions.
- Followed by creating a set of glyphs to be used in the lookup subtables.
- Then we’ll create two (2) separate single substitution lookup tables.
- Next, we’ll create a contextual substitution lookup table.
- Then we’ll test whether our contextual substitution lookup works.
- I’ll provide alternate formulas so you can see how they work, and
- I’ll give you some tips on why your contextual substitution lookup may not be working.
i. You can download Fontforge for Windows, Mac, or Linux from here.
ii. The font used in this tutorial is called Belmist. It’s a free font for personal and commercial use with an open source license.
iii. This tutorial is shown on a Windows 10 computer with Fontforge version 03142020.
iv. Fontforge does crash, so save often.
v. Detailed information on lookup tables can be found at Fontforge.
Definitions
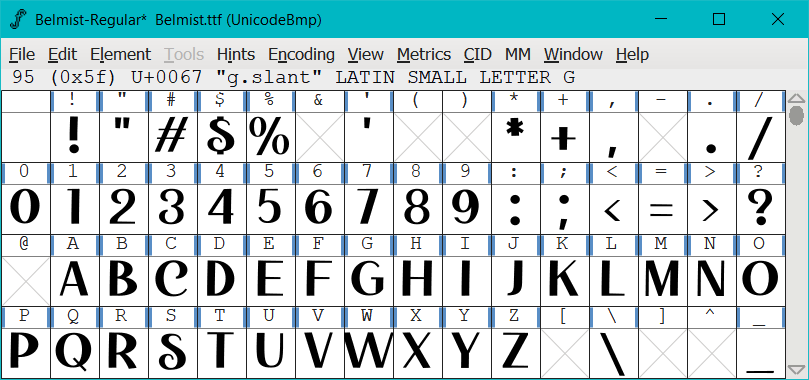
This is ‘Font View’
| Title | Meaning | Also Known As |
|---|---|---|
| Single Substitution Lookup Table | It’s a table you create when you want to replace a single glyph with another single glyph. | Lookup, lookup table, substitution lookup, single substitution lookup |
| Subtable | Every lookup table has one or more subtables that defines what glyph will replace another glyph. | Lookup subtable, substitution subtable, single substitution lookup subtable |
| Contextual Substitution Lookup Table | It’s a table describing glyph substitutions in context. It can be a substitution of one or more glyphs within a certain pattern of glyphs. | Contextual substitution lookup, contextual substitution table, contextual lookup |
| Contextual Substitution Lookup Subtable | This has the same meaning as ‘Subtable’ |
Nominating Glyphs
-
For this tutorial we’ll be adding two single substitution lookup tables, and one contextual substitution lookup table.
-
First we’ll create a set of glyphs to be used for the first subtable.
a) In this example I’ve created:g.slant, s.slant, y.slant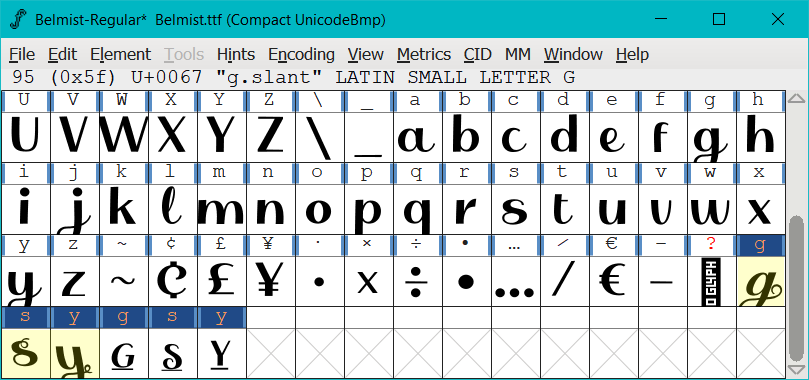
-
Now, create a second set of glyphs that will be used for the second subtable.
a) In this example I’ve created:g.sc, s.sc, y.sc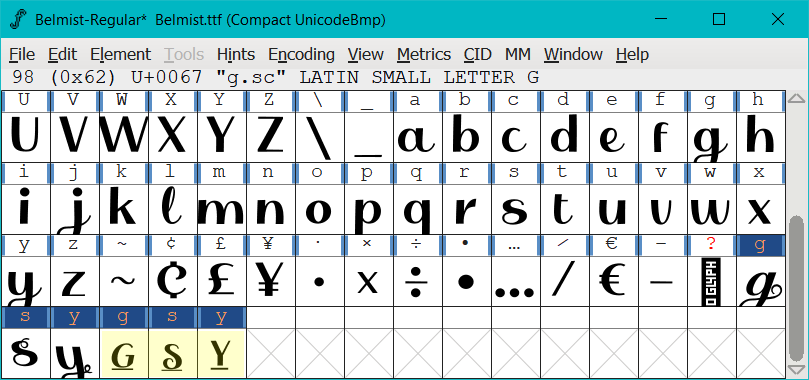
Single Substitution Lookup Table 1
-
Now we will create our first single substitution lookup table to describe our changes.
-
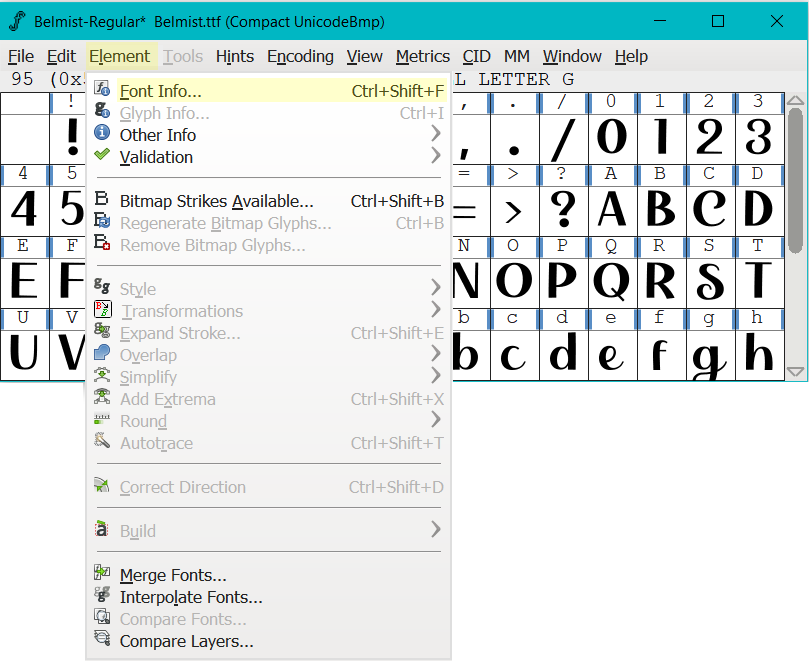
To create a new lookup table, make sure you’re in ‘Font View’ then
a) Click on ‘Element>Font Info’
-
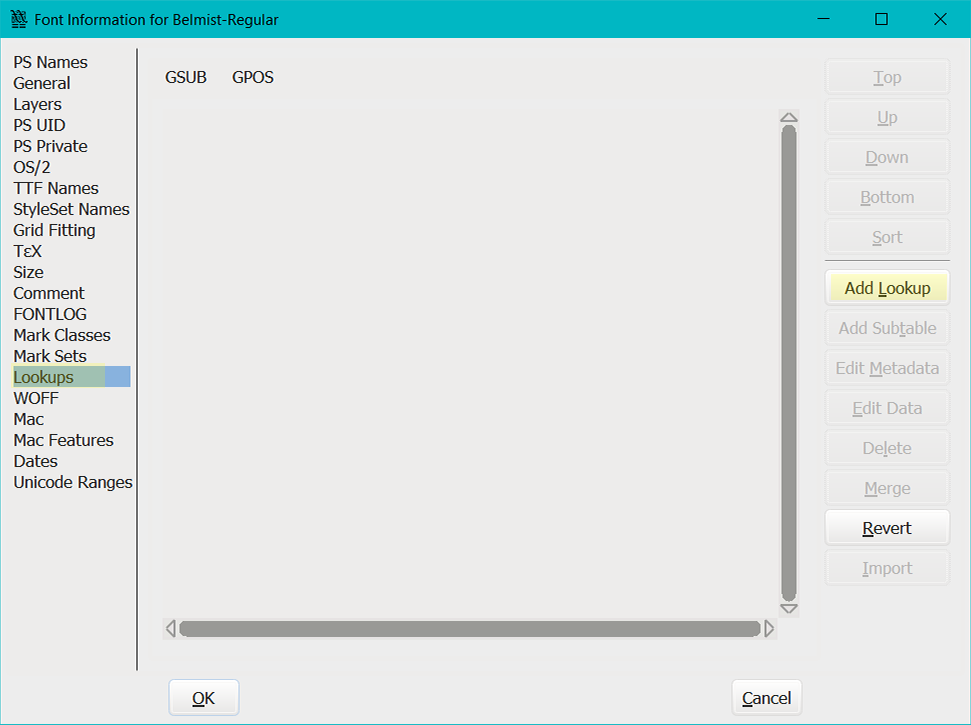
On the next screen that pops up, make sure you’ve selected ‘Lookups’ in the left hand column, then
a) select ‘Add Lookup’.
-
When the ‘Lookup’ dialogue box pops up,
a) Select ‘Single Substitution’ from the drop down list.
b) There’s no need to add a feature line item.
c) Type the name of your lookup in the box next to ‘Lookup Name:’
In this example I’ve named it ‘slant’.
d) Click ‘OK.’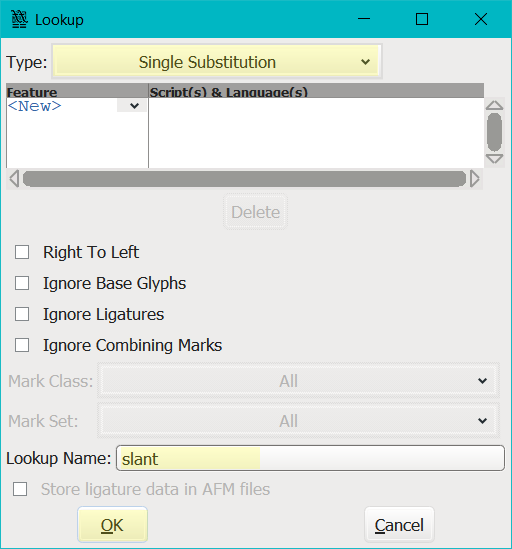
Adding a Subtable
-
Now we’ll add a subtable to our lookup by,
a) selecting ‘slant’,
b) then click on ‘Add Subtable’.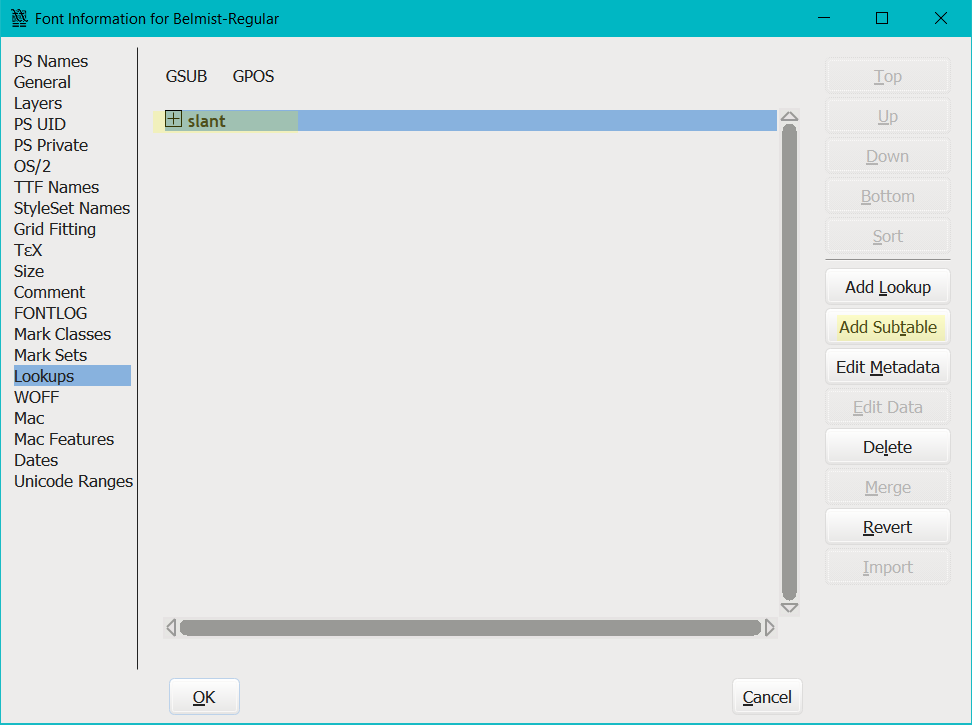
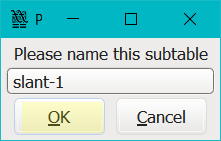
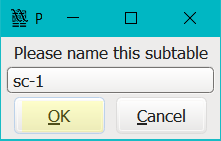
c) Then click ‘OK’ to accept the default name, or you can rename it.
-
On the next dialogue box that pops up, we’ll associate our substitution glyphs with their default source glyphs by,
a) typing ‘slant’ in the box next to ‘Default Using Suffix’.i. The suffix is linked to the name you gave your glyphs. For example, I called my new glyphs ‘
g.slant, s.slant, y.slant’ and their suffix is ‘slant’.
ii. If I created ‘g.name, s.name, y.name’ their suffix would be ‘name’ and I would type ‘name’ in the box next to ‘Default Using Suffix’.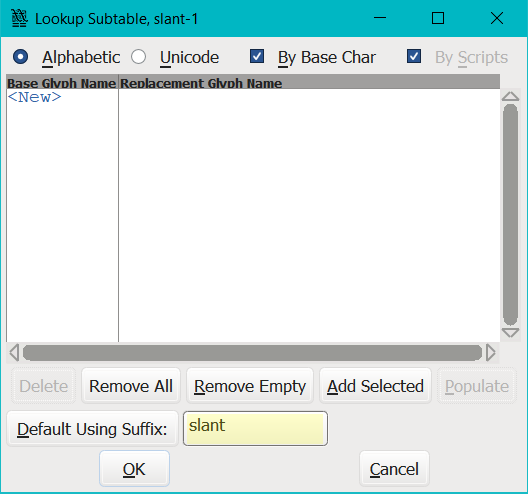
b) Now click the button called ‘Default Using Suffix’ to automatically fill the list.
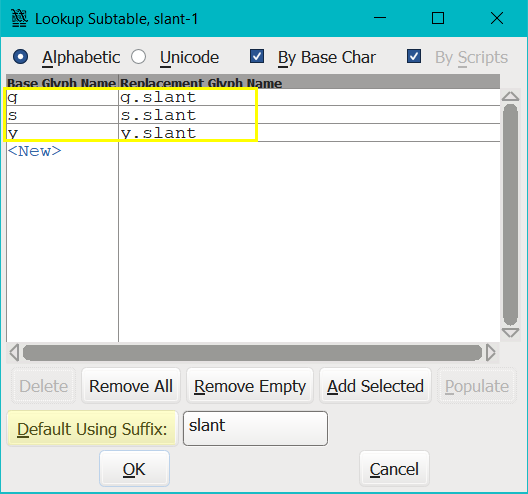
c) If the list doesn’t auto fill,
- check the glyph names,
- check spelling,
- make sure you’re referring to the right names (g.sc and G.sc are not the same), are you thinking about the uppercase glyph and have named it with a lowercase letter.
- Try to manually type in the list, and as a last resort save, quit and restart Fontforge and start again.
- Be aware if you get a warning pop up asking ‘whether the glyphs you typed were intentional’, you need to save, quit, restart Fontforge and start again for the ‘Default Using Suffix’ button to work.
- ‘Default Using Suffix’ will never work if you’ve used Fontforge’s ‘Mass Glyph Rename’ function. I’ve outlined the reasons why and what to do, to be able to use ‘Default Using Suffix’, here.
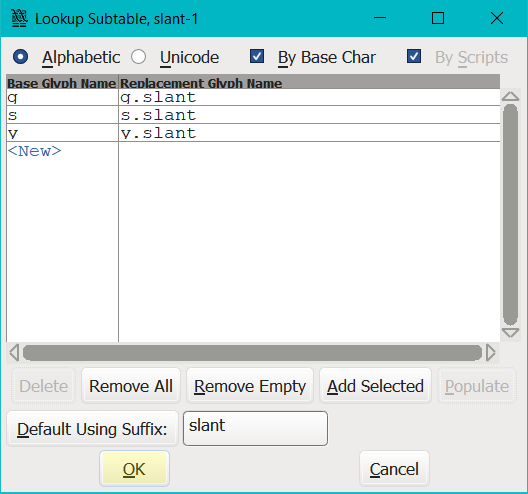
d) Click ‘OK’.
Single Substitution Lookup Table 2
-
Now we’ll create our second single substitution lookup table just as we did in the previous step, only now using the second set of glyphs.
g.sc, s.sc, y.sc -
We’re going to repeat the previous steps to create a new lookup table. Make sure you’re in ‘Font View’ then
a) Click on ‘Element>Font Info>Lookups>Add Lookup’.

-
When the ‘Lookup’ dialogue box pops up,
a) Select ‘Single Substitution’ from the drop down list.
b) There’s no feature needed for this one.
c) Type the name of your lookup in the box next to ‘Lookup Name:’
In this example I’ve named it ‘sc’.
d) Click ‘OK.’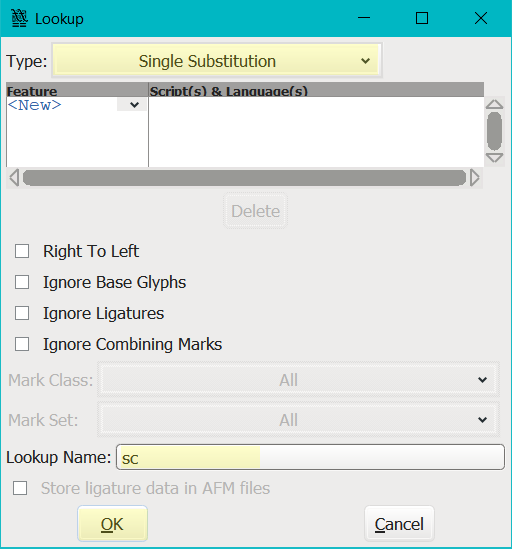
Adding a Subtable
-
Now, we need to create and name a subtable.
a) select ‘sc’,
b) then click ‘Add Subtable’.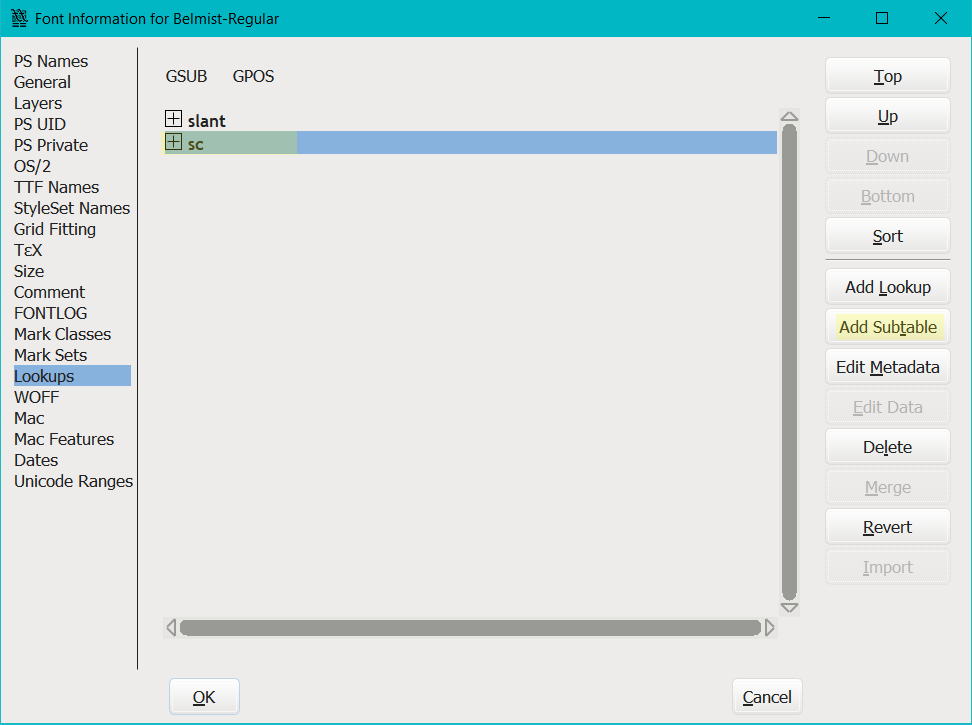
c) Click ‘OK’ to accept the default name.
-
Next, we’ll associate our substitution glyphs with their default source glyphs.
a) Type ‘sc’ in the box next to ‘Default Using Suffix’. -
Then click the button called ‘Default Using Suffix’ to automatically fill the list.
a) Click ‘OK’ to take you back to the ‘Font Info’ dialogue box.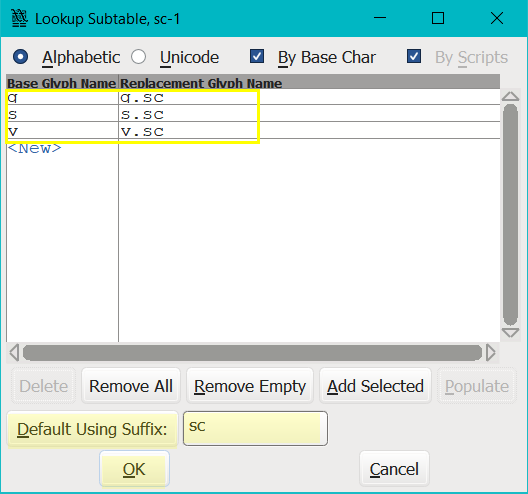
Contextual Substitution Lookup Table
-
Next, we’ll create another lookup table just as you did above, only now using ‘contextual substitution’.
-
On the ‘Font Info’ dialogue box,
a) click on ‘Add Lookup’.
-
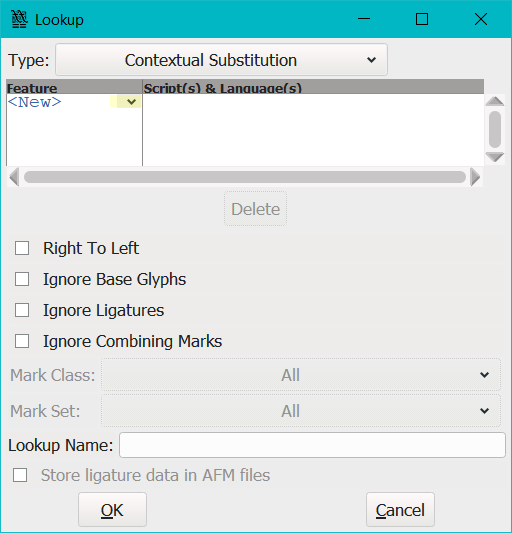
When the ‘Lookup’ dialogue box pops up,
a) select ‘Contextual Substitution’ from the drop down list at the top, next to the word ‘Type:’.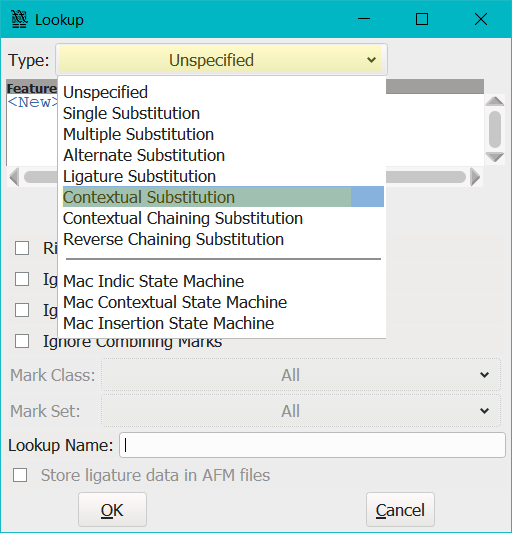
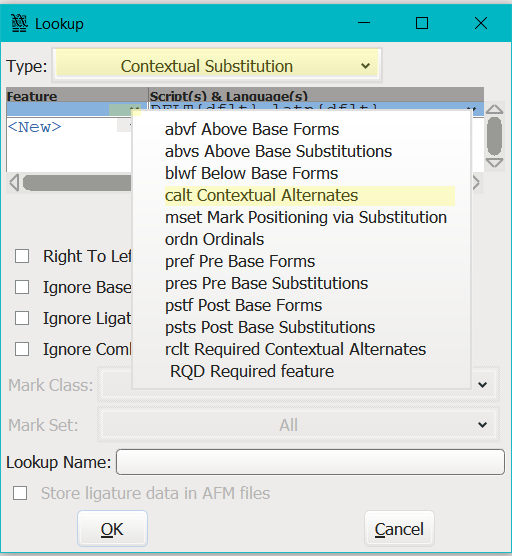
b) Now click on the little button next to ‘<New>’ to add a new line, which should also trigger a drop down list.
c) select ‘calt Contextual Alternatives’ from the drop down list.
-
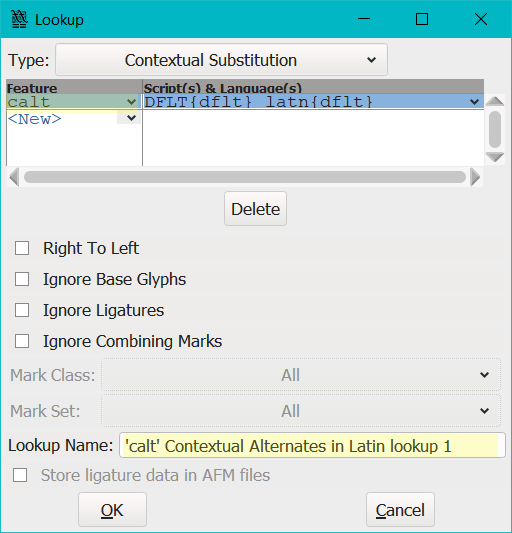
The ‘Lookup Name’ will now be auto populated and a ‘calt’ will be added to the feature column.
-
In the box next to ‘Lookup Name’, you can either keep the default name or change it.
a) In this example I’m going to keep the name. -
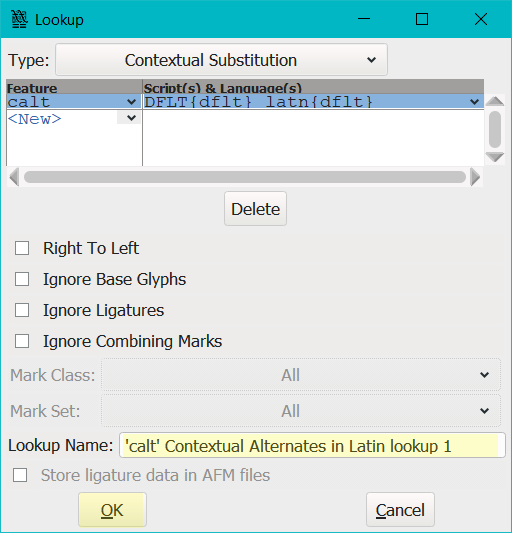
Now go ahead and,
a) Click ‘OK’.
-
Now that we’ve added a contextual lookup table, the next step will be to add a corresponding subtable to it, just like we did in the previous steps.
Adding a Contextual Subtable
-
Now we’ll be adding a subtable to our contextual lookup.
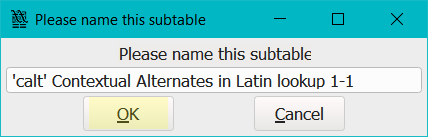
a) Click ‘Add Subtable’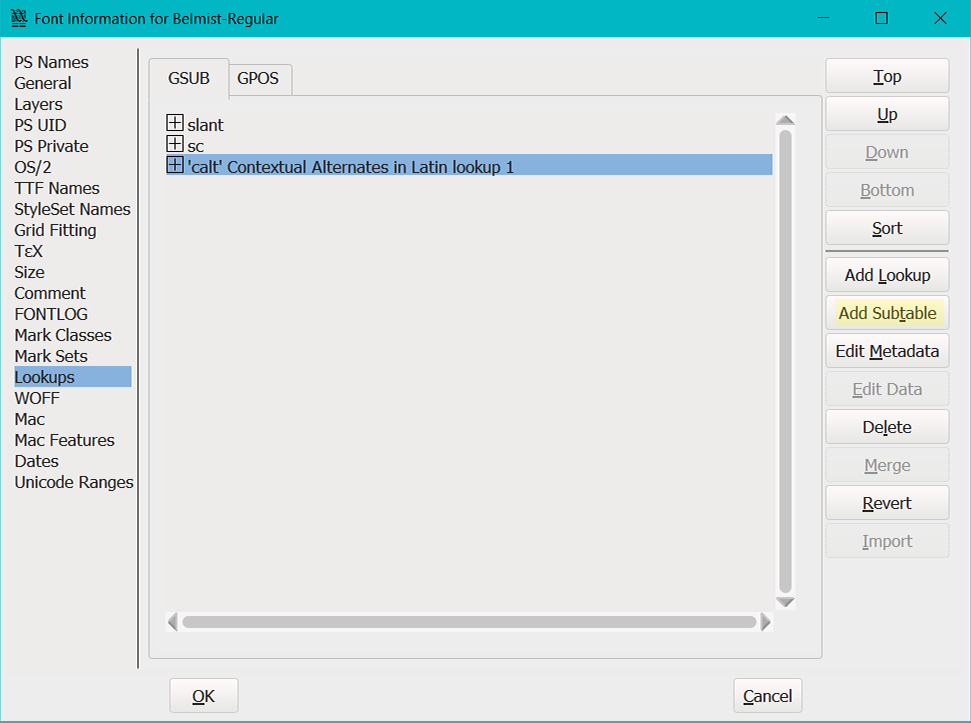
b) Click ‘OK’ to accept the default name, or rename it.
-
On the next dialogue box that pops up,
a) Select ‘By classes’, and ‘Single’,
b) Click ‘Next>’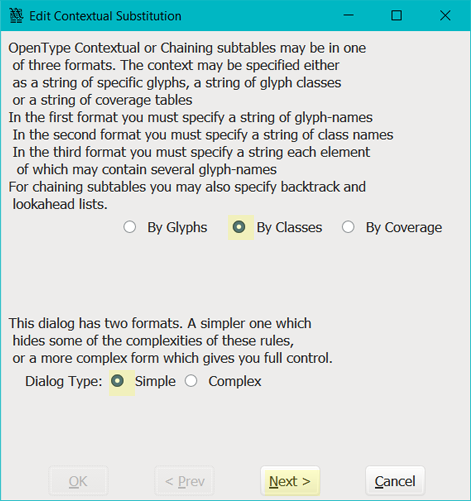
Bottom Section
-
For the next section, be aware the bottom container needs to be completed before the top container.
-
First, we’re going to define the glyphs that will form the context class.
a) Type the word ‘letters’, or a name of your choosing, in the column on the left.
b) Then, in the right hand column, type in each glyph ‘g s y’, separated by a space, or use the drop down arrow to select the glyphs that represent the class you want substituted.i. The bottom section should look like this:
letters | g s y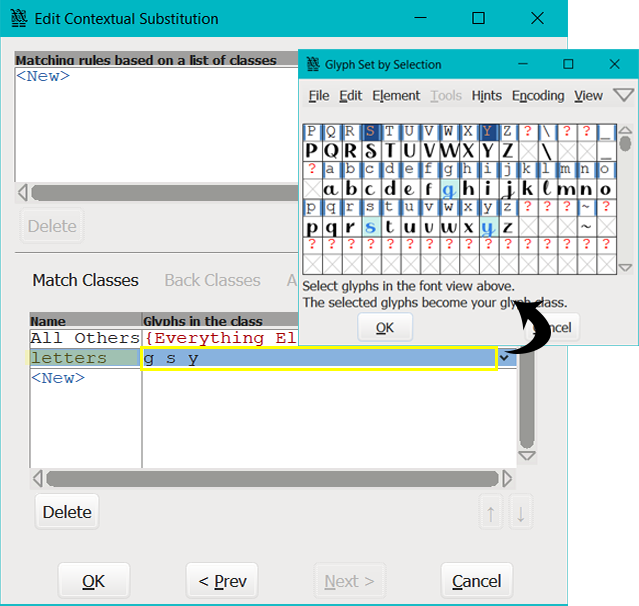
Top Section
-
Now to create the rule in the top section,
a) click on ‘<New>’
b) Type the word ‘letters’, which should auto populate as you type.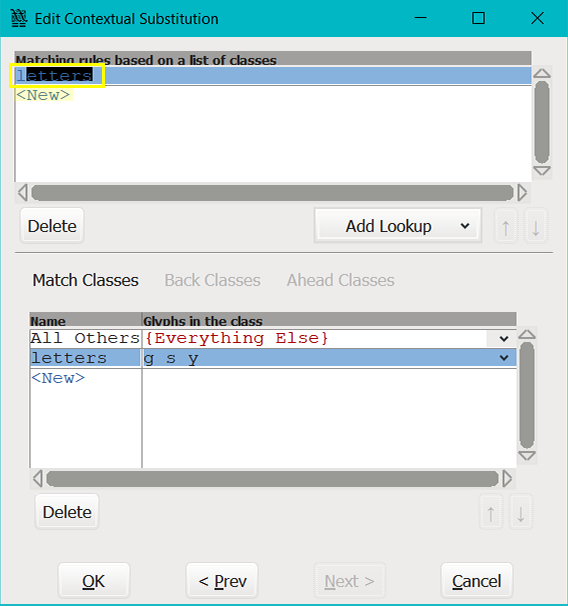
c) Click on ‘Add Lookup’,
d) then select ‘slant’,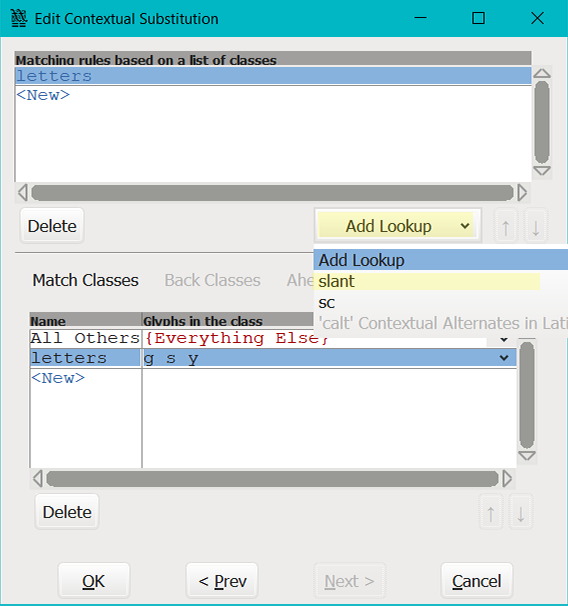
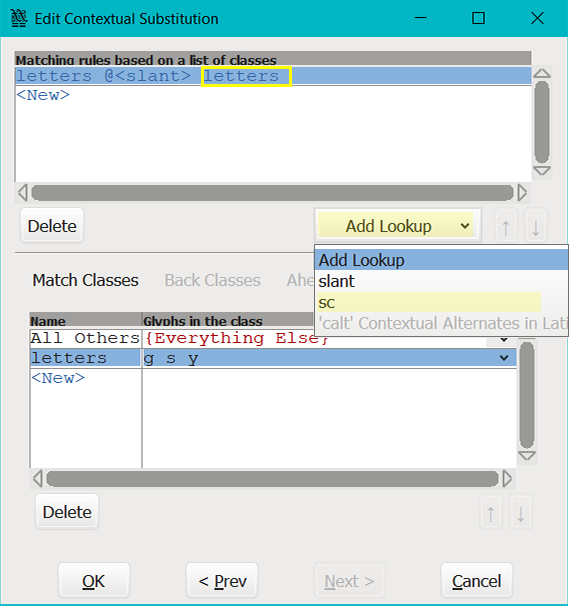
e) now type ‘
letters’ again, and
f) click on ‘Add Lookup’ again, but this time select ‘sc’.
-
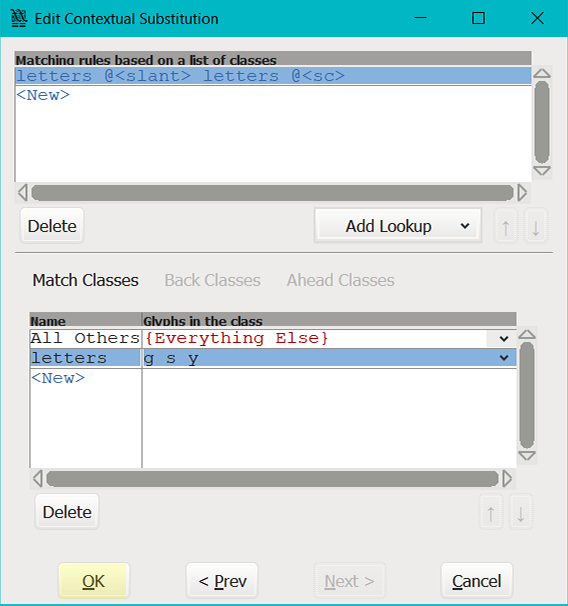
The contextual formula for the top container should look like this:
letters @<slant> letters @<sc>a) Note that ‘spaces’ in the formula are inconsequential.
-
The contextual formula means:
if any of the glyphs present in ‘letters’ is followed by any of the glyphs present in ‘letters’, apply the lookup ‘slant’ to the first glyph and apply the lookup ‘sc’ to the second glyph. -
Now click ‘OK’.
-
Click ‘OK’ again to commit and save all of your lookup tables.

-
We have now finished completing our lookup tables and will move on to testing them.
Testing the Contextual Lookups
-
To test your contextual lookups, start from ‘Font View’
a) Click on ‘Metrics>New Metrics Windows’
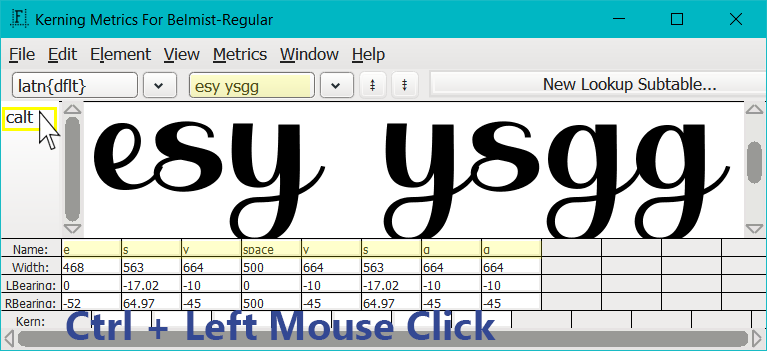
b) Type into the box and test whether your formula works or not.
c) De-select ‘calt’ by holding down ‘Ctrl’ on your keyboard, and left mouse click on the word ‘calt’.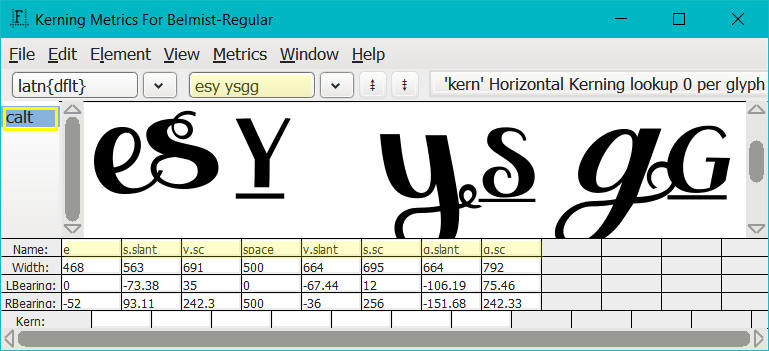
Alternate Formula Examples
-
Here are some alternate formulas to consider.
Alternate Example 1
-
In this example, the two single substitution lookups stay the same.
slant sc -
However the contextual lookup formula changes.
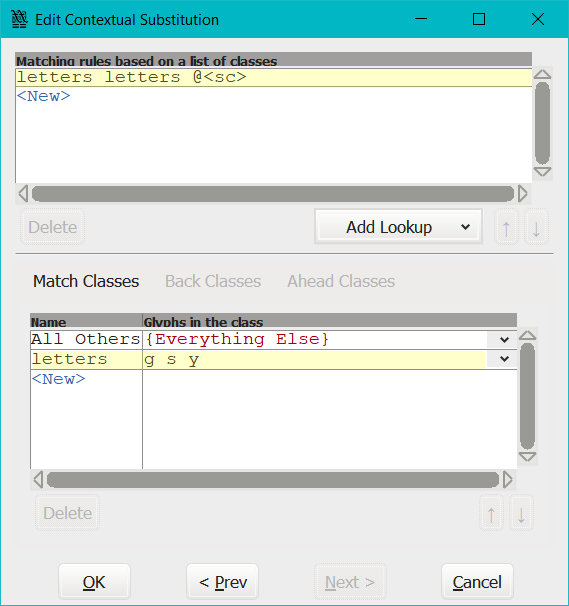
a) For example, the formula for the top part of the container is:letters letters @<sc>b) Note that ‘spaces’ in the formula don’t matter.
-
The contextual formula means,
If two glyphs, from ‘letters’ appear consecutively, then replace the second glyph with ‘lookup @<sc>’
-
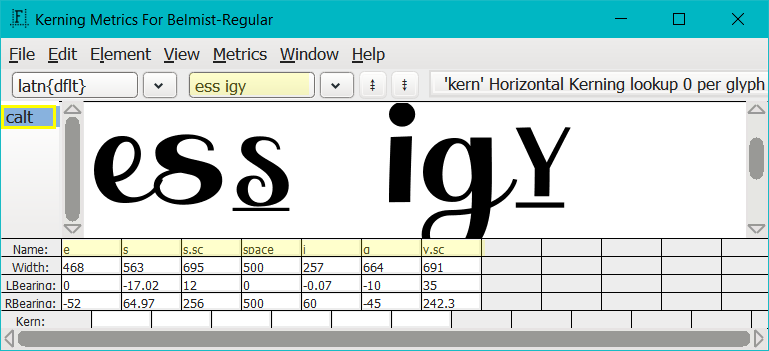
This is what it looks like when testing in ‘Metrics View’.
Alternate Example 2
-
The next example changes both the top section of the contextual lookup formula and adds a line to the bottom section of the formula.
-
The two single substitution lookups stay the same:
slant sc -
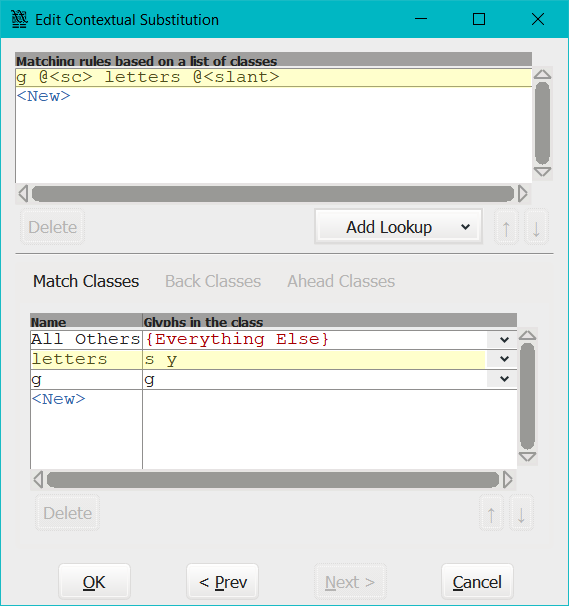
This is what the formula for the top section looks like:
g @<sc> letters @<slant> -
This is what will be added to the bottom section:
letters  |  s y
g  |  g
a) Remember the bottom part needs to be completed before you can add the top formula.
-
The contextual formula means:
Replace g with ‘lookup @<sc>’ if it’s followed by a glyph from ‘letters’, and if it is, then replace the glyph from letters with ‘lookup @<slant>’.
-
This is what it looks like when testing in ‘Metrics View’.
a) Remember to hold down Control (Ctrl) on your keyboard, then left mouse click on the word ‘calt’ to change between normal text and calt text.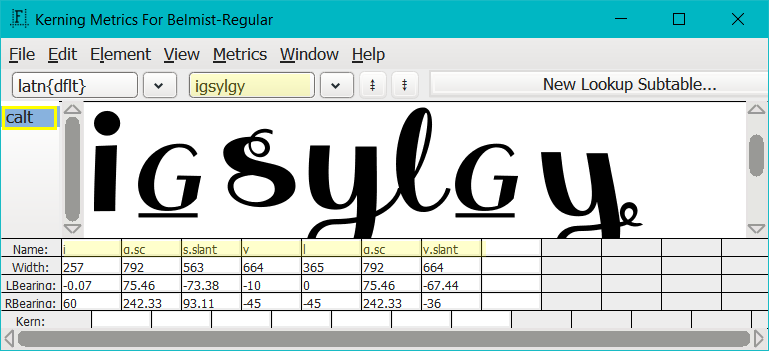

It’s Not Working
-
Here are some solutions to the problems that I’ve encountered when completing contextual lookups.
-
If it’s not working out correctly,
a) Review your two ‘single substitution’ look up tables.
b) Make sure lookup tables match what you’ve typed or match what you’ve included in your contextual formula top and bottom containers.
c) Check spelling throughout.
d) Start with small formulas so that you can identify what is and is not working.
e) If you get a warning pop up asking ‘whether the glyphs you typed were intentional’, you need to save, quit, restart Fontforge and start again for the ‘Default Using Suffix’ button to work.
f) ‘Default Using Suffix’ will never work if you’ve used Fontforge’s ‘Mass Glyph Rename’ function. I’ve outlined the reasons why and what to do, to be able to use ‘Default Using Suffix’, here.
Congratulations on making it to the end of this tutorial.
If all went well, you now have a working contextual lookup and you can build a fully functional font using Fontforge.