
How to Create Ligature Tables in Fontforge
This tutorial will show you how to create ligature tables in Fontforge, via ‘Glyph Info’.
How this Tutorial Is Organized
- We’ll start with a brief definitions section.
- Next we’ll add a new encoding slot so that we can create and build the ‘tt’ ligature.
- Then we’ll add a single substitution lookup table, using ‘Glyph Info’.
- Next we’ll type ‘tt’ in “Metrics View’ to check whether our ligature table works.
- To finish off, I’ll provide tips in case your ligature lookup table may not be working.
i. You can download Fontforge for Windows, Mac, or Linux from here.
ii. The font used in this tutorial is called Belmist. It’s a free font for personal and commercial use with an open source license.
iii. This tutorial is shown on a Windows 10 computer with Fontforge version 03142020.
iv. Fontforge does crash, so save often.
Definitions
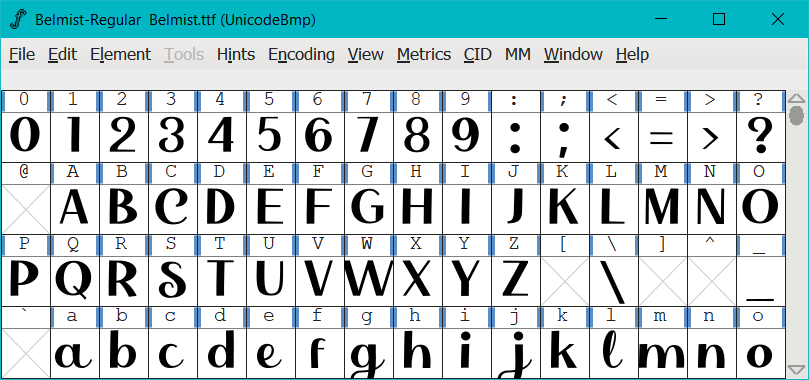
This is ‘Font View
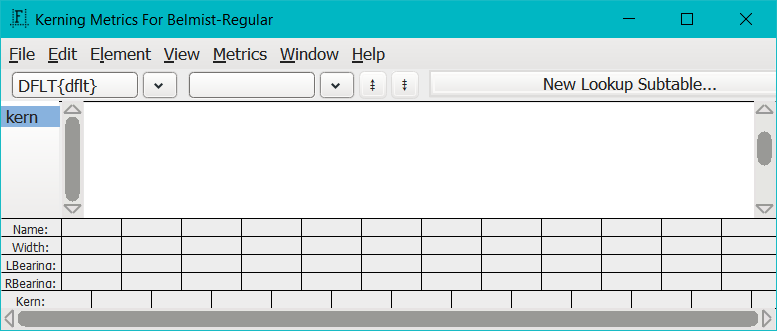
This is ‘Metrics View’
Adding A New Encoding Slot
-
For this tutorial we’ll be adding a new encoding slot for the ‘tt’ ligature, however you can also,
a) use one of the Private Use Area (PUA) Unicode slots which start at E000, or
b) use one of the Unicode slots for ligatures at FB00, or
c) use an existing Unicode slot. -
To add a new encoding slot,
a) Click on ‘Encoding>Add Encoding Slots’
-
On the next screen that pops ups,
b) Insert the number of encoding slots to add.
c) Then click ‘OK’.
-
The new encoding slot will be added to the end and right at the bottom of ‘Font View’.
Naming Your New Encoding Slot
Now we need to name our new encoding slot.
-
Click on the new encoding slot glyph cell,
a) then right click
b) Select ‘Glyph Info’
-
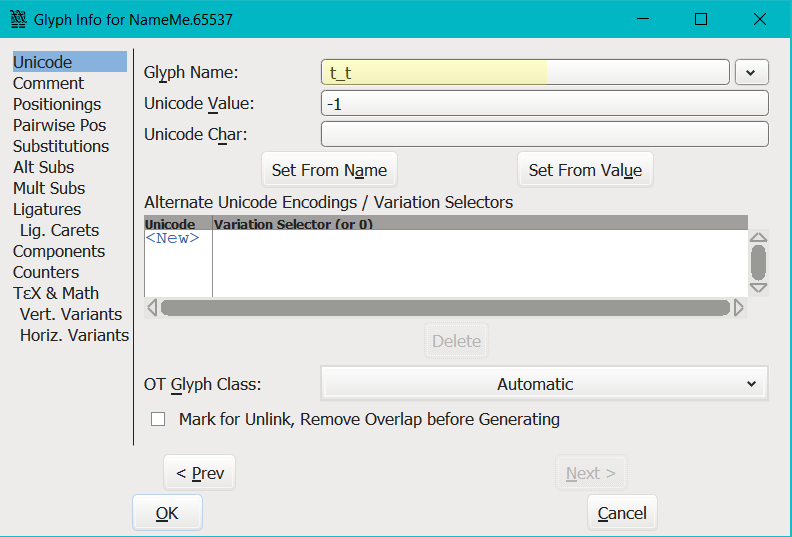
On the next screen, make sure ‘Unicode’ is selected in the left hand column then,
a) In the box next to ‘Glyph Name’, manually type in the name of your glyph.
In this example we’ll be typing:t_t
-
Note it is standard practice for ligatures to have an underscore ( _ ) separating glyphs, although Fontforge seems to recognize either; an underscore (f_i) or, no underscore (fi) for the output fi.
a) or this tutorial, we’ll be using an underscore ( _ ). -
For a detailed explanation of the Glyph Info dialogue box visit Fontforge’s userguide.
-
Once you’ve named your new encoding slot, we’ll move on to creating a ligature substitution lookup table.
Creating the Lookup Table
-
To create a ligature substitution lookup table, make sure you’re still in the ‘Glyph Info’ dialogue box from the previous step.
a) Now select ‘Ligatures’ in the left hand column, then
b) Select ‘New L>New Lookup Subtable’.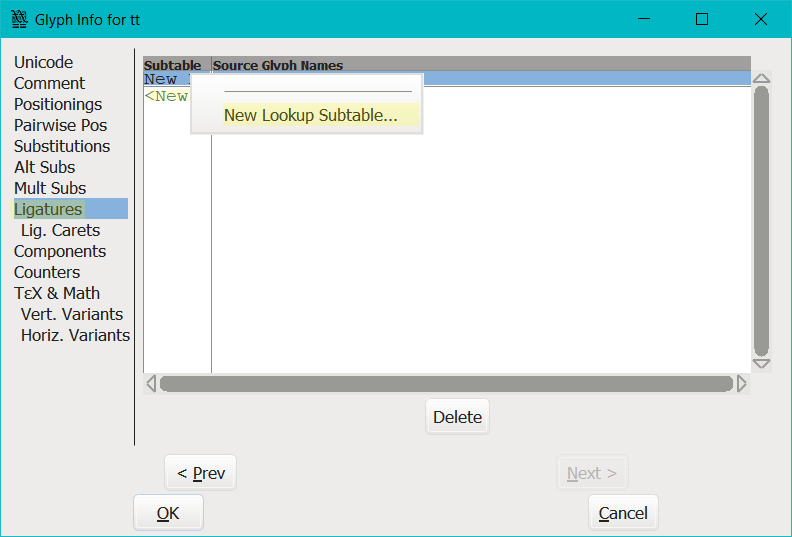
-
When the ‘Lookup’ dialogue box pops up,
a) select ‘Ligature Substitution’ from the drop down list at the top, next to the word ‘Type:’.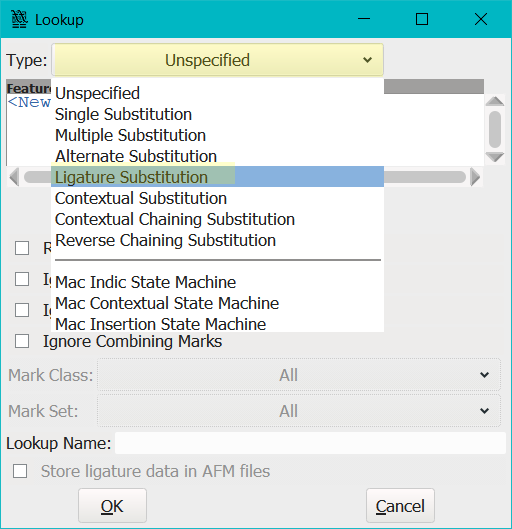
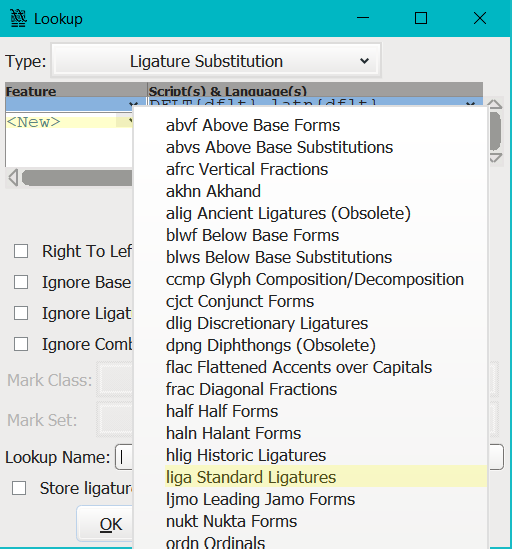
b) Now click on the little button next to <New> to add a new line, which should also trigger a drop down list.

c) Select ‘liga Standard Ligatures’.
-
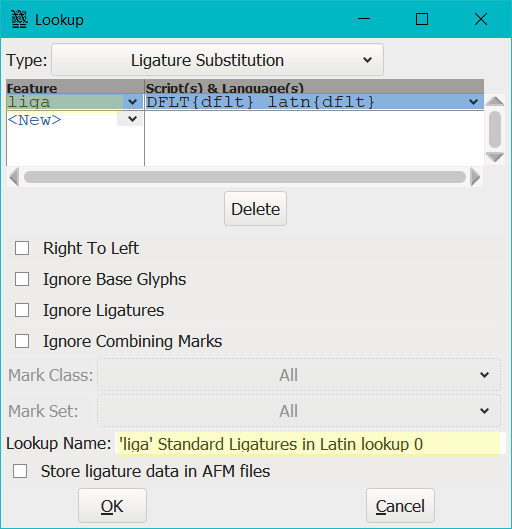
The ‘Lookup Name’ will now be auto populated and a ‘liga’ will be added to the feature column.
a) You can either keep the default ‘Lookup Name’ or change it.
b) In this example I’m going to keep it.
-
Next,
a) Go ahead and untick ‘Store ligature data in AFM files’,
b) then click ‘OK’.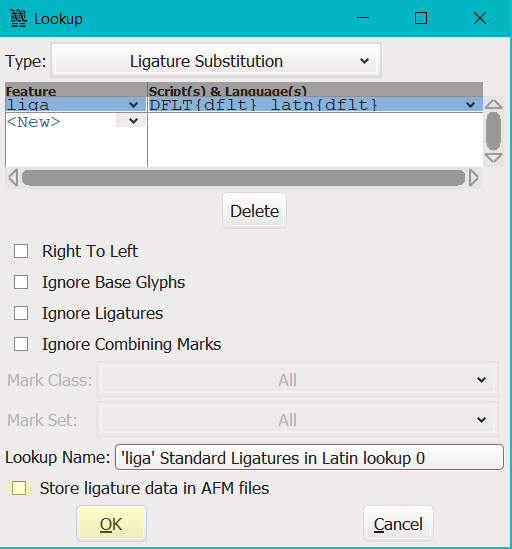
-
A new dialogue box will pop up asking you to name this subtable. The next step in this tutorial will guide you through the process of naming and completing this subtable.
Adding a Ligature Substitution Subtable
-
To add the corresponding ligature substitution subtable go ahead and,
a) Click ‘OK’ to accept the default name, or change it.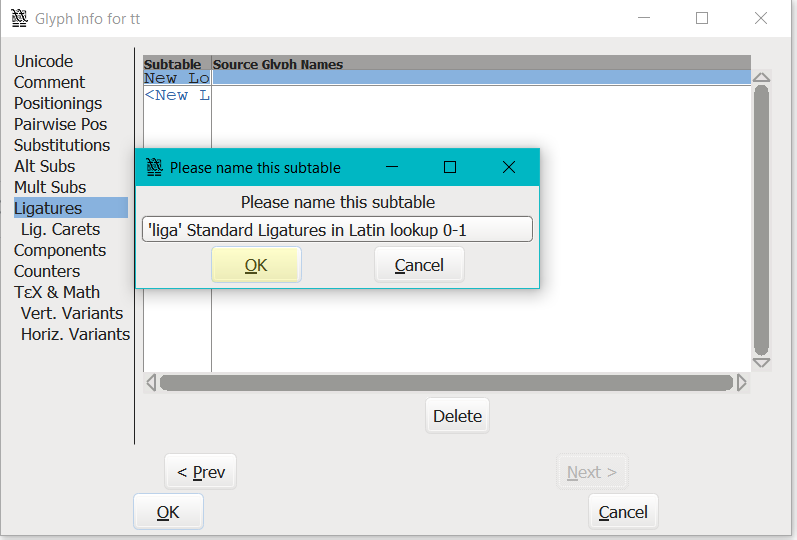
-
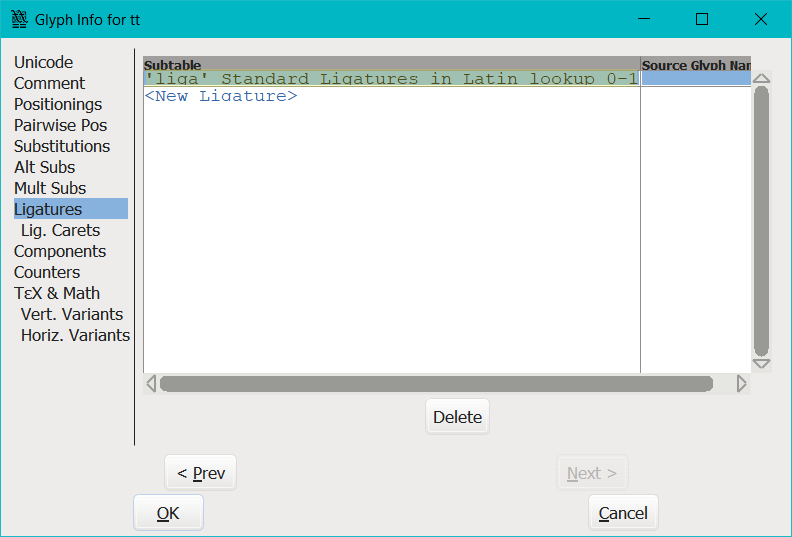
The subtable name will be added to the subtable column on the left.
-
Next, we’ll need to associate our ligature glyphs with their default source glyphs.
-
We’ll do this by typing the letters into the right hand column called ‘Source Glyph Names’.
a) In this example I’ll enter:t t
b) If your ligature is made up of more than 1 source glyph, separate them with a ‘space’.For example: mpl = m p l
Our example is: tt = t t
We will type: t t making sure to separate each glyph with a space.
c) To view your entries you can hover your mouse over the source glyphs and a pop up will appear.
-
When you’ve finished,
a) click ‘OK’ to commit and save your ligature substitution lookup table.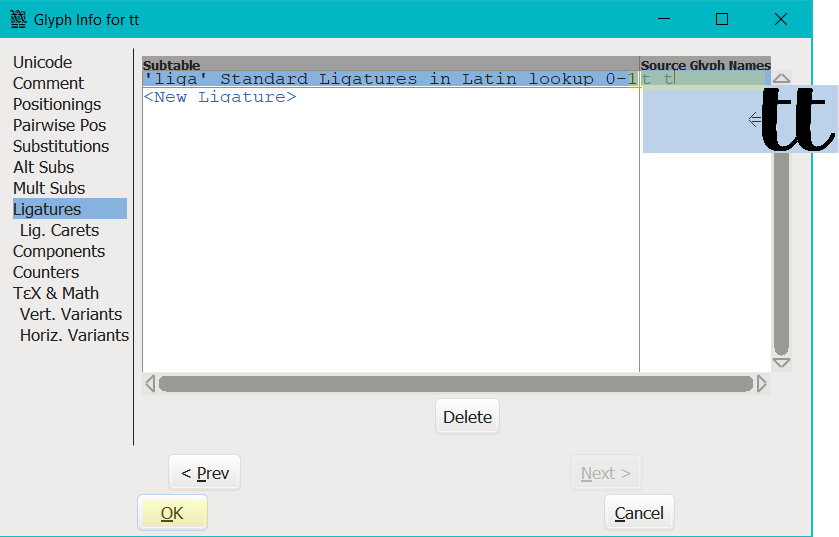
-
We have now completed adding a ligature substitution lookup table and you should be back in ‘Font View’, ready for the next step.
Building a Composite Glyph
-
Next, we need to build a composite glyph that will go into the new encoding slot.
-
Make sure the new encoding slot you created, is selected, then
a) click ‘Element>Build>Build Composite Glyph’.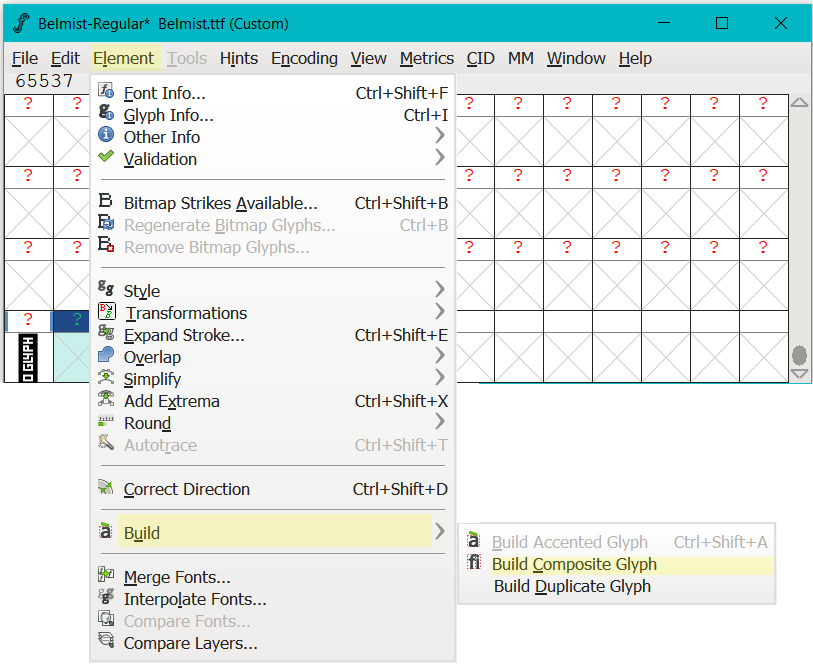
-
Note if you find that your ‘Element>Build’ is grayed out, it means that Fontforge is not yet able to recognize what glyphs it should use to build your composite glyph.
a) In other words, you need to add a ligature substitution lookup table first, then come back and you’ll be able to access ‘Element>Build’ to complete this step.

-
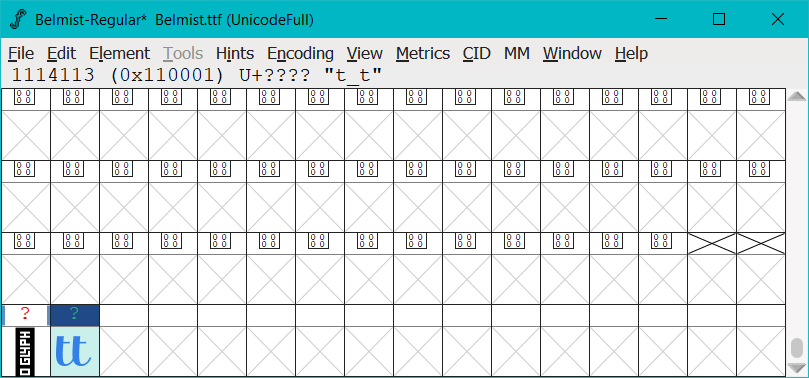
After clicking ‘Element>Build>Build Composite Glyph’ your glyph cell should now be filled with two (2) glyphs.
Unlink Reference
-
Before we edit the glyphs in this cell, we need to ‘unlink’ them from their source, otherwise any changes we make to the glyphs within the new encoding slot, will change the source glyphs.
-
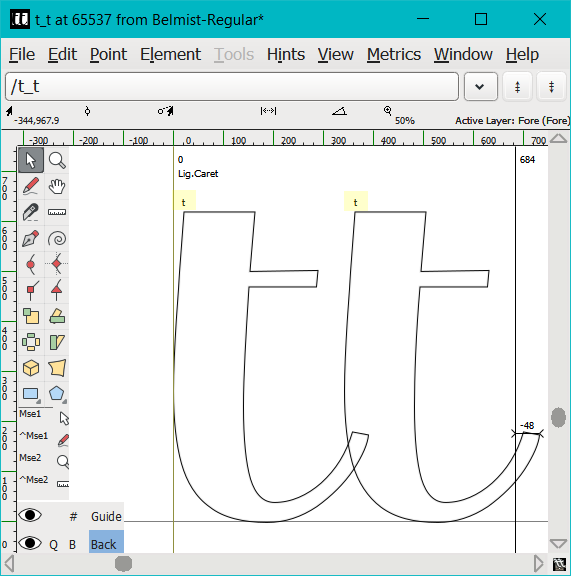
Linked glyphs or references will display a character above the glyph in ‘character view’.
a) You can get to ‘character view’ by double clicking a glyph cell from ‘Font View’.
-
To unlink them, make sure your new encoding slot is still selected, then;
a) click ‘Edit>Unlink Reference’.

-
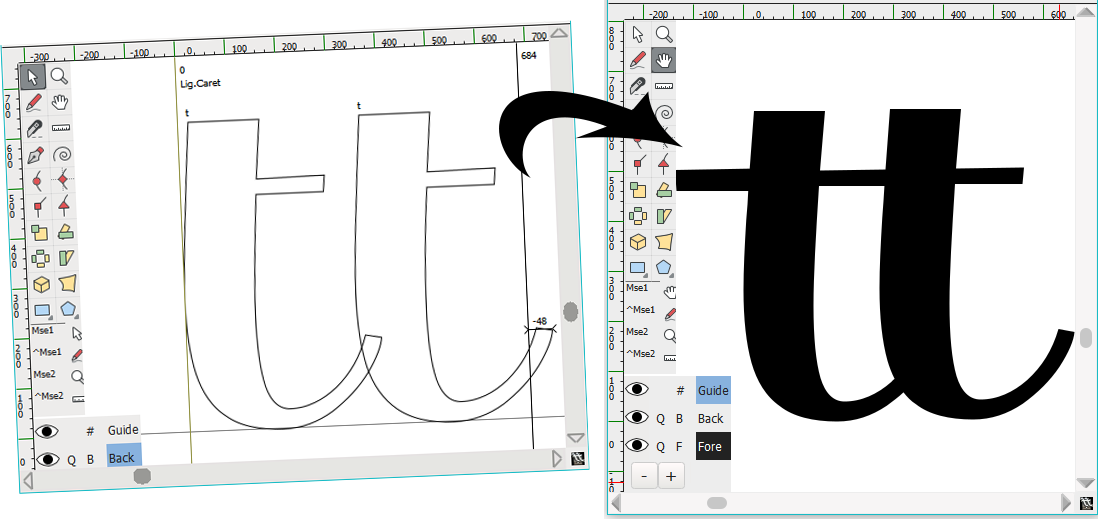
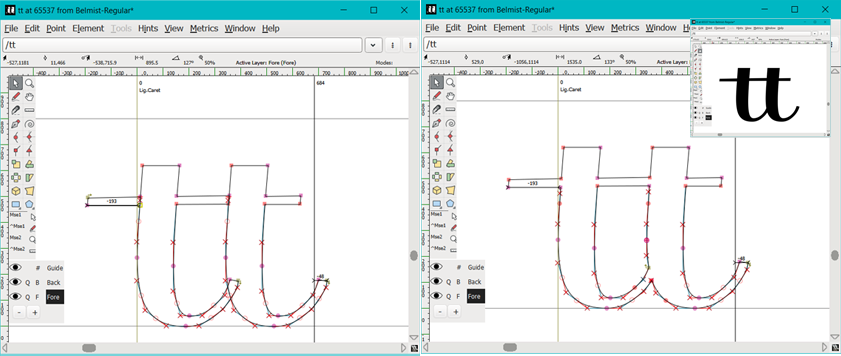
Your new encoding slot glyphs are now independent to your base glyphs and ready for editing, removing overlaps and adjusting the caret.
-
Once you’ve finished editing, removing overlaps and adjusting the caret, you can move on to testing the lookup table.
Testing the Lookup Table
-
To test your lookup table,
a) go to ‘Font View’,
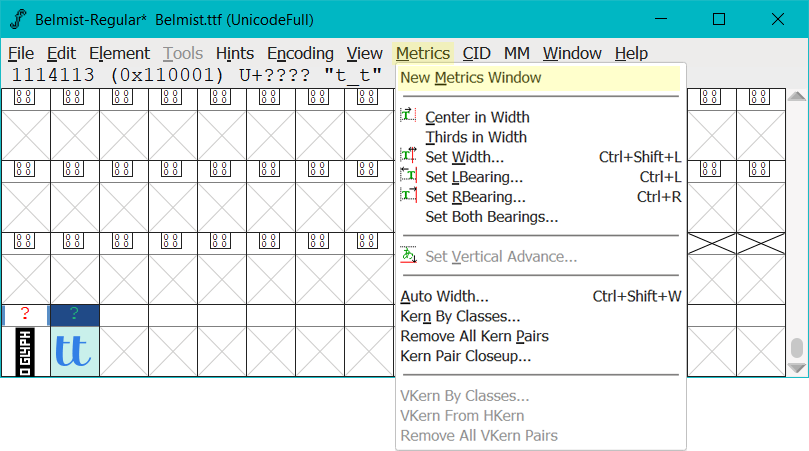
b) click ‘Metrics>New Metrics Window’,
c) type ‘ttle’ in the text box, and
d) deselect ‘liga’ by holding down ‘Ctrl’ on your keyboard and ‘Left Mouse Click’ with your mouse pointer on the word ‘liga’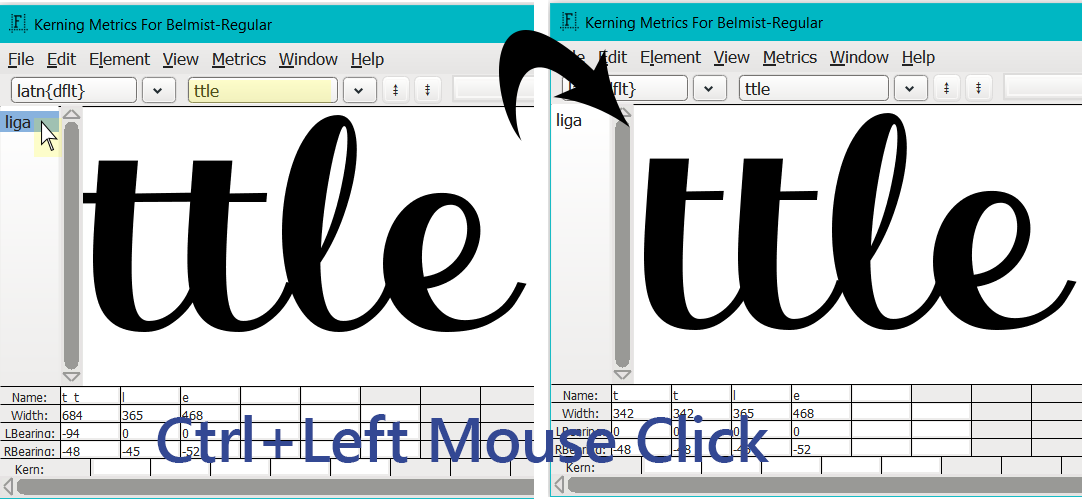
-
Congratulations on making it to the end and creating your lookup table.
It’s Not Working
- If you see your ligature changing within the ‘Metrics View’, congratulations, if you don’t, go back and make sure:
a) you’ve followed the instructions step by step and haven’t skipped a step like ‘build composite glyphs’.
b) Check spaces and your spelling,
c) adjust the kerning of your new glyphs,
d) check that you’ve entered the correct letters in the subtable,
e) consider saving, closing Fontforge and restarting Fontforge.
f) ‘Default Using Suffix’ will never work if you’ve used Fontforge’s ‘Mass Glyph Rename’ function. I’ve outlined the reasons why and what to do, to be able to use ‘Default Using Suffix’, here.
That brings us to the end of this tutorial.
I hope this tutorial has been of assistance and you can put some of the information to good use when using Fontforge.